Range Rover Evoque: Anti-Lock Control
Torque Specifications
Anti-Lock Brake System (ABS) Module
Removal
CAUTIONS:
If brake fluid is spilt on the paintwork, the affected area must be immediately washed down with cold water.
Make sure that all openings are sealed. Use new blanking caps.
NOTES:
Removal steps in this procedure may contain installation details.
LHD illustration shown, RHD is similar.
All vehicles
1. WARNING: Make sure to support the vehicle with axle stands. Raise and support the vehicle.
2. Refer to: Plenum Chamber (412-01 Climate Control, Removal and Installation).
3. Refer to: Battery Tray (414-01 Battery, Mounting and Cables, Removal and Installation).
Vehicles with petrol engine
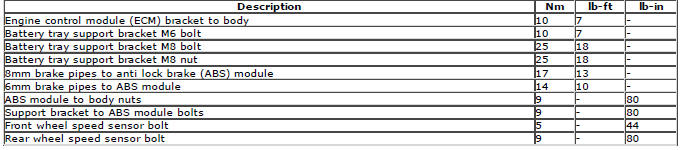
4.
Vehicles with diesel engine
5.
All vehicles
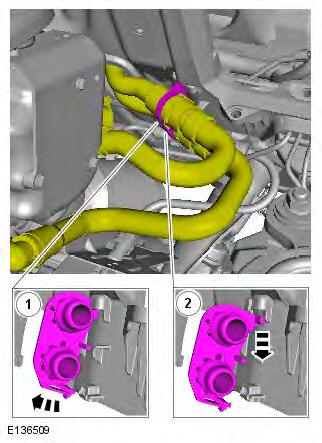
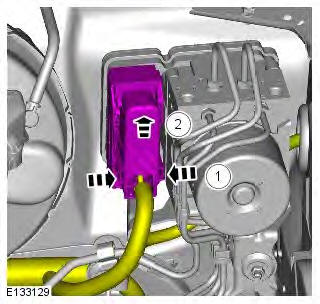
6.
7.
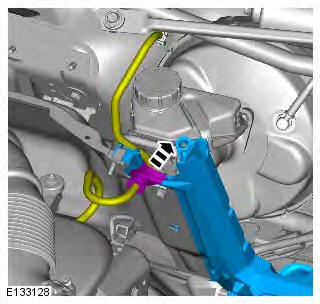
8.
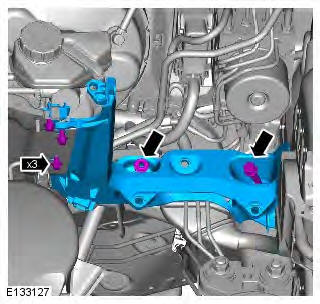
9. Torque:
M6 10 Nm
M8 25 Nm
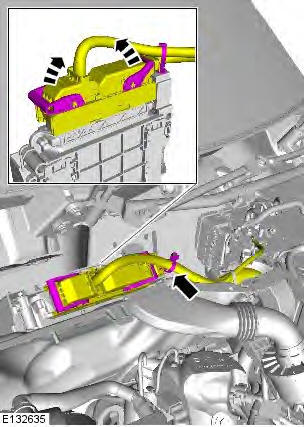
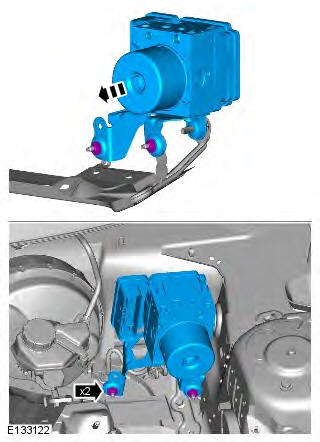
10. WARNING: Fluid loss is unavoidable, use absorbent cloth or a container to collect the fluid. Torque: 17 Nm
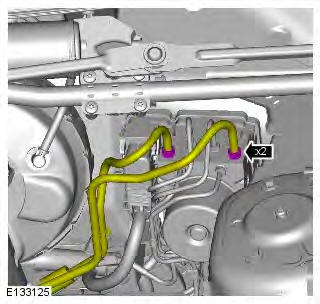
11.
12. Torque: 14 Nm

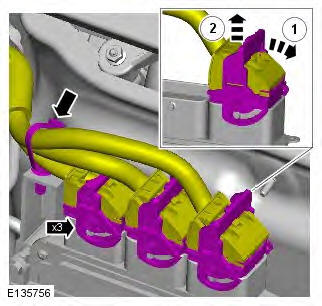
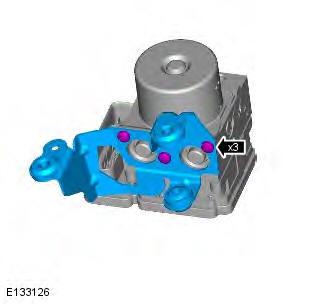
13. Torque: 9 Nm
14. NOTE: Do not disassemble further if the component is removed for access only. Torque: 9 Nm
Installation
1. NOTE: Remove and discard all blanking caps. To install, reverse the removal procedure.
2. Refer to: Brake System Pressure Bleeding (206-00 Brake System - General Information, General Procedures).
3. If a new component has been installed, configure using Land Rover approved diagnostic equipment.
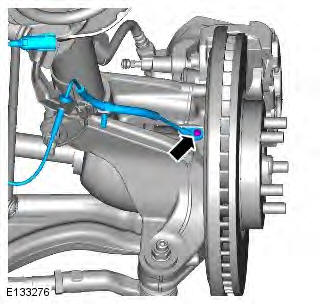
Front Wheel Speed Sensor
Removal
NOTE: Removal steps in this procedure may contain installation details.
1. WARNING: Make sure to support the vehicle with axle stands. Raise and support the vehicle.
2. Remove the fender splash shield.
Refer to: Fender Splash Shield (501-02 Front End Body Panels, Removal and Installation).
3.
4. Torque: 5 Nm
Installation
1. CAUTION: Make sure that the mating faces are clean and free of foreign material. To install, reverse the removal procedure.
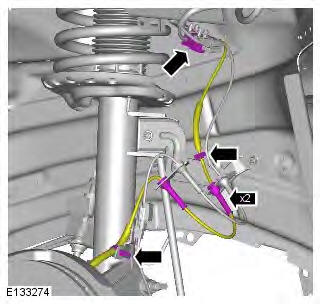
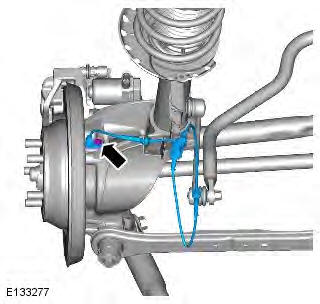
Rear Wheel Speed Sensor
Removal
NOTE: Removal steps in this procedure may contain installation details.
1. WARNING: Make sure to support the vehicle with axle stands. Raise and support the vehicle.
2. Refer to: Wheel and Tire (204-04 Wheels and Tires, Removal and Installation).
3.

4.
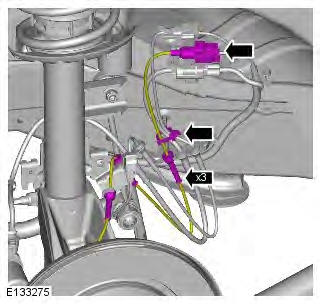
5. Torque: 9 Nm
Installation
1. CAUTIONS:
Make sure that the sensor tip is clean and free of foreign material.
Make sure that the mating faces are clean and free of foreign material.
To install, reverse the removal procedure.
READ NEXT:
 Anti-Lock Control - Traction
Control AWD
Anti-Lock Control - Traction
Control AWD
Component Location
NOTE: RHD (right-hand drive) installations shown; LHD (left-hand drive)
installations similar.
COMPONENT LOCATION - SHEET 1 OF 2
RH (right-hand) front wheel speed sensor
RH rea
Anti-Lock Control - Traction
Control FWD
Component Location
NOTE: RHD (right-hand drive) installations shown; LHD (left-hand drive)
installations similar.
COMPONENT LOCATION - SHEET 1 OF 2
RH (right-hand) front wheel speed sensor
RH rea
SEE MORE:
Important information
The information contained in this handbook covers all vehicle derivatives and
optional equipment,
some of which may not be fitted to your vehicle. Due to printing cycles, this
handbook may include
descriptions of options before they become generally available.
The vehicle options, hardware an
Symbols used in this handbook
Safety warnings indicate either a procedure which must be followed
precisely, or
information that should be considered with great care, in order to avoid the
possibility
of personal injury.
Cautions indicate either a procedure which must be followed precisely, or
information that
should
