Range Rover Evoque: Engine Ignition - GTDi 2.0L Petrol
Engine Ignition
Principles of Operation
For a detailed description of the ignition system, refer to the relevant Description and Operation section in the workshop manual. REFER to: (303-07D)
Inspection and Verification
CAUTION: Diagnosis by substitution from a donor vehicle is NOT acceptable. Substitution of control modules does not guarantee confirmation of a fault, and may also cause additional faults in the vehicle being tested and/or the donor vehicle.
1. Verify the customer concern.
2. Visually inspect for obvious signs of mechanical or electrical damage.
Visual Inspection

3. If an obvious cause for an observed or reported concern is found, correct the cause (if possible) before proceeding to the next step
4. If the cause is not visually evident, verify the symptom and refer to the Symptom Chart, alternatively, check for Diagnostic Trouble Codes (DTCs) and refer to the DTC Index.
Symptom Chart
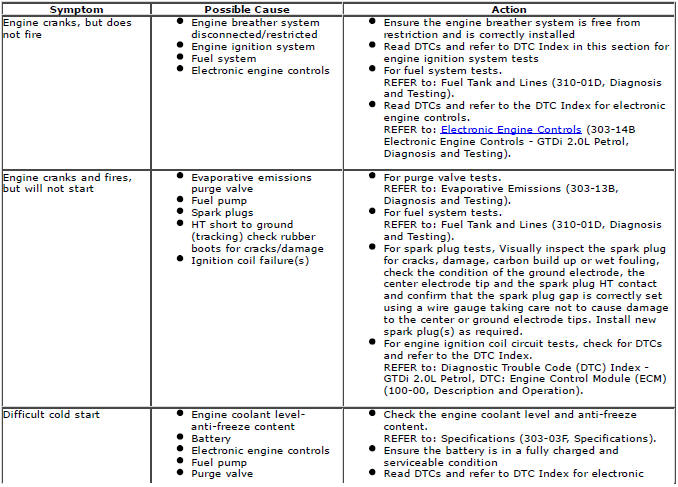
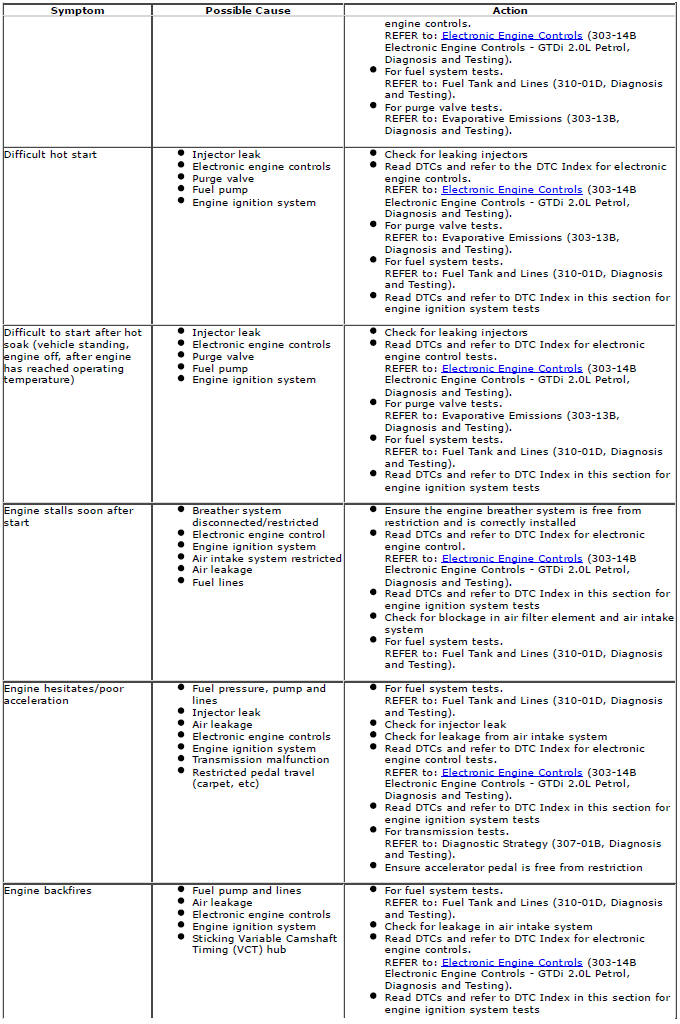
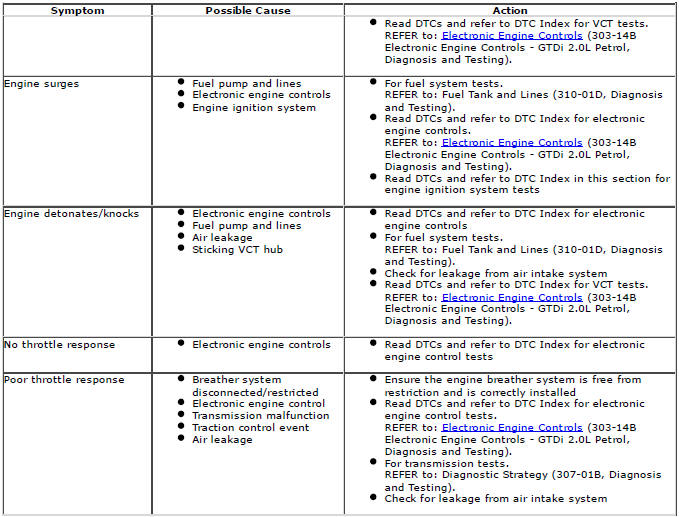
Engine Ignition - GTDi 2.0L Petrol


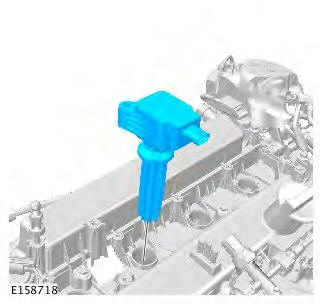
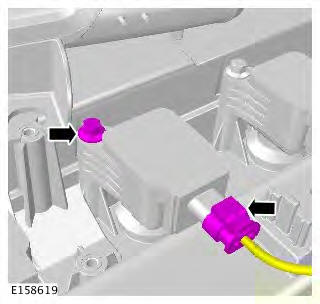
Ignition Coil-On-Plug
Removal
NOTES:
Removal steps in this procedure may contain installation details.
Some variation in the illustrations may occur, but the essential information is always correct.
1. Refer to: Engine Cover - GTDi 2.0L Petrol (501-05 Interior Trim and Ornamentation, Removal and Installation).
2.

3.

4. Torque: 8 Nm

5. CAUTION: Carefully remove the ignition coil-onplug(s).
Installation
1. To install, reverse the removal procedure.
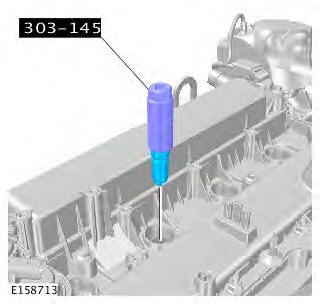
Spark Plugs
Removal
NOTES:
Removal steps in this procedure may contain installation details.
Some variation in the illustrations may occur, but the essential information is always correct.
1. Remove the engine cover.
Refer to: Engine Cover - GTDi 2.0L Petrol (501-05 Interior Trim and Ornamentation, Removal and Installation).
2.
3. Torque: 10 Nm
4. Torque: 8 Nm
5. CAUTION: Carefully remove the ignition coil-onplug( s).
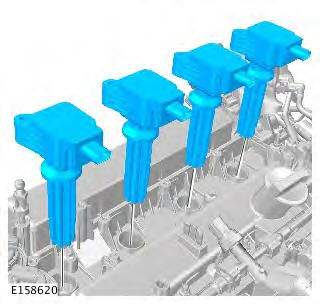
6. NOTE: Repeat this step for the remaining spark plugs. Torque: 12 Nm
Installation
1. To install, reverse the removal procedure.
READ NEXT:
 Engine Emission Control - GTDi 2.0L Petrol
Emission Control -
Component Location
COMPONENT LOCATION
Intake manifold
Bolt (8 off)
Crankcase ventilation hose
Oil separator
Gasket
Camshaft cover
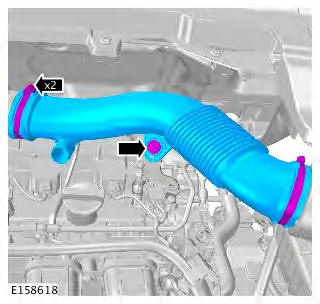
Lower clean air inlet duct
Upper clean ai
Intake Air Distribution and Filtering - GTDi 2.0L Petrol
Intake Air
Distribution and Filtering - Component Location
COMPONENT LOCATION
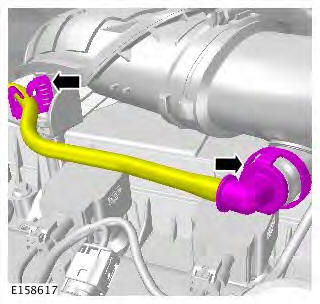
Purge hose from charcoal canister
Clean air purge hose
Clean air inlet ducts
Camshaft cover vent pipe connection
So
Evaporative Emissions - GTDi 2.0L Petrol
Evaporative Emissions -
Component Location
COMPONENT LOCATION ROW
Clean air purge 2 hose connection
Clean air purge 2 hose
Vapor purge 3 hose from purge valve
Double check valve
Venturi
Purge
SEE MORE:
Front Lower Arm
Removal
NOTES:
Some variation in the illustrations may occur, but the essential
information is always correct.
Front wheel drive transmission illustrations shown, all wheel wheel drive
transmission is similar.
1. WARNING: Make sure to support the vehicle with axle stands.
Raise and support the ve
Rear Lower Arm AWD
Special Tool(s)
205-857
Remover, Halfshaft
Removal
CAUTION: LH illustration shown, RH is similar.
NOTE: Some variation in the illustrations may occur, but the essential
information is always correct.
1. WARNING: Make sure to support the vehicle with axle stands.
Raise and support the vehicle.
2. Re
