Range Rover Evoque: Fuel Pump
Removal
WARNING: This procedure involves fuel handling. Be prepared for fuel spillage at all times and always observe fuel handling precautions. Failure to follow these instructions may result in personal injury.
NOTE: Removal steps in this procedure may contain installation details.
1. Disconnect the battery ground cable.
Refer to: Specifications (414-01 Battery, Mounting and Cables, Specifications).
2. Refer to: Engine Cover - GTDi 2.0L Petrol (501-05 Interior Trim and Ornamentation, Removal and Installation).
3. Refer to: Air Cleaner Intake Pipe (303-12B Intake Air Distribution and Filtering - GTDi 2.0L Petrol, Removal and Installation).
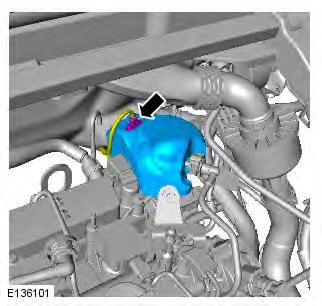
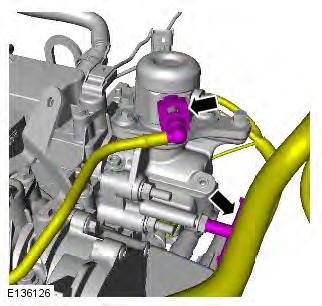
4.
5.
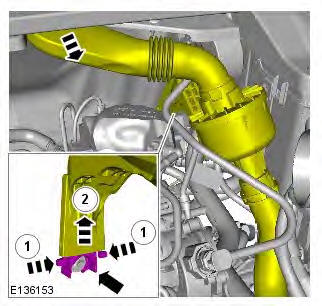
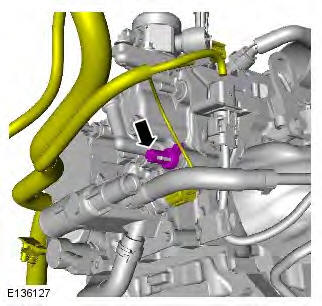
6. CAUTION: Discard the fuel pipe.
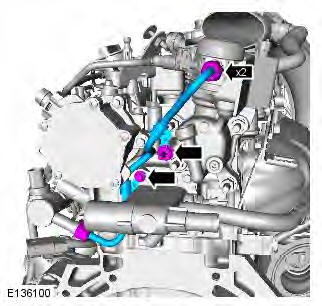
7.
8.
9.
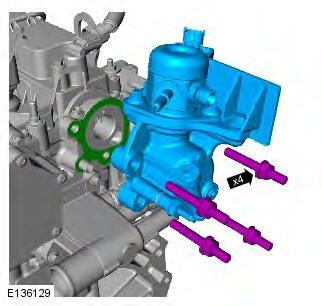
10.
11. CAUTION: Discard the bolts.
Installation
1. CAUTIONS:
Make sure that the mating faces are clean and free of foreign material.
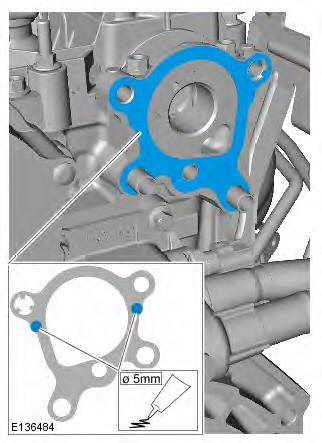
Apply sealant WSE-M4G323-A6 in a 5mm diameter on the gasket as illustrated. Install the gasket immediately after applying the sealant without smearing the sealant.
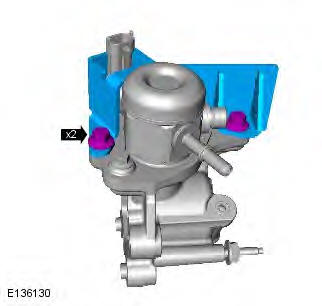
2. CAUTION: Make sure that the mating faces are clean and free of foreign material.
Torque: 20 Nm
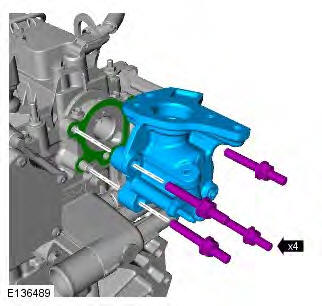
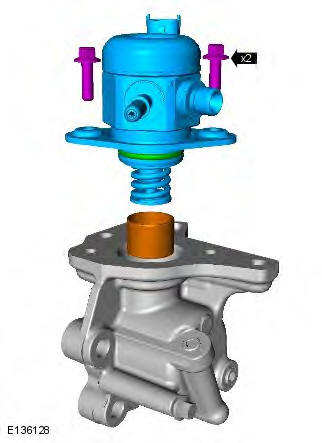
3. CAUTIONS:
Install all the bolts finger tight before final tightening.
Make sure that new bolts are installed.
NOTE: Lubricate the O-ring seal with clean engine oil.
Torque:
- Stage 1: 5 Nm
- Stage 2: 55
READ NEXT:
Torque Specifications Turbocharger Removal NOTES: Some illustrations may show the engine removed for clarity. Some variation in the illustrations may occur, but the essential information is always Fuel Charging and Controls - Turbocharger - GTDi 2.0L Petrol
Torque Specifications Accessory Drive Belt Removal NOTE: Some illustrations may show the engine removed for clarity. 1. Disconnect the battery ground cable. Refer to: Specifications (414-01 Battery Accessory Drive - GTDi 2.0L Petrol
Starting System - Component Location COMPONENT LOCATION Solenoid 12V supply from battery Solenoid power supply from Battery Junction Box (BJB) Starter motor Pinion gear Starting System - Overv Starting System - GTDi 2.0L Petrol
SEE MORE:
Connect. Press and release to send or accept a call or to access the last 10 dialled list. Press and hold to access the phonebook. Disconnect. Use to end or reject a call. Voice control talk button. Press to increase call volume. Press to decrease call volume. Press to scroll u
Steering wheel icons
Contacts stored in the memory of a paired phone can be automatically downloaded to the vehicle’s phonebook each time the phone is connected to the system. See 141, TELEPHONE COMPATIBILITY. Certain mobile phones store the phonebook in two different areas, the SIM card and the phone memory. The
Phonebook
