Range Rover Evoque: Headlamp Adjustment
NOTE: The headlamp setting is 1.2 % below horizontal and parallel.
1. Align the headlamp beam setting equipment to one headlamp.
2. Switch the headlamps on and to dipped beam.
3. NOTE: NAS vehicles have vertical adjustment only.
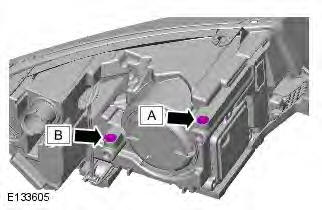
- Adjust the headlamps with an Allen Key.
- Rotate the adjuster 'A' for horizontal alignment.
- Rotate the adjuster 'B' for vertical alignment.
4.
- To adjust the second headlamp, repeat the above procedure.
Front Fog Lamp Adjustment
NOTE: Some variation in the illustrations may occur, but the essential information is always correct.
1. NOTE: The fog lamp beam should be set at 2% below the horizontal and parallel. Check the fog lamp beam alignment.
2. Align the beam setting equipment 2. to one fog lamp.
3.
4. Adjust the fog lamp.
5. To adjust the second fog lamp, repeat the above procedure.
Front Fog Lamp LH
Removal
NOTE: Removal steps in this procedure may contain installation details.
1. WARNING: Make sure to support the vehicle with axle stands. Raise and support the vehicle.
2. Remove the LH front wheel and tire.
Refer to: Wheel and Tire (204-04 Wheels and Tires, Removal and Installation).
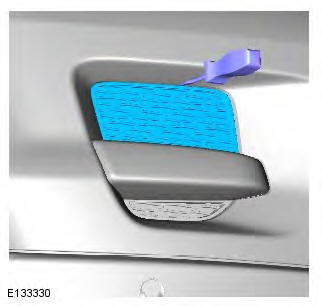
3. CAUTION: Take extra care not to damage the component.
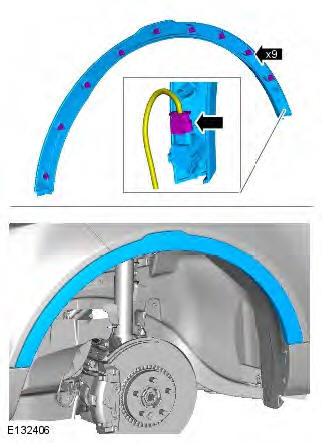
4.
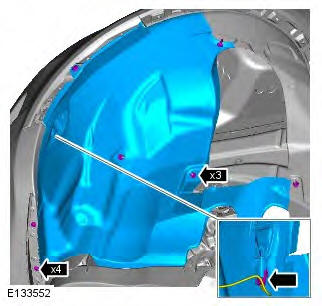
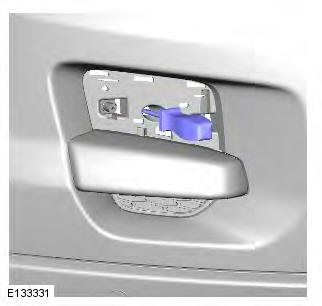
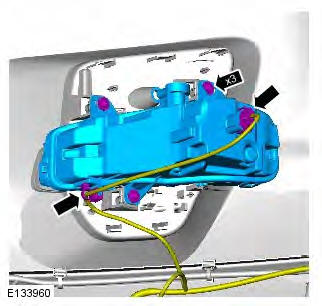
5. NOTE: RH illustration shown, LH is similar.
Torque: 2 Nm
Installation
1. To install, reverse the removal procedure.
2. Check the fog lamp beam alignment.
Refer to: Front Fog Lamp Adjustment (417-01 Exterior Lighting, General Procedures).
READ NEXT:
 Headlamp Assembly
Removal
NOTE: Removal steps in this procedure may contain installation details.
1. WARNING: Make sure to support the vehicle with axle stands.
Raise and support the vehicle.
2.
3.
4. NOTE: Some com
Headlamps
Principle of Operation
Three types of headlamp are available: Halogen, bi-xenon or Adaptive Front
Lighting System (AFS).
For a detailed description of the headlamps operation, refer to the relevant
Stoplamps
Principle of Operation
For information on the description and operation of the system, refer to
relevant section of the workshop manual. REFER
to: (417-01 Exterior Lighting)
Note that the stoplamps w
SEE MORE:
Control Diagram, System Operation
Control Diagram
NOTE: A = Hardwired; D = High Speed CAN Bus; O = Local Interconnect
Network (LIN) Bus
CONTROL DIAGRAM - SHEET 1 OF 2
Battery
Starter motor fuse
Battery Junction Box (BJB)
Starter motor
Generator
Transmission Control Module (TCM)
Cooling fan control module
Air Conditioning
Component Description
DESCRIPTION
Engine Control Module (ECM)
The ECM is located at the rear of the engine compartment, between the
bulkhead and the engine sound insulation. The ECM is located in a plastic molded
carrier which in turn is located in a bracket attached to the vehicle structure.
The ECM is connected to t
