Range Rover Evoque: Inner Constant Velocity (CV) Joint Boot
Special Tool(s)
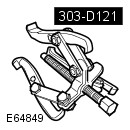 303-D121
Puller, General Purpose
General Equipment
- Vise
Removal
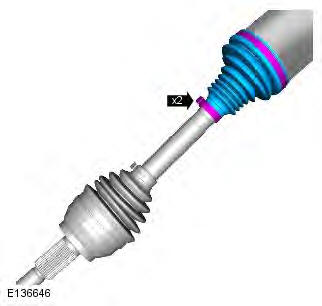
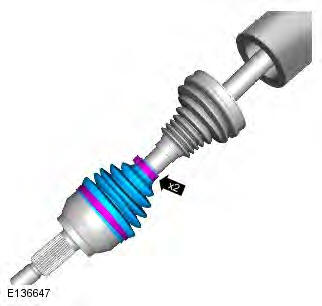
NOTE: RH inner constant velocity joint boot shown, LH is similar.
1. Refer to: Rear Halfshaft LH (205-05 Rear Drive Halfshafts, Removal and Installation).
Refer to: Rear Halfshaft RH (205-05 Rear Drive Halfshafts, Removal and Installation).
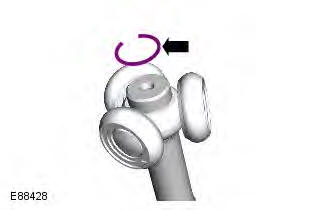
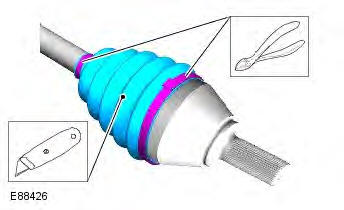
2. NOTE: Discard the retaining clips. General Equipment: Vise
3. CAUTION: Make sure that filings and swarf do not enter the component.
NOTE: Some variation in the illustrations may occur, but the essential information is always correct.

4. NOTE: Discard the retaining clip.
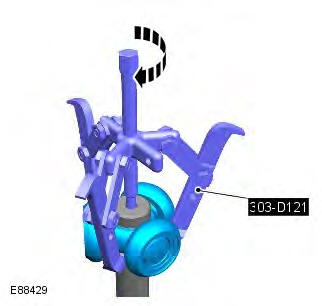
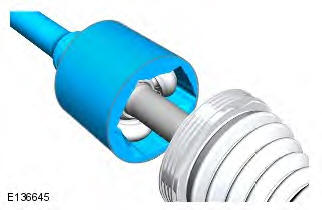
5. Special Tool(s): 303-D121

Installation
1. CAUTION: Extreme cleanliness must be exercised when handling these components. Clean and inspect the components for deterioration.
2.

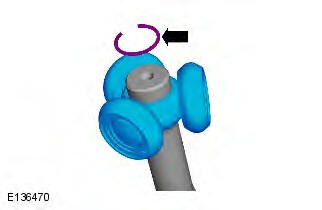
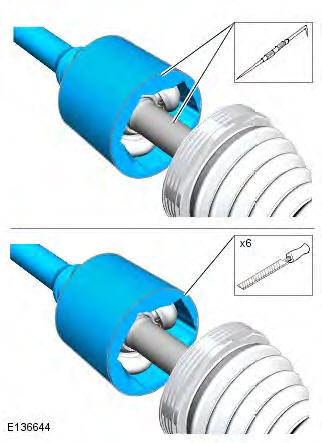
3. NOTE: Install a new retaining clip.
4. CAUTION: Make sure that these components are installed to the noted removal position.

5. Pack the inner CV joint with the grease supplied.
6. NOTE: Install new retaining clips.
7. Refer to: Rear Halfshaft LH (205-05 Rear Drive Halfshafts, Removal and Installation).
Refer to: Rear Halfshaft RH (205-05 Rear Drive Halfshafts, Removal and Installation).
Outer Constant Velocity (CV) Joint Boot
Special Tool(s)
 303-D121
Puller, General Purpose
General Equipment
- Vise
Removal
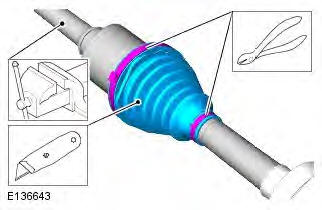
NOTE: The outer constant velocity joint must not be removed from the shaft. The inner joint and boot have to be removed to allow the outer joint boot to be replaced. The inner and outer boots are supplied together as a kit. RH inner constant velocity joint boot shown, LH is similar.
1. WARNING: Make sure to support the vehicle with axle stands. Raise and support the vehicle.
2. Refer to: Rear Halfshaft LH (205-05 Rear Drive Halfshafts, Removal and Installation).
Refer to: Rear Halfshaft RH (205-05 Rear Drive Halfshafts, Removal and Installation).
3. NOTE: Discard the retaining clips. General Equipment: Vise

4. NOTE: Discard the retaining clips.
5.
CAUTION: Make sure that filings and swarf do not enter the component.
NOTE: Some variation in the illustrations may occur, but the essential information is always correct.
6. NOTE: Discard the retaining clip.

7. Special Tool(s): 303-D121
Installation
1. CAUTION: Extreme cleanliness must be exercised when handling these components. Clean and inspect the components for deterioration.
2.

3. NOTE: Install a new retaining clip.

4. CAUTION: Make sure that these components are installed to the noted removal position.
5. Pack the outer CV joint with the 5. grease supplied.
6. NOTE: Install new retaining clips.
7. Pack the inner CV joint with the grease supplied.
8. NOTE: Install new retaining clips.

9. Refer to: Rear Halfshaft LH (205-05 Rear Drive Halfshafts, Removal and Installation).
Refer to: Rear Halfshaft RH (205-05 Rear Drive Halfshafts, Removal and Installation).
Rear Drive Halfshafts
General Specification

Recommended Lubricant

Torque Specifications

* New nuts/bolts must be installed
READ NEXT:
 Brake System - General Information
Brake System Bleeding
CAUTION: Brake fluid will damage paint finished surfaces. If spilled,
immediately remove the fluid and clean the area
with water.
NOTES:
Bleeding of the complete brake system mu
Front Disc Brake
General specifications
Torque Specifications
Brake Pads
Removal
WARNING: Brake pads must be renewed in axle sets only. Failure to follow
this instruction may result in braking
efficiency being impa
SEE MORE:
Important information
The information contained in this handbook covers all vehicle derivatives and
optional equipment,
some of which may not be fitted to your vehicle. Due to printing cycles, this
handbook may include
descriptions of options before they become generally available.
The vehicle options, hardware an
Symbols used in this handbook
Safety warnings indicate either a procedure which must be followed
precisely, or
information that should be considered with great care, in order to avoid the
possibility
of personal injury.
Cautions indicate either a procedure which must be followed precisely, or
information that
should
