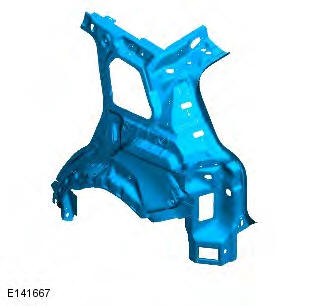
Range Rover Evoque: Inner Quarter Panel and Wheelhouse
Removal
NOTES:
The inner quarter panel and wheelhouse is manufactured from mild steel.
The aid of a second technician is required to remove, offer up and align the inner quarter panel and wheelhouse.
The service panel is not fully welded.
1. In this procedure, to make sure the vehicle is correctly aligned, it must be placed on an approved alignment jig.
2. NOTE: Irrespective of body type the roof must be removed.
The inner quarter panel and wheelhouse is replaced in conjunction with:
- Rear bumper cover
- Rear door
- Quarter panel
- Quarter glass
- Water drain panel
- Roof panel without sunroof
- Moon roof
- Liftgate
3. For additional information relating to this repair procedure please see the following: For additional information, refer to: Health and Safety Precautions (100-00 General Information, Description and Operation) / Body Repairs (501-25A Body Repairs - General Information, Description and Operation) / Corrosion Protection (501-25B Body Repairs - Corrosion Protection, Description and Operation) / Body and Frame (501-26 Body Repairs - Vehicle Specific Information and Tolerance Checks, Description and Operation) / Standard Workshop Practices (100-00 General Information, Description and Operation).
4. NOTE: Irrespective of body type the roof must be removed. Remove the roof panel.
For additional information, refer to: Roof Panel - Vehicles Without: Sliding Roof Opening Panel (501-28A Roof Sheet Metal Repairs - 3-Door, Removal and Installation).
5. NOTE: Irrespective of body type the roof must be removed. Remove the moon roof.
For additional information, refer to: Glass Roof Panel (501-11 Glass, Frames and Mechanisms, Removal and Installation).
6. Remove the quarter panel, refer to option 2.
For additional information, refer to: Quarter Panel (501-30B Rear End Sheet Metal Repairs - 5-Door, Removal and Installation).
7. Remove and retain the liftgate hinge.
8. NOTE: On reinstallation of the damper torque lower pinch bolt to 110Nm and upper lock nuts to 32Nm. Remove the rear suspension damper.
9. Remove the brake pipe.
10. RH side: Drain the fuel tank.
For additional information, refer to: Fuel Tank Draining (310-00 Fuel System - General Information, General Procedures).
11. RH side: Remove the fuel tank filler pipe.
For additional information, refer to: Fuel Tank Filler Pipe (310-01A Fuel Tank and Lines - TD4 2.2L Diesel, Removal and Installation).
12. Release and lay aside the wiring harness.
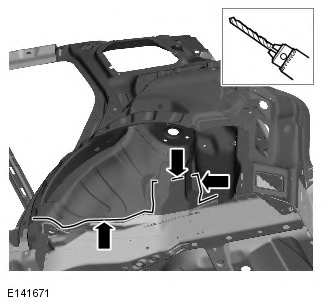
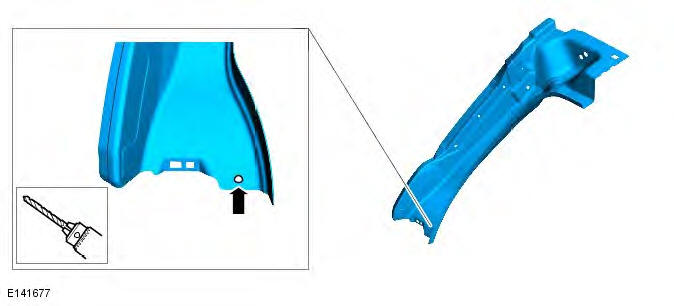
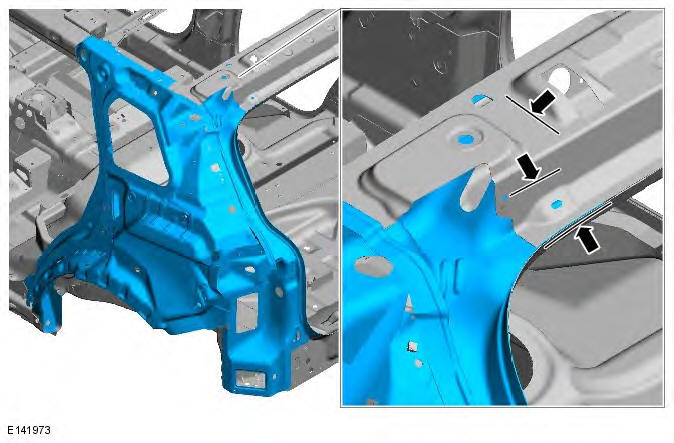
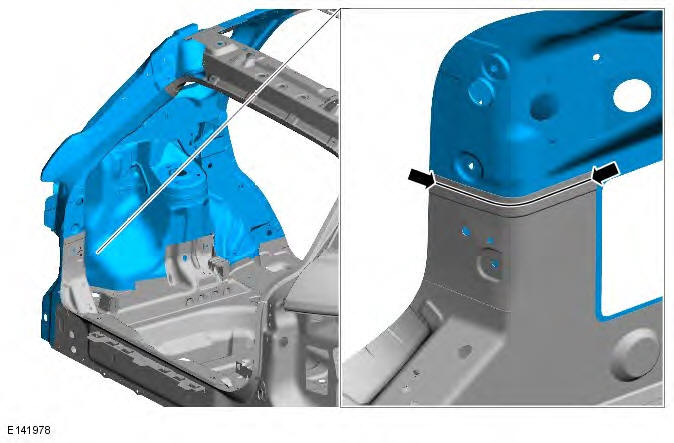
13. NOTE: The spot welds must be drilled from the inside of the vehicle. The roof bow will also need to be drilled for vehicles with a full roof panel. Drill out the spot welds as indicated.
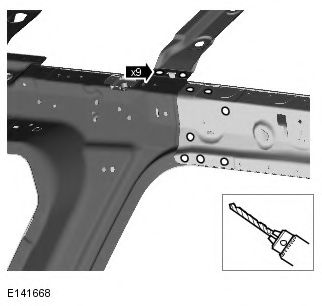
14. NOTE: The spot welds must be drilled from the inside of the vehicle. Drill out the spot welds as indicated.
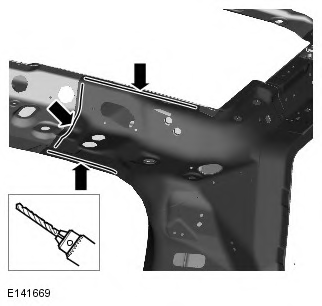
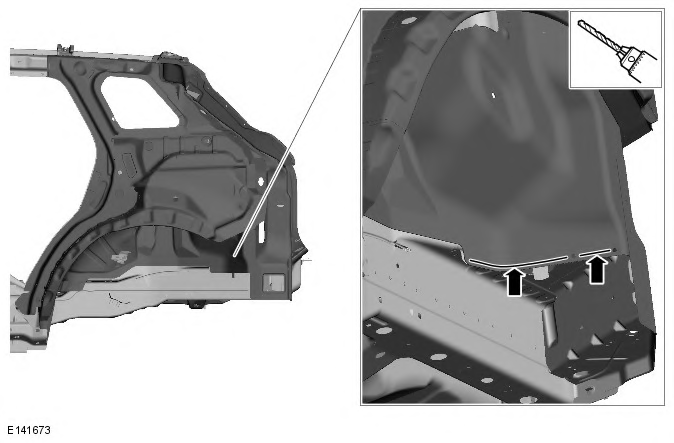
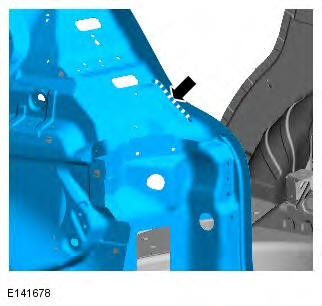
15. NOTE: The spot welds must be drilled from the outside of the vehicle.
Drill out the spot welds as indicated.
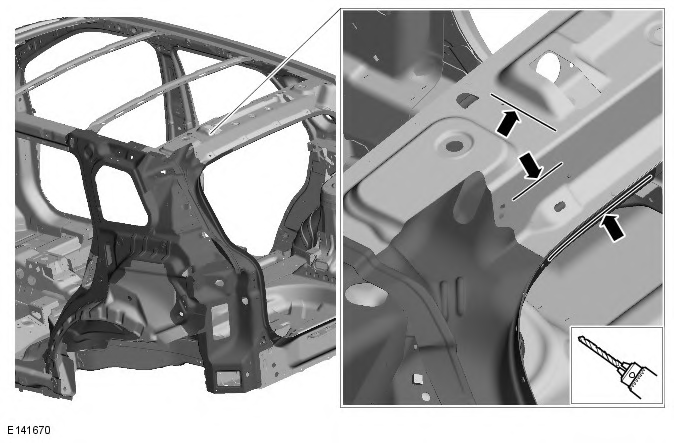
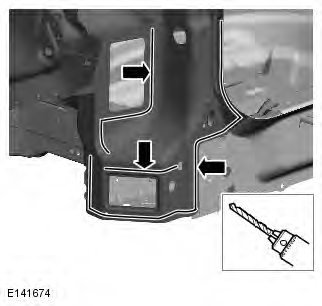
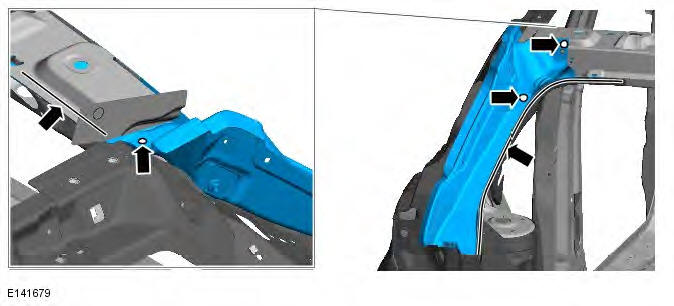
16. NOTE: The spot welds must be drilled all the way through this will enable the joint to be MIG plug welded on installation. Drill out the spot welds as indicated.
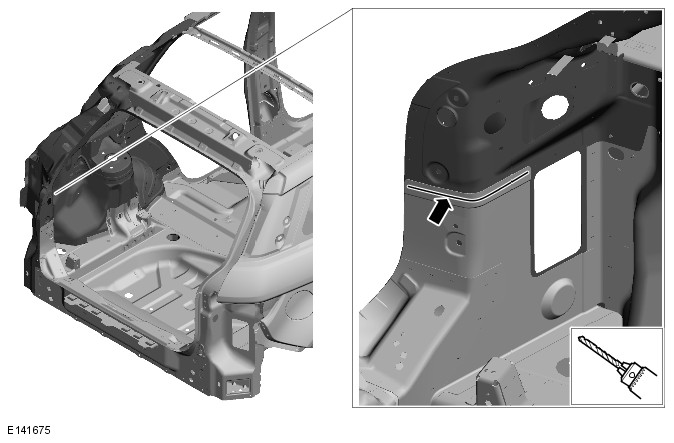
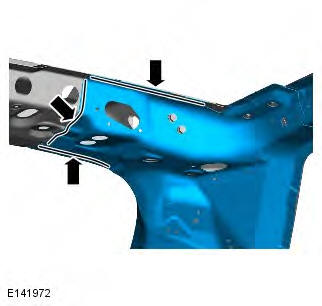
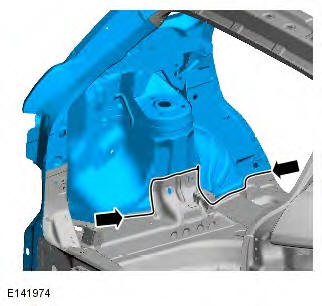
17. NOTES:
Where access is limited use a belt sander to sand down the spot welds in these areas , to enable the new panel to be spot welded on installation.
Spot welds to the boron rocker panel inner reinforcement must be released from the inside to enable spot welding on installation.
Drill out the spot welds as indicated.

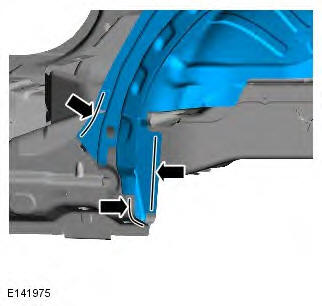
18. Drill out the spot welds as indicated.
19. Drill out the spot welds as indicated.
20. Drill out the spot welds as indicated.
21. NOTE: If the NVH component is damaged on separation, a new component will be required. Separate the joints and remove the old panel, also releasing the NVH component from the inner back panel assembly as indicated.

Installation
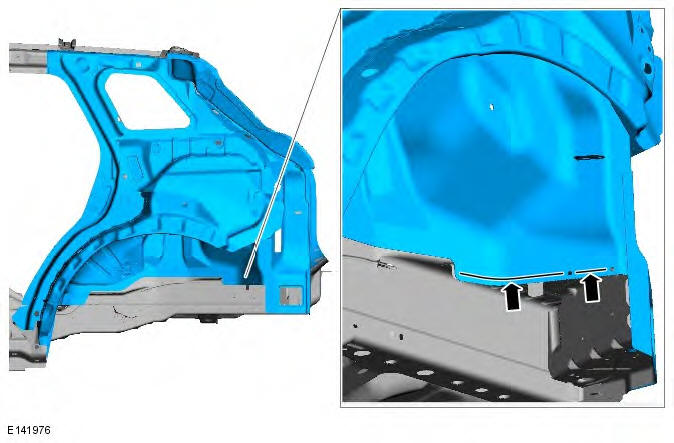
1. Prepare the new inner quarter panel and wheelhouse in the areas where it is not fully welded and spot weld.
2. Drill hole in new water drain panel for MIG plug.
3. Prepare the old and new panel joint surfaces, including NVH component.
4. NOTE: With panel in position check for access to spot weld the joints. Where there is no access to spot weld MIG plug welds must be installed. Offer up the new inner quarter panel and wheelhouse and loosely clamp into position.
Next offer up the water drain channel and fully clamp panels into position, Check alignment, if correct, proceed to next step, if not, rectify and recheck before proceeding.
5. Remove the new panels.
6. Drill holes in new inner quarter panel and wheelhouse ready for MIG plug welding where there is no access to spot weld.
7. Deburr MIG plug locations in new panels.
8. Apply sealer adhesive to the NVH component on the inner back panel assembly.
9. Offer up the new inner quarter panel and wheelhouse and loosely clamp into position to allow access to offer up the water drain channel. Check alignment, if correct, proceed to next step, if not, rectify and recheck before proceeding.
10. Apply panel bonding adhesive to area as indicated.
11. NOTE: It will be necessary to release some of the clamps from the inner quarter and wheelhouse in the rear roof bow area to enable fitment of water drain panel. Offer up the new water drain panel to the new inner quarter panel and wheelhouse and clamp into position. Check alignment, if correct, proceed to next step, if not, rectify and recheck before proceeding.
12. Spot weld.
13. Mig plug weld the water drain channel.
14. NOTE: If the vehicle has a full roof panel then the roof bow has to be spot welded at this point.
Mig plug weld.

15. NOTE: MIG plug welds can be substituted for spot welds if access is insufficient.
Spot weld and MIG plug weld where required.
16. NOTE MIG plug welds can be substituted for spot welds if access is insufficient
Spot weld and MIG plug weld where required.
17. Mig plug weld as indicated.
18. Spot weld as indicated.
19. NOTE MIG plug welds can be substituted for spot welds if access is insufficient
Spot weld and MIG plug weld where required.
20. NOTE: MIG plug welds can be substituted for spot welds if access is insufficient. Spot weld and MIG plug weld where required.

21. Mig plug weld as indicated.
22. Dress all welded joints.
23. Apply a zinc rich primer to any bare metal surfaces at this stage.
24. NOTE: Make sure all underbody joints are sealed following this repair procedure
The installation of associated panels and mechanical components is the reverse of removal.
READ NEXT:
 Inner Back Panel Assembly
Removal
NOTES:
The inner back panel assembly is manufactured from mild steel.
The panel is serviced less its weld studs.
The new service panel is not fully spot welded when supplied.
It is necessar
Rear Side Member Upper Side Extension
Removal
NOTES:
The rear side member upper side extension is manufactured from mild steel.
If a new Rear side member upper side extension is being replaced in combination
with a rear side member clos
SEE MORE:
Wipers and Washers - Component Location, System Operation and Component
Description
Component Location
COMPONENT LOCATION - SHEET 1 OF 2
Central Junction Box (CJB)
Integrated Control Panel (ICP)
Rain/Light sensor (if fitted)
Right tailgate actuator (upper)
Rear wiper motor
Left tailgate actuator (upper)
Rear Junction Box (RJB)
Wiper control switch
Instrument Cluster (IC)
Wipers and Washers - Removal and Installation
Windshield Wiper Motor
Removal
NOTE: Removal steps in this procedure may contain installation details.
1. Refer to: Plenum Chamber (412-01 Climate Control, Removal and
Installation).
2. NOTE: LHD illustration shown, RHD is similar.
Torque: 8 Nm
Installation
1. To install, reverse the removal proced
