Range Rover Evoque: Spare Wheel Well
Removal
NOTES:
The spare wheel well is manufactured from mild steel, it includes the spare wheel retaining bracket.
The panel is serviced less its weld studs
1. The spare wheel well is replaced in conjunction with:
- Rear bumper cover
- Rear bumper
- Back panel
- Rear bumper mounting LH & RH
- Rear lamp mounting panel
- Inner back panel assembly
- Fuel tank
- Rear subframe and suspension assembly
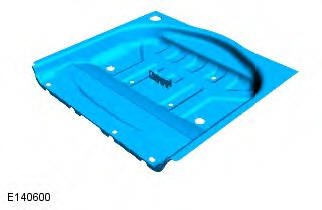
2. For additional information relating to this repair procedure please see the following: For additional information, refer to: Health and Safety Precautions (100-00 General Information, Description and Operation) / Body Repairs (501-25A Body Repairs - General Information, Description and Operation) / Corrosion Protection (501-25B Body Repairs - Corrosion Protection, Description and Operation) / Body and Frame (501-26 Body Repairs - Vehicle Specific Information and Tolerance Checks, Description and Operation) / Standard Workshop Practices (100-00 General Information, Description and Operation).
3. Remove the inner back panel assembly.
For additional information, refer to: Inner Back Panel Assembly (501-30A Rear End Sheet Metal Repairs - 3-Door, Removal and Installation).
4. Remove the LH and RH rear quarter trims.
For additional information, refer to: Rear Quarter Trim Panel (501-05 Interior Trim and Ornamentation, Removal and Installation).
5. Release and lay aside rear carpet.
6. Remove the rear subframe / suspension as an assembly.
For additional information, refer to: Rear Subframe - Vehicles With: M66 6-Speed Manual Transmission FWD (502-00 Uni-Body, Subframe and Mounting System, Removal and Installation) / Rear Subframe - Vehicles With: AWF21 6-Speed Automatic Transmission (502-00 Uni-Body, Subframe and Mounting System, Removal and Installation) / Rear Subframe - Vehicles With: M66 6-Speed Manual Transmission AWD (502-00 Uni-Body, Subframe and Mounting System, Removal and Installation).
7. Remove the fuel tank.
For additional information, refer to: Fuel Tank (310-01B Fuel Tank and Lines - GTDi 2.0L Petrol, Removal and Installation).
8. Release and lay aside the insulating material.
9. Release and lay aside the wiring harnesses.
10. Drill out the spot welds as indicated.
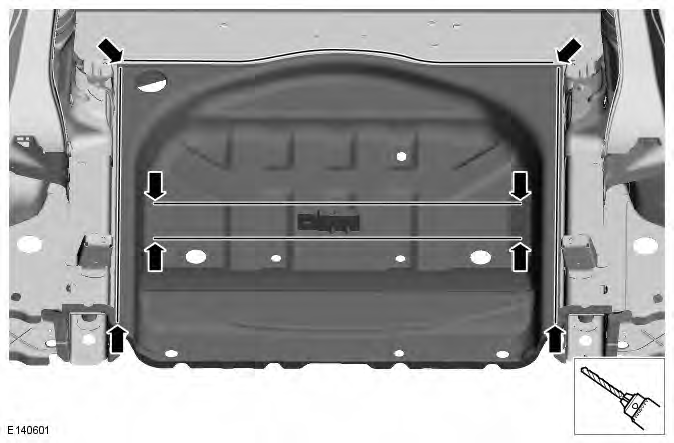
11. Separate the joints and remove the old panel.
Installation
1. NOTE: MIG plug welded joints that have cured adhesive in them must be cleaned out as well as possible with the access available. Prepare the old and new panel joint surfaces.
2. NOTE: With panel in position check for access to spot weld the joints. Offer up the new panel and clamp into position. Check alignment, if correct, proceed to next step, if not, rectify and recheck before proceeding.
3. NOTES:
If a new rear side member closing has been installed in combination with the spare wheel well the MIG plug weld locations must be drilled through both panels taking care not to drill into the rear side member.
If the spare wheel well is being installed in isolation drill MIG plug locations through new panel taking care not to drill into rear side member closing.
While the new panel is clamped in position drill out MIG plug locations as indicated.
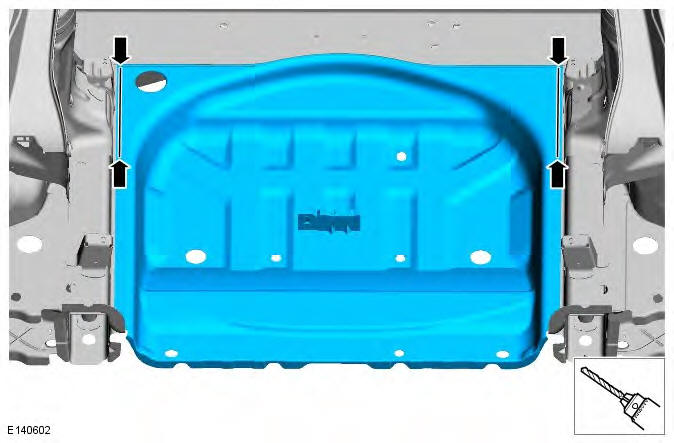
4. NOTE: Using the removed spot weld holes as a template drill MIG plug locations through new panel taking care not to drill into the floor crossmember. While the new panel is clamped in position drill out MIG plug locations as indicated.
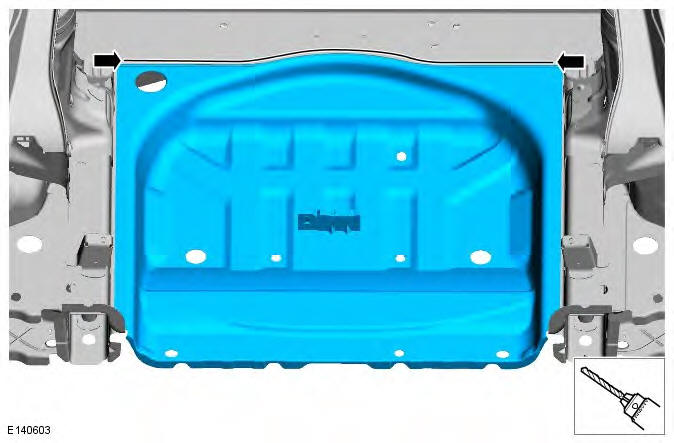
5. Remove the new panel.
6. Deburr MIG plug locations in new panel.
7. NOTES:
Only apply adhesive where you have access to spot weld.
Make sure the adhesive does not encroach into the area of the MIG plug welds as it will contaminate the weld, leave a 30mm gap.
Apply panel bonding adhesive to the areas as indicated.
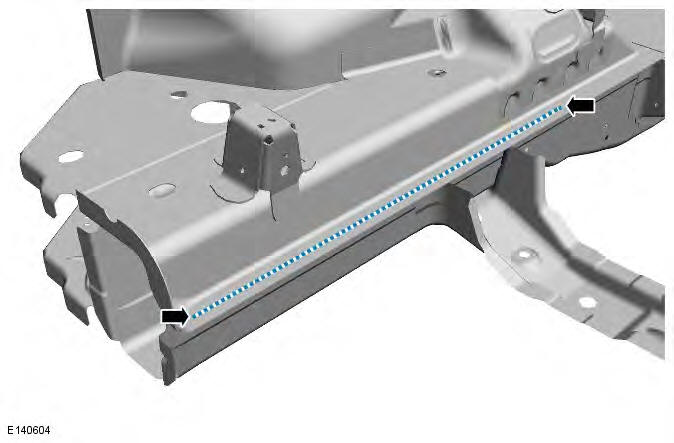
8. Offer up the new panel and clamp into position. Check alignment, if correct, proceed to next step, if not, rectify and recheck before proceeding.
9. Spot weld.
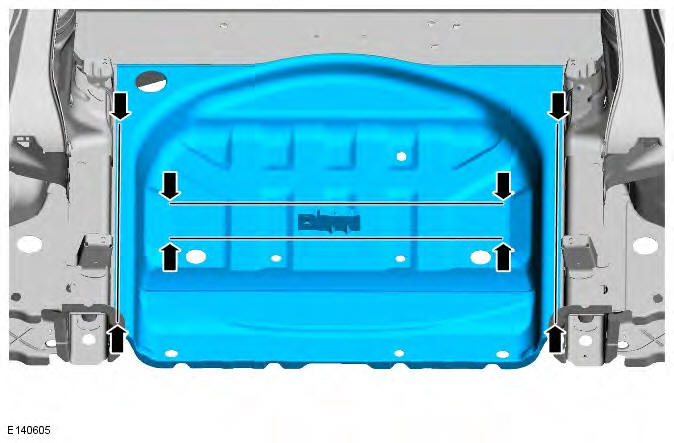
10. MIG plug weld.
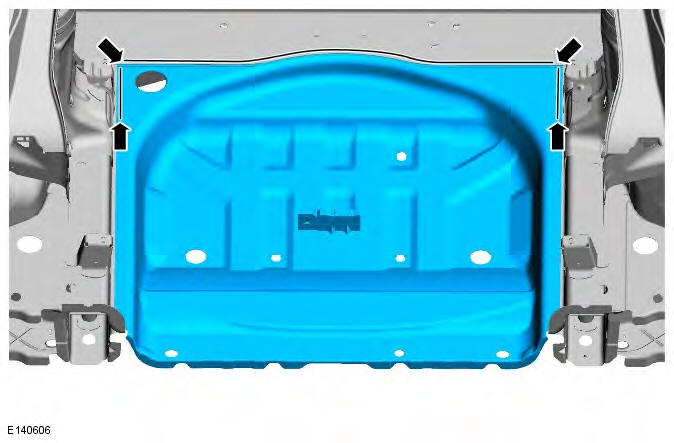
11. Dress the MIG plug welds.
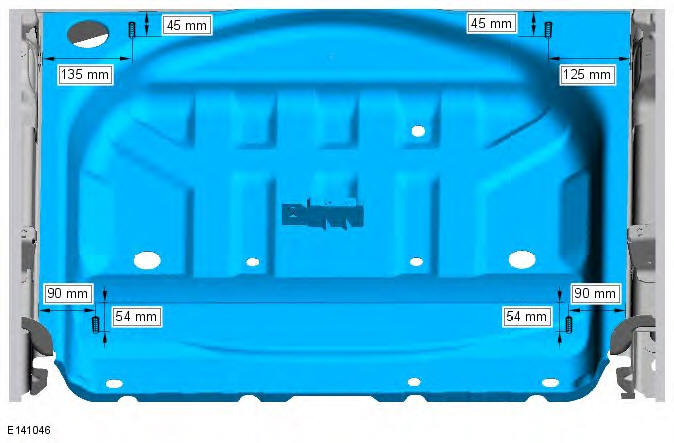
12. Prepare the new panel and install the weld studs in their original locations from underneath.
The measurements provided in the graphic are to be used as a guide only, the components that are located/fixed to these weld studs must be offered up and cross checked for alignment prior to the installation of the weld studs to the new panel.
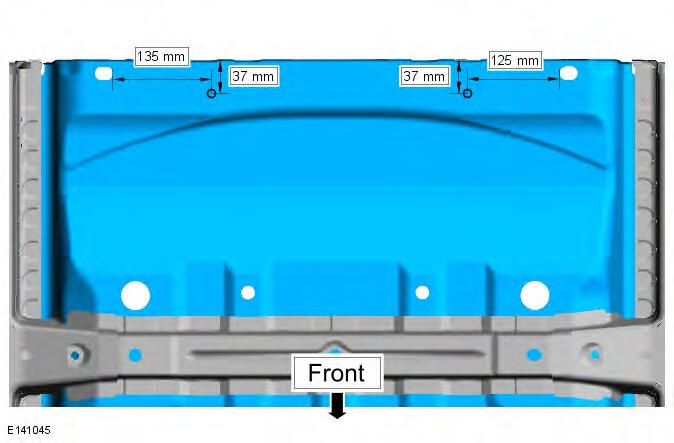
13. Prepare the new panel and install the weld studs in their original locations from inside. The measurements provided in the graphic are to be used as a guide only, the components that are located/fixed to these weld studs must be offered up and cross checked for alignment prior to the installation of the weld studs to the new panel.
14. NOTE: Any areas of bare metal must be coated with etch primer prior to the application of sound deadening material. Reinstate sound deadening material to spare wheel well.
15. Apply a zinc rich primer to any bare metal surfaces at this stage.
16. NOTE: Make sure all underbody joints are sealed following this repair procedure. The installation of associated panels and mechanical components is the reverse of removal.

