Range Rover Evoque: Transfer Case Fluid Level Check

CAUTION: The fluid filler plug is not a fluid level plug.

NOTE: Some variation in the illustrations may occur, but the essential information is always correct.

1. WARNING: Make sure to support the vehicle with axle stands. Raise and support the vehicle.

2. Refer to: Engine Undershield (501-02 Front End Body Panels, Removal and Installation).

3. CAUTION: Make sure that the area around the component is clean and free of foreign material.

NOTE: Remove and discard the sealing washer.
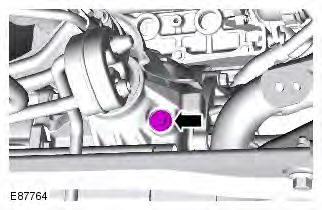
Range Rover Evoque. Transfer Case - Vehicles With: AWF21 6-Speed Automatic
Transmission/M66 6-Speed Manual Transmission AWD

4. CAUTION: The fluid filler plug is not a fluid level plug. Fill the transfer case with the recommended fluid.

Refer to: Specifications (308-07B Transfer Case - Vehicles With: AWF21 6-Speed Automatic Transmission/M66 6-Speed Manual Transmission AWD, Specifications).

5. NOTE: Install a new sealing washer. Torque: 35 Nm
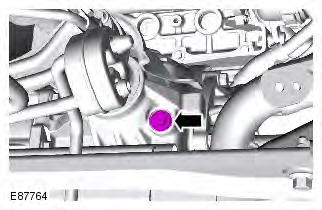
Range Rover Evoque. Transfer Case - Vehicles With: AWF21 6-Speed Automatic
Transmission/M66 6-Speed Manual Transmission AWD

6. Refer to: Engine Undershield (501-02 Front End Body Panels, Removal and Installation).

Power Transfer Unit GTDi 2.0L Petrol

Removal

NOTE: Some variation in the illustrations may occur, but the essential information is always correct.

1. WARNING: Make sure to support the vehicle with axle stands. Raise and support the vehicle.

2. Refer to: Air Cleaner Intake Pipe (303-12B Intake Air Distribution and Filtering - GTDi 2.0L Petrol, Removal and Installation).

3. Refer to: Front Halfshaft RH - LHD AWD/RHD AWD (205-04 Front Drive Halfshafts, Removal and Installation).

4. Refer to: Engine Undershield (501-02 Front End Body Panels, Removal and Installation).

5. Torque: 24 Nm
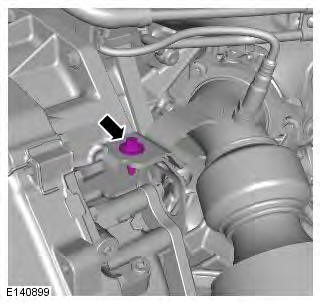
Range Rover Evoque. Transfer Case - Vehicles With: AWF21 6-Speed Automatic
Transmission/M66 6-Speed Manual Transmission AWD

6. CAUTIONS: Mark the position of the driveshaft flange in relation to the drive pinion flange.

To avoid damage to the joint or gaiter, do not allow the driveshaft to hang.

Make sure that the driveshaft is supported with suitable retaining straps.

The component must be aligned with the installation markings.

Torque: 40 Nm
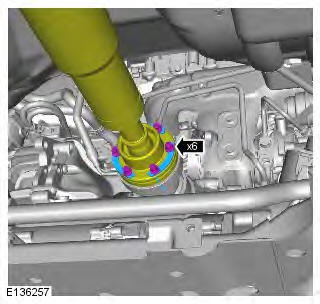
Range Rover Evoque. Transfer Case - Vehicles With: AWF21 6-Speed Automatic
Transmission/M66 6-Speed Manual Transmission AWD

7. CAUTION: Take extra care not to damage the component.

NOTE: LH illustration shown, RH is similar.
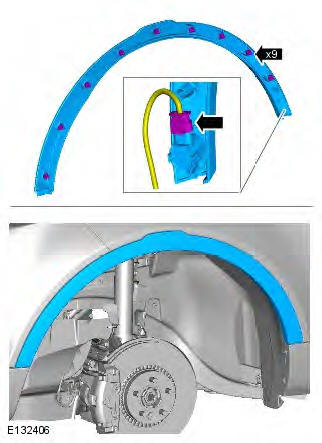
Range Rover Evoque. Transfer Case - Vehicles With: AWF21 6-Speed Automatic
Transmission/M66 6-Speed Manual Transmission AWD

8. NOTE: LH illustration shown, RH is similar.

Remove the RH front wheel arch liner.
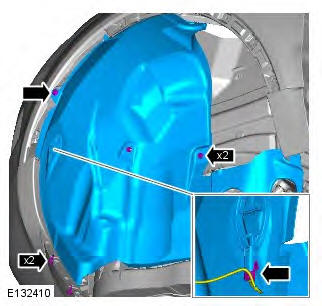
Range Rover Evoque. Transfer Case - Vehicles With: AWF21 6-Speed Automatic
Transmission/M66 6-Speed Manual Transmission AWD

9. CAUTIONS: Discard the bolt.

Make sure that a new bolt is installed.

Torque:

READ NEXT:

 Power Transfer Unit TD4 2.2L Diesel

Removal NOTE: Removal steps in this procedure may contain installation details. All vehicles 1. WARNING: Make sure to support the vehicle with axle stands. Raise and support the vehicle. 2. Refer to:

 Transfer Case Connecting Sleeve Seals GTDi 2.0L Petrol

Special Tool(s) 100-012 Slide Hammer 307-594 Installer, Seal 308-005 Remover, Axle oil seal Removal NOTE: Some variation in the illustrations may occur, but the essential information is always correc

 Transfer Case Connecting Sleeve Seals TD4 2.2L Diesel, Vehicles With: AWF21 6-Speed Automatic Transmission

Special Tool(s) 100-012 Slide Hammer 307-594 Installer, Seal 308-005 Remover, Axle oil seal Removal NOTE: Some variation in the illustrations may occur, but the essential information is always correc

SEE MORE:

 Rear Inner Quarter Panel

Removal NOTES: The rear inner quarter panel is manufactured from mild steel. The rear inner quarter panel is unpicked from the inner quarter panel, it is not serviced separately. There are NVH components on this panel, they are not serviced on the new panel. If damaged, new components will be re

 Powered tailgate opening height

The maximum opening height can be set as required. This is useful in parking areas with low ceiling heights or just for ease of use. 1. Open the tailgate to the position which you want to set as the maximum height. Press any tailgate control to stop movement at the required position. Final pos

© 2011-2024 Copyright www.rrevoque.org