Range Rover Evoque: Bumpers
Front Bumper Cover
Removal
NOTE: Removal steps in this procedure may contain installation details.
1.
2.
3. WARNING: Make sure to support the vehicle with axle stands. Raise and support the vehicle.
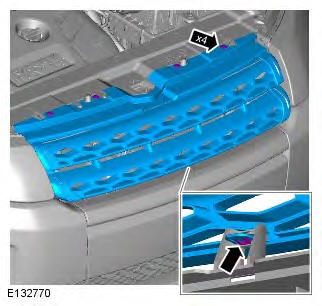
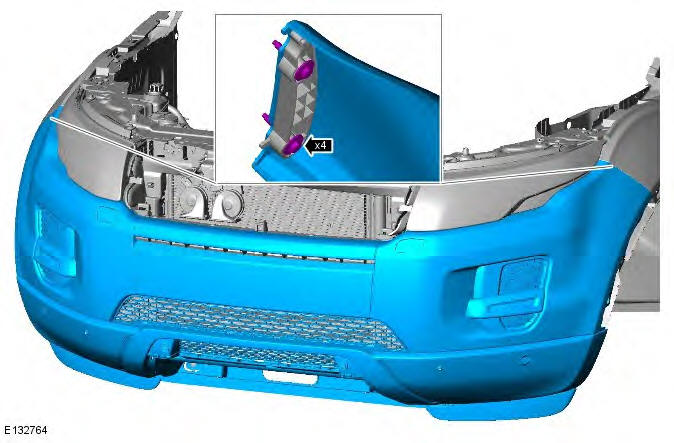
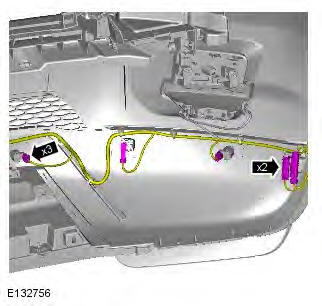
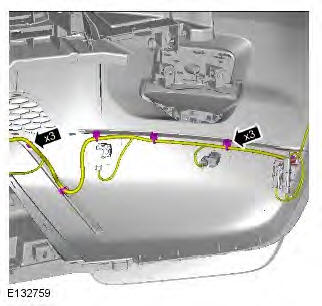
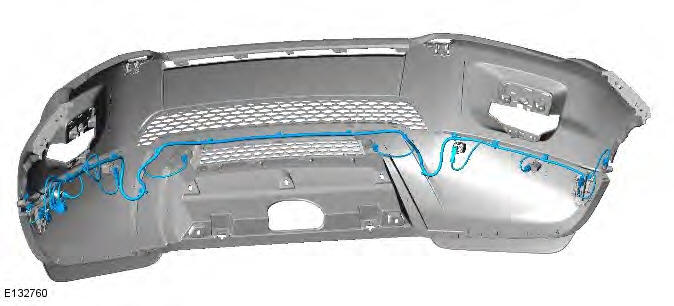
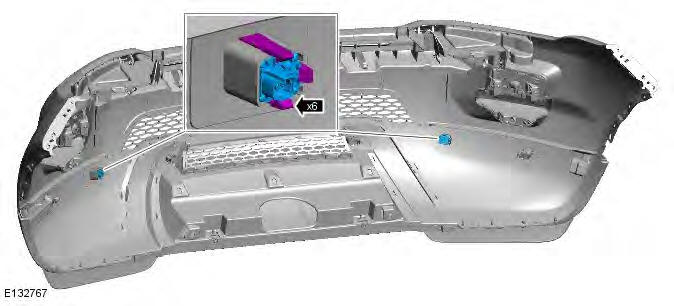
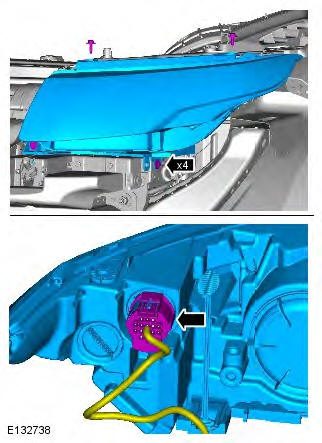
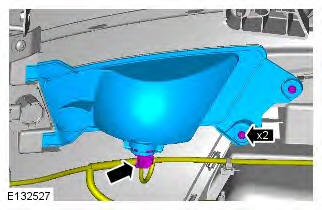
4. NOTE: The step must be carried out on both sides. Refer to: Fender Splash Shield (501-02 Front End Body Panels, Removal and Installation).
5.
6.
7.

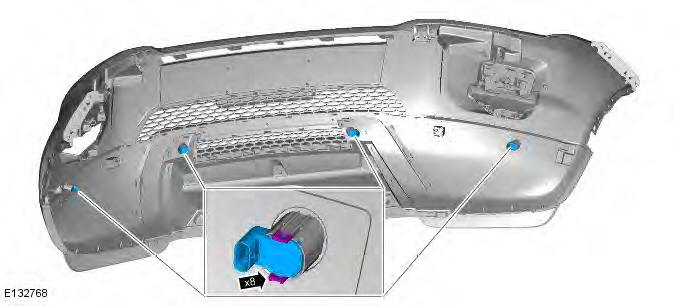
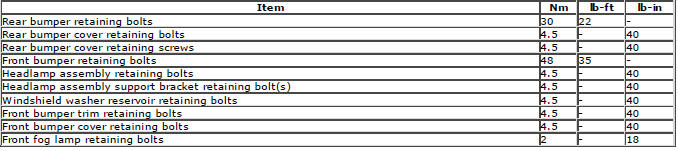
8. Torque: 4.5 Nm
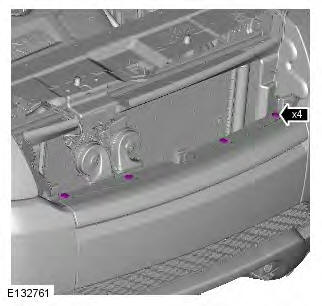
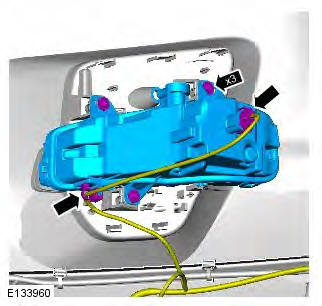
9. NOTES:
The step must be carried out on both sides.
Do not disassemble further if the component is removed for access only.
Torque: 2 Nm
10.
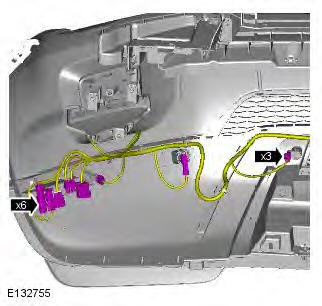
11.

12.
13.
14.
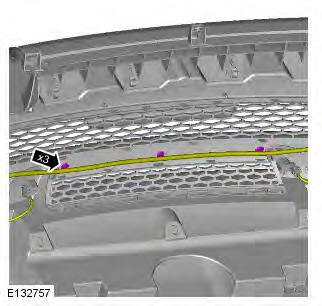
15.
16.
17.
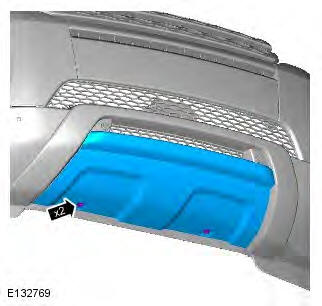
18. NOTE: The step must be carried out on both sides.
19.
Installation
1. To install, reverse the removal procedure.
Front Bumper
Removal
NOTE: Removal steps in this procedure may contain installation details.
1. WARNING: Make sure to support the vehicle with axle stands. Raise and support the vehicle.
2. Refer to: Front Bumper Cover (501-19 Bumpers, Removal and Installation).
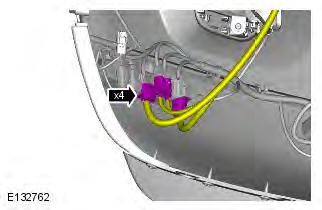
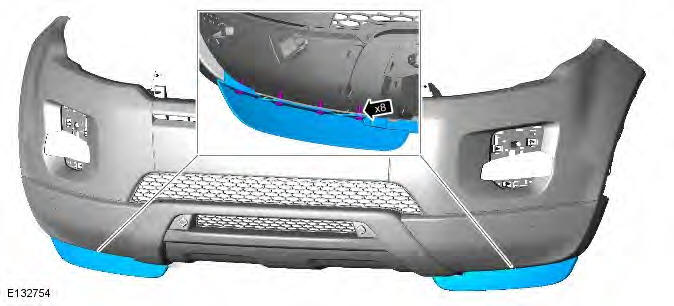
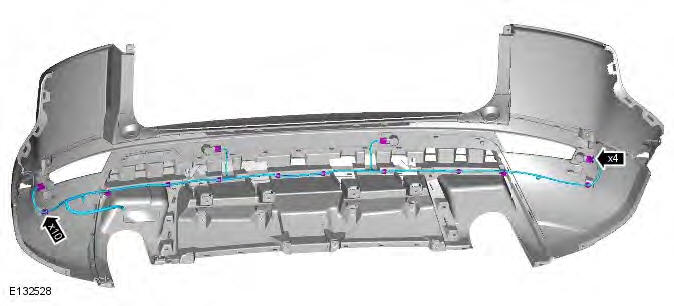
3. NOTE: The step must be carried out on both sides.
Torque: 4.5 Nm
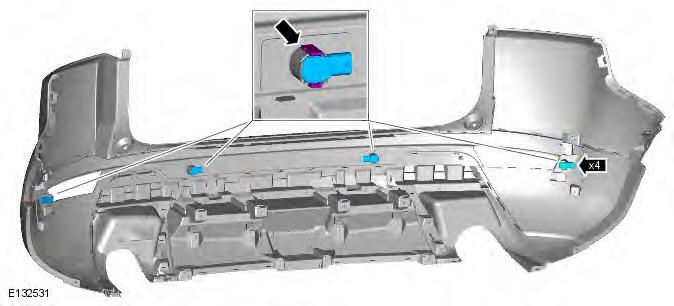
4. NOTE: The step must be carried out on both sides. Torque: 4.5 Nm
5. Torque: 4.5 Nm
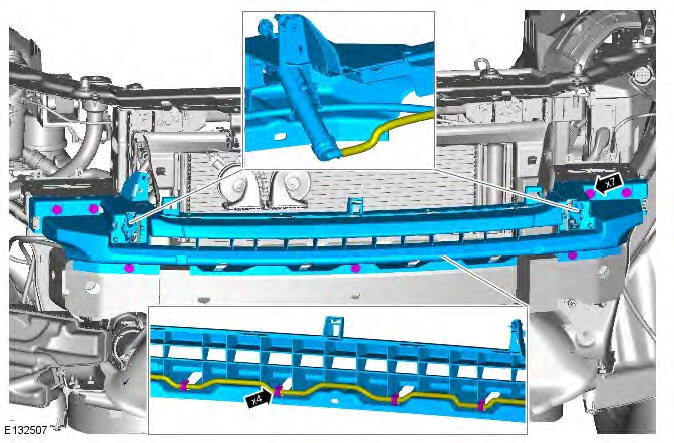
6. Torque: 4.5 Nm
7. Torque: 48 Nm
Installation
1. To install, reverse the removal procedure.
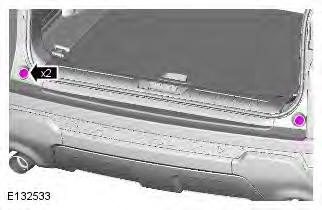
Rear Bumper Cover
Removal
NOTE: Removal steps in this procedure may contain installation details.
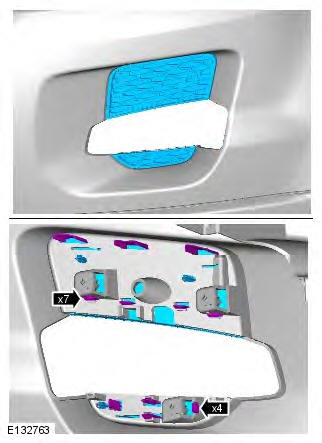
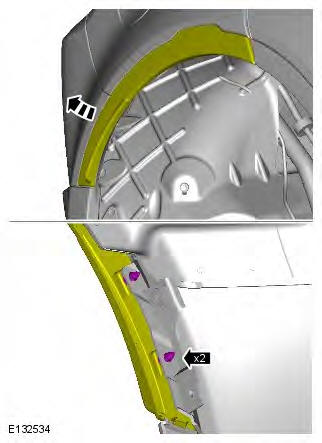
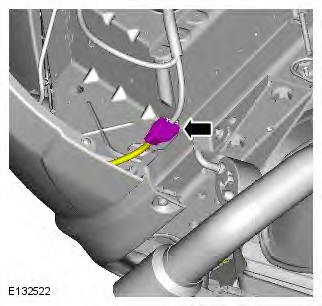
1. NOTE: The procedure must be carried out on both sides. Refer to: Rear Lamp Assembly (417-01 Exterior Lighting, Removal and Installation).
2.
3. WARNING: Make sure to support the vehicle with axle stands. Raise and support the vehicle.
4. Remove the rear wheels and tyres.
Refer to: Wheel and Tire (204-04 Wheels and Tires, Removal and Installation).
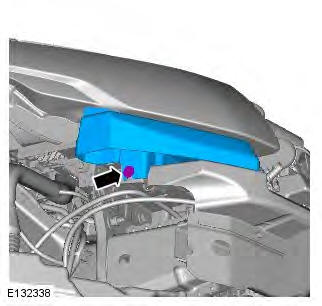
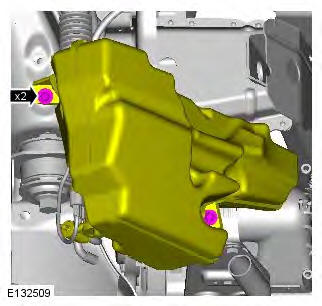
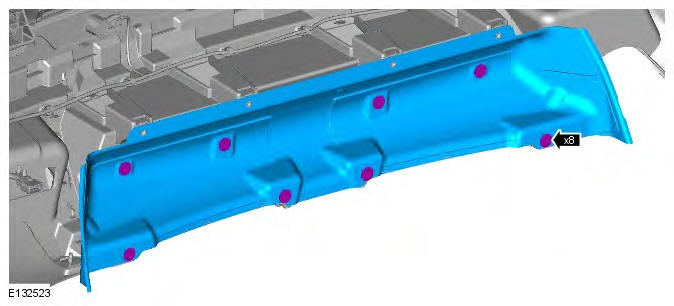
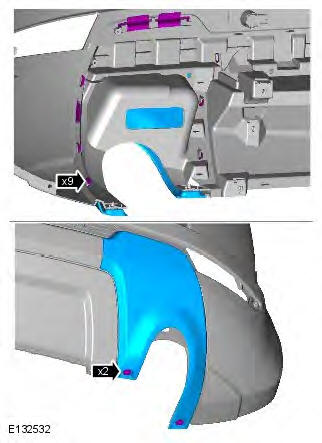
5. CAUTION: Take extra care not to damage the component.
NOTE: The step must be carried out on both sides.
6.
7.
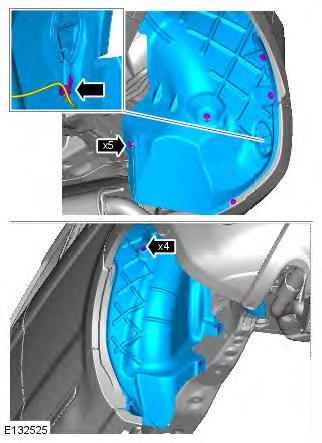
8. Torque: 4.5 Nm
9.
10. CAUTION: Take extra care not to damage the edges of the component.
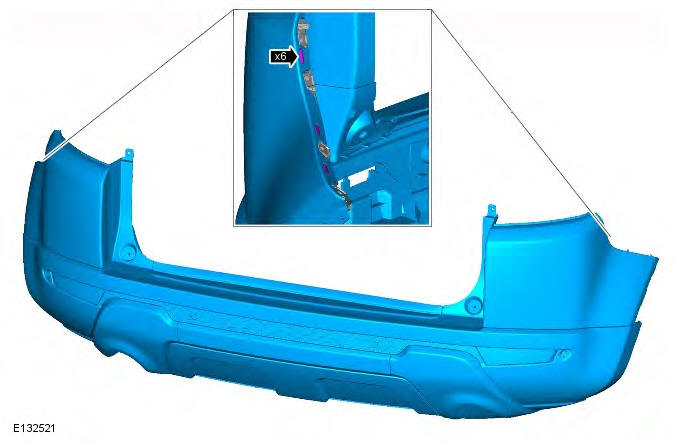
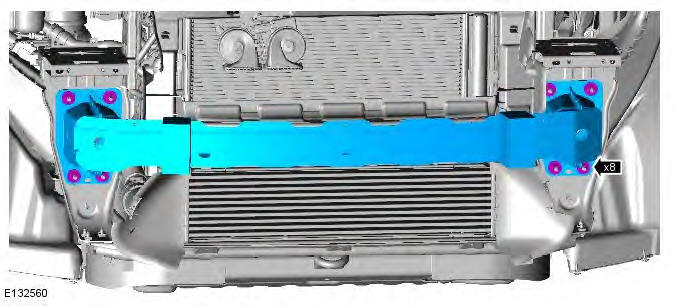
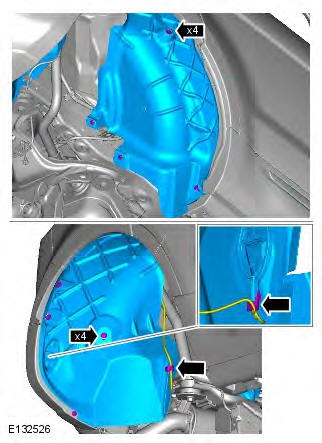
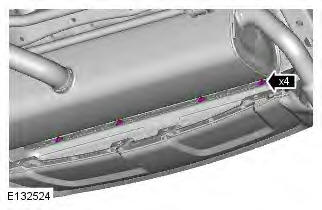
11. NOTE: Do not disassemble further if the component is removed for access only. Torque: 4.5 Nm
12. NOTE: The procedure must be carried out on both sides. Torque: 4.5 Nm
13.
14.
15.
Installation
1. To install, reverse the removal procedure.
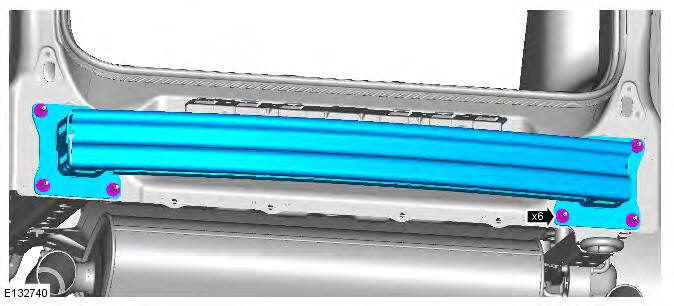
Rear Bumper
Removal
NOTE: Removal steps in this procedure may contain installation details.
1. WARNING: Make sure to support the vehicle with axle stands. Raise and support the vehicle.
2. Refer to: Rear Bumper Cover (501-19 Bumpers, Removal and Installation).
3. Torque: 30 Nm
Installation
1. To install, reverse the removal procedure.
Bumpers
Torque Specifications
READ NEXT:
 Safety Belt System
Safety Belt System
Diagnosis and Testing
Principle of Operation
For a detailed description of the seatbelt system and operation, refer to the
relevant description and operation section of
the worksho
Air Bag Supplemental Restraint System
(SRS)
Component Location
COMPONENT LOCATION SHEET 1 OF 2
Battery
ECM (engine control module)
CJB (central junction box)
Passenger air bag
Overhead console
RCM (restraints control module)
Driver air
SEE MORE:
Important information
The information contained in this handbook covers all vehicle derivatives and
optional equipment,
some of which may not be fitted to your vehicle. Due to printing cycles, this
handbook may include
descriptions of options before they become generally available.
The vehicle options, hardware an
Symbols used in this handbook
Safety warnings indicate either a procedure which must be followed
precisely, or
information that should be considered with great care, in order to avoid the
possibility
of personal injury.
Cautions indicate either a procedure which must be followed precisely, or
information that
should
