Range Rover Evoque: Engine Wiring Harness GTDi 2.0L Petrol
Removal
CAUTIONS: Make sure that the wiring harness is not twisted or damaged on removal. Failure to follow this instruction may result in damage to the vehicle.
Take extra care not to damage the wiring harness clips.
NOTE: Removal steps in this procedure may contain installation details.
1. Disconnect the battery ground cable.
Refer to: Specifications (414-01 Battery, Mounting and Cables, Specifications).
2. WARNING: Make sure to support the vehicle with axle stands. Raise and support the vehicle.
3. Refer to: Plenum Chamber (412-01 Climate Control, Removal and Installation).
4. Refer to: Air Cleaner (303-12A Intake Air Distribution and Filtering - TD4 2.2L Diesel, Removal and Installation).
5. Refer to: Air Cleaner Intake Pipe (303-12B Intake Air Distribution and Filtering - GTDi 2.0L Petrol, Removal and Installation).
6. Refer to: Engine Undershield (501-02 Front End Body Panels, Removal and Installation).
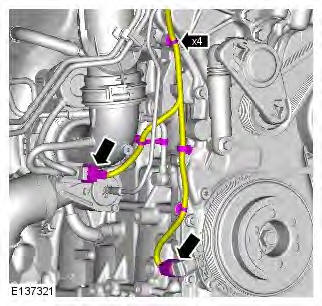
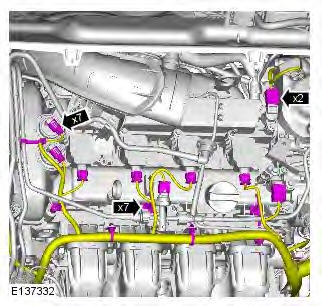
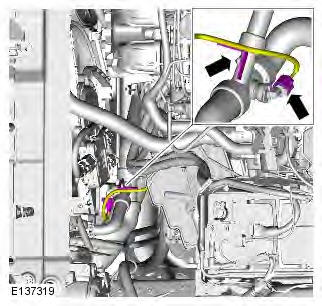
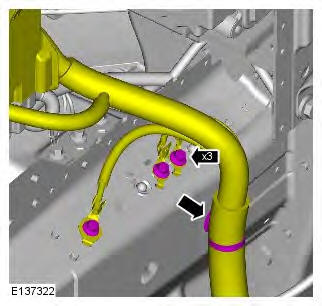
7. NOTE: LH illustration shown, RH is similar. Remove the front RH wheel arch liner.
Refer to: Fender Splash Shield (501-02 Front End Body Panels, Removal and Installation).
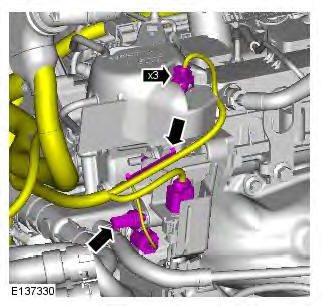
8.
9.
10.
11.
12.
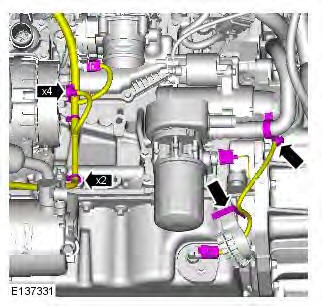
13. Torque: 6 Nm
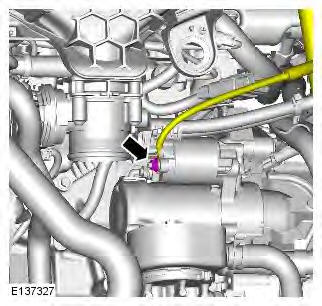
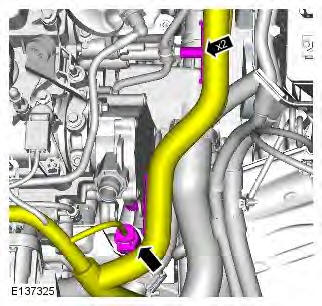
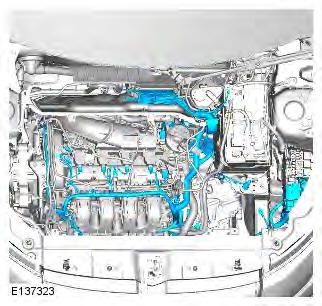
14.
15.

16.
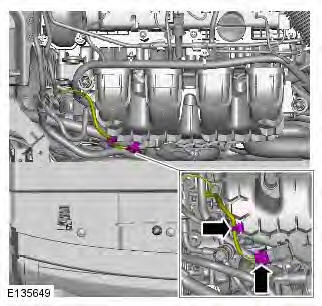
17.
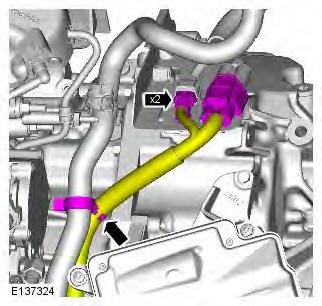
18.
19.
20.
21.
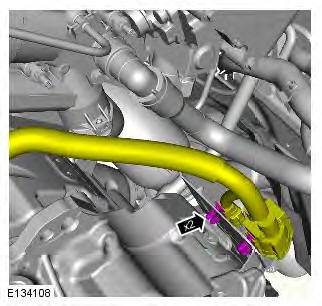
22.
23.
24.
25.
26.
27.
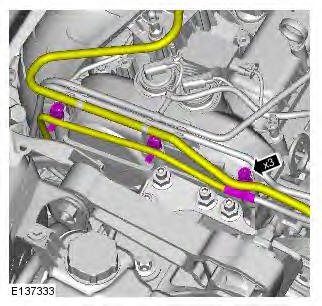
28.
29. Torque: 10 Nm

30. Torque: 10 Nm
31.
Installation
1. CAUTION: Make sure that the wiring harness is not twisted or damaged on installation. Failure to follow this instruction may result in damage to the vehicle.
To install, reverse the removal procedure.
READ NEXT:
 Engine Wiring Harness TD4 2.2L Diesel, Vehicles With:
M66 6-Speed Manual Transmission AWD/M66 6-Speed Manual
Transmission FWD
Engine Wiring Harness TD4 2.2L Diesel, Vehicles With:
M66 6-Speed Manual Transmission AWD/M66 6-Speed Manual
Transmission FWD
Removal
CAUTIONS:
Make sure that the wiring harness is not twisted or damaged on removal. Failure
to follow this instruction may result
in damage to the vehicle.
Take extra care not to damage the wi
Anti-Theft - Active
Anti-Theft - Active - Component Location
COMPONENT LOCATION
RH (right-hand) front door module
RH front door latch mechanism
Radio Frequency (RF) receiver
RH rear door module
RH rear door latch
Anti-Theft - Passive
Anti-Theft - Passive - Component Location
COMPONENT LOCATION
Instrument cluster
Start/stop button
Radio Frequency (RF) receiver
Interior antennas
Keyless Vehicle Module (KVM)
Immobilizer Anten
SEE MORE:
Important information
The information contained in this handbook covers all vehicle derivatives and
optional equipment,
some of which may not be fitted to your vehicle. Due to printing cycles, this
handbook may include
descriptions of options before they become generally available.
The vehicle options, hardware an
Symbols used in this handbook
Safety warnings indicate either a procedure which must be followed
precisely, or
information that should be considered with great care, in order to avoid the
possibility
of personal injury.
Cautions indicate either a procedure which must be followed precisely, or
information that
should
