Range Rover Evoque: Fender Apron Upper Panel
Removal
NOTES:
The fender apron upper panel is manufactured from mild steel.
The service panel is serviced not fully spot welded.
There is an NVH component on this panel, it is serviced on the new panel.
1. The fender apron upper panel is replaced in conjunction with:
- Front bumper cover
- Hood
- Hood hinge
- Hood latch panel
- Front fender
2. For additional information relating to this repair procedure please see the following: For additional information, refer to: Health and Safety Precautions (100-00 General Information, Description and Operation) / Body Repairs (501-25A Body Repairs - General Information, Description and Operation) / Corrosion Protection (501-25B Body Repairs - Corrosion Protection, Description and Operation) / Body and Frame (501-26 Body Repairs - Vehicle Specific Information and Tolerance Checks, Description and Operation) / Standard Workshop Practices (100-00 General Information, Description and Operation).
3. Remove the front fender.
For additional information, refer to: Fender (501-02 Front End Body Panels, Removal and Installation).
4. Remove the hood latch panel.
For additional information, refer to: Hood Latch Panel (501-02 Front End Body Panels, Removal and Installation).
5. Remove the hood.
6. Remove the hood hinge.
7. Remove the plenum chamber panel.
For additional information, refer to: Plenum Chamber (412-01 Climate Control, Removal and Installation).
8. Remove the front shock absorber.
For additional information, refer to: Front Shock Absorber - Vehicles Without: Dynamic Suspension (204-01 Front Suspension, Removal and Installation) / Front Shock Absorber - Vehicles With: Dynamic Suspension (204-01 Front Suspension, Removal and Installation).
9. NOTE: Right hand side for right hand drive, left hand side for left hand drive. Remove the wiper motor if required.
For additional information, refer to: Windshield Wiper Motor (501-16 Wipers and Washers, Removal and Installation).
10. LH Side: Release the battery junction box and position aside.
11. LH Side; Remove the security sounder.
For additional information, refer to: Anti-Theft Alarm Horn with Integral Battery (419-01A Anti-Theft - Active, Removal and Installation).
12. LH Side: Remove the air intake pipe.
13. RH Side: Release the coolant expansion tank and lay it aside.
14. RH Side: Evacuate the A/C system.
For additional information, refer to: Air Conditioning (A/C) System Recovery, Evacuation and Charging - GTDi 2.0L Petrol (412-00 Climate Control System - General Information, General Procedures) / Air Conditioning (A/C) System Recovery, Evacuation and Charging - TD4 2.2L Diesel (412-00 Climate Control System - General Information, General Procedures).
15. RH Side: Remove the fender apron A/C pipes.
16. RH Side: Release and lay aside the insulating material at the bulkhead.
17. Release and lay aside the wiring harness.
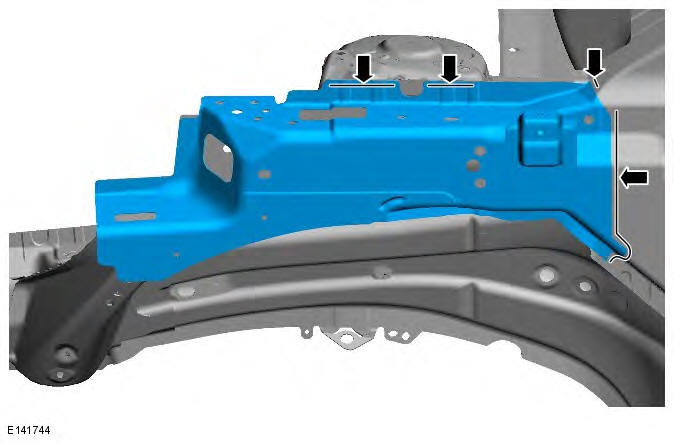
18. NOTE: This enables access to remove and install fender apron upper panel.
19. NOTE: This enables access to remove and install fender apron upper panel.
20. NOTES: This enables access to remove and inst fender apron upper panel.
21.
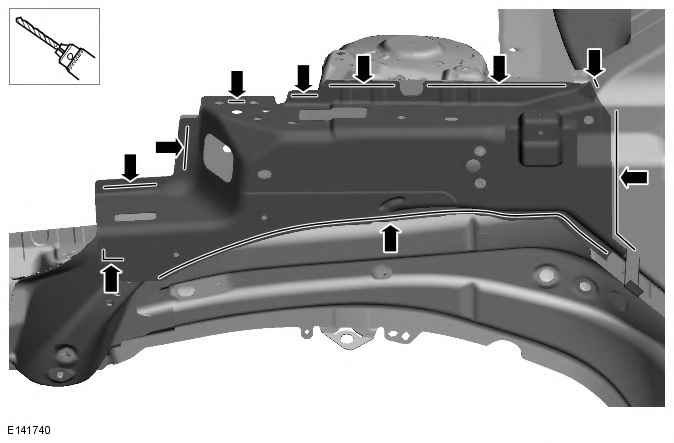
22. Separate the joints and remove the old panel, including its NVH component.
Installation
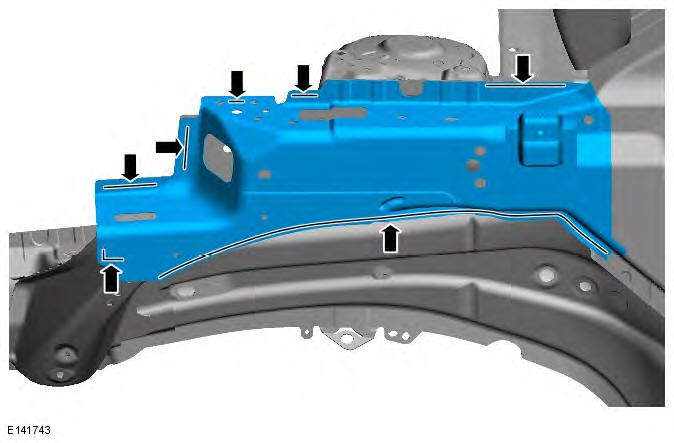
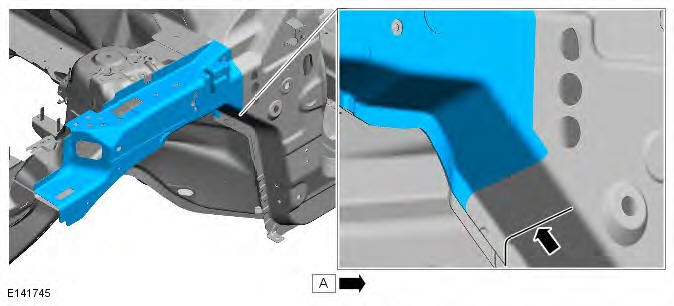
1. Refer to the old panel as reference and prepare the new panel in the areas where it is not fully welded and install missing spot welds.
2. Prepare the old and new panel joint surfaces.
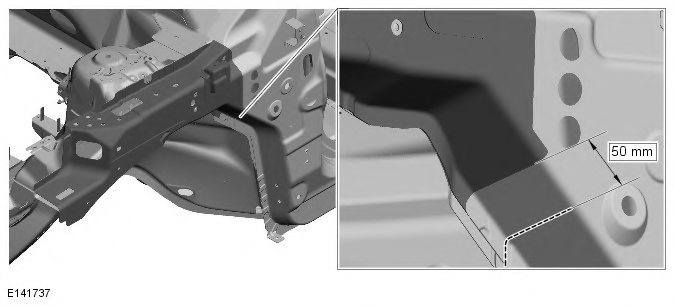
3. NOTE: With panel in position check for access to spot weld the joints. Offer up the new panel and clamp into position. Check alignment, if correct, proceed to next step, if not, rectify and recheck before proceeding.
4. Remove the new panel.
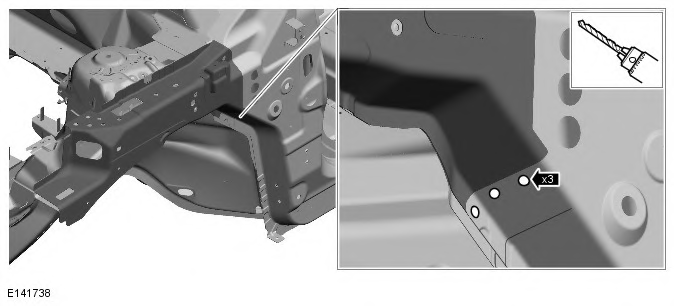
5. Drill holes in new panel ready for MIG plug welding as indicated.
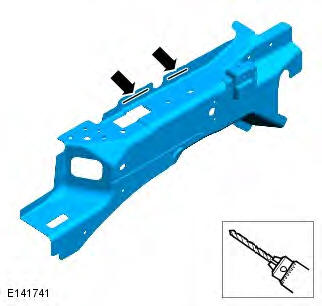
6. Deburr MIG plug locations in new panel.
7.
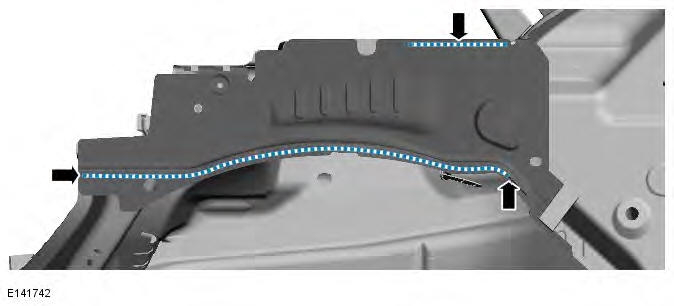
8. Apply sealer adhesive to the NVH component on the new panel and to the vehicle.
9. Offer up the new panel and clamp into position, also realigning the a-pillar outer flange. Check alignment, if correct, proceed to next step, if not, rectify and recheck before proceeding.
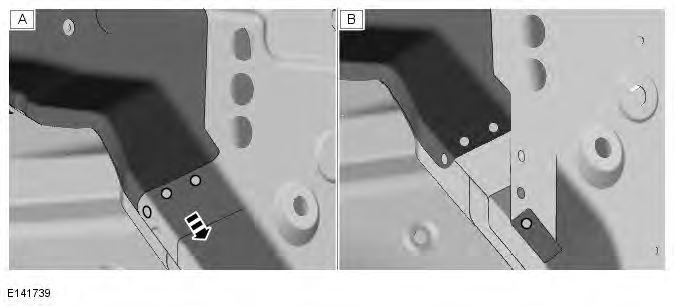
10. Spot weld.
11. MIG tack weld the a-pillar flange butt joint.
12. MIG Plug weld as indicated
13. MIG weld the a-pillar flange butt joint.
14. Dress all welded joints.
15. NOTE: Make sure all body joints are sealed following this repair procedure. The installation of associated panels and mechanical components is the reverse of removal.
READ NEXT:
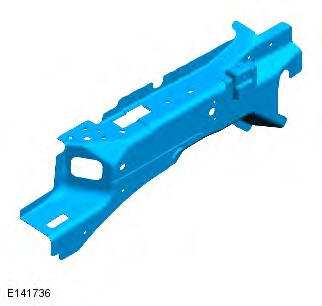
 Front Side Member Closing Panel
Removal
NOTES:
The front side member closing panel is manufactured from RP260.
The front side member closing panel is serviced as part of the front side member
and suspension top mount assembly.
Th
Fender Apron Panel Front Reinforcement
Removal
NOTES:
The fender apron panel front reinforcement is manufactured from RP220 and
mild steel.
The panel is serviced less its weld studs
1. In this procedure, to make sure the vehicle is corre
SEE MORE:
Isofix child seat positions
Isofix child seat positions
- IUF = Suitable for ISOFIX forward child
restraint systems of universal category
approved for use in the mass group.
- IL = These ISOFIX child restraint systems
are of the specific vehicle, restricted or
semi-universal categories.
- X = Not suitable for ISOFIX c
Installing an isofix child seat
Installing an isofix child seat
To install an ISOFIX child seat:
1. Locate the ISOFIX locking mechanism.
2. Slide the child seat into the locking
mechanism.
3. If an upper tether is fitted to the child seat,
ensure it is properly secured to the upper
tether anchorages on the rear of the sea
