Range Rover Evoque: Front Shock Absorber Vehicles Without: Dynamic Suspension
General Equipment
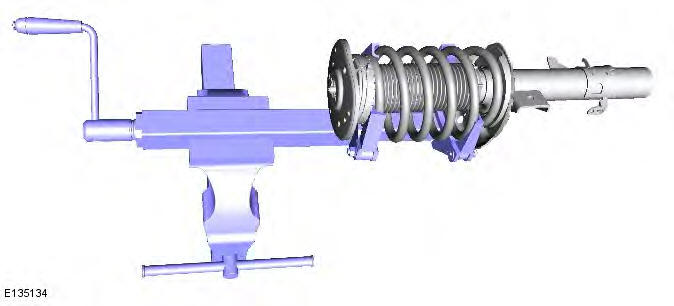
- Suspension Spring Compressor
- Vise
Removal
WARNINGS:
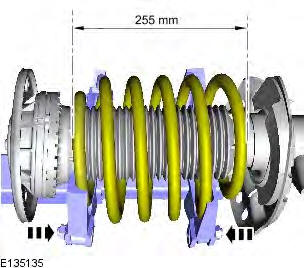
Make sure the spring compressor Safe Working Load (SWL) meets or exceeds the spring rating quoted in the Specifcations section.
Always follow the spring compressor manufacturer's instructions.
The spring is under extreme tension, care must be taken at all times. Failure to follow these instuctions may result in personal injury.
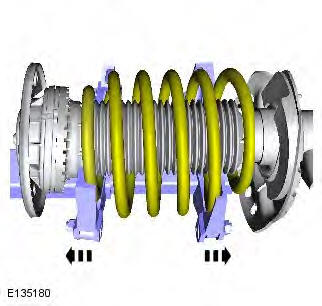
1. WARNING: Make sure to support the vehicle with axle stands. Raise and support the vehicle.
2. Remove the spring and damper assembly.
Refer to: Shock Absorber and Spring Assembly - Vehicles Without: Dynamic Suspension (204-01 Front Suspension, Removal and Installation).
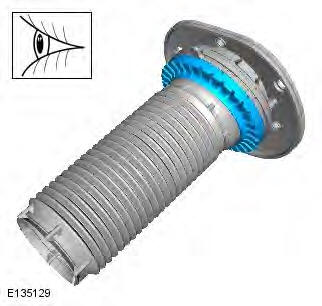
3.

4.
- General Equipment: Suspension Spring Compressor
- General Equipment: Vise
5.
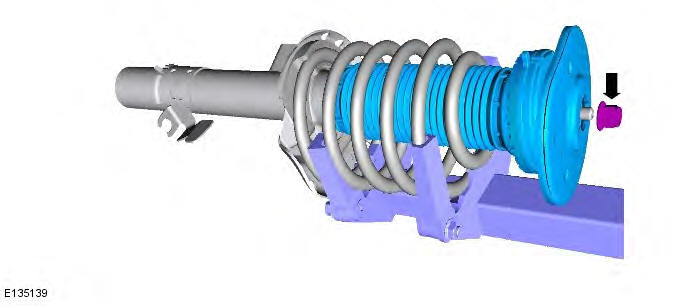
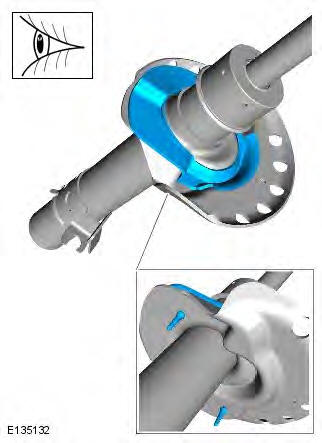
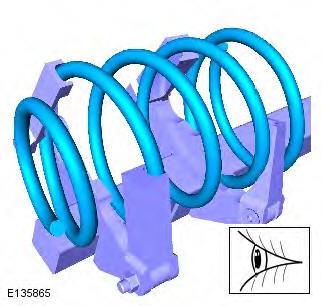
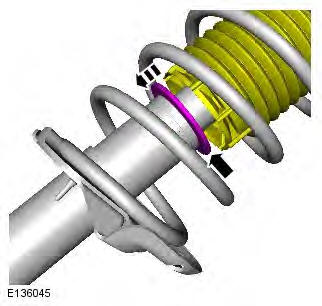
6. WARNING: Make sure to support the shock absorber.
CAUTION: Discard the nut.
7.
8.
Installation
1. Make sure the correct vehicle suspension components are installed.
Refer to: Specifications (204-00 Suspension System - General Information, Specifications).
2. Inspect the component and install a new one if damaged.
3. Inspect the component and install a new one if damaged.
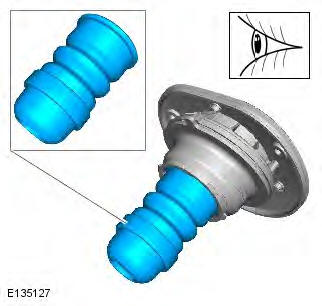
4. Inspect the component and install a new one if damaged.
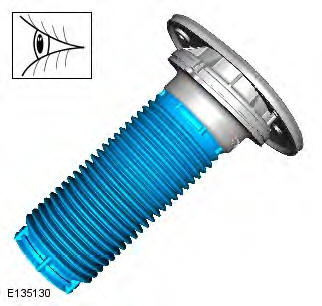
5. Inspect the component and install a new one if damaged.
6. Inspect the component and install a new one if damaged.

7. Inspect the component and install a new one if damaged.
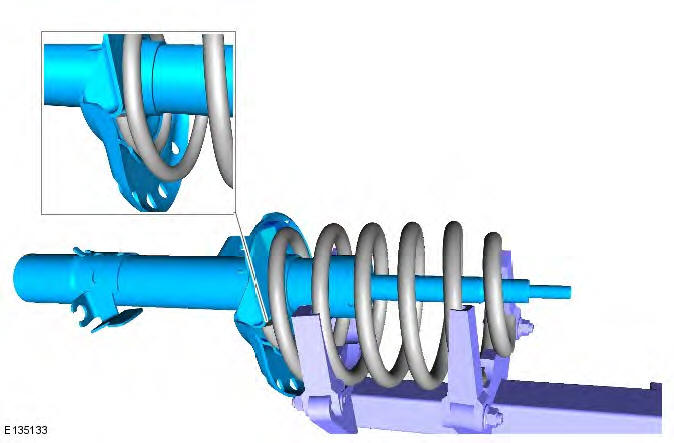
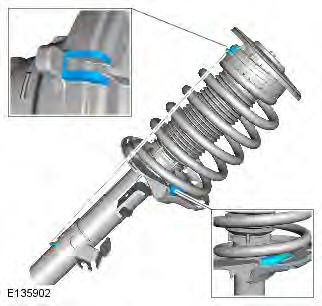
8. WARNING: Make sure to support the shock absorber.
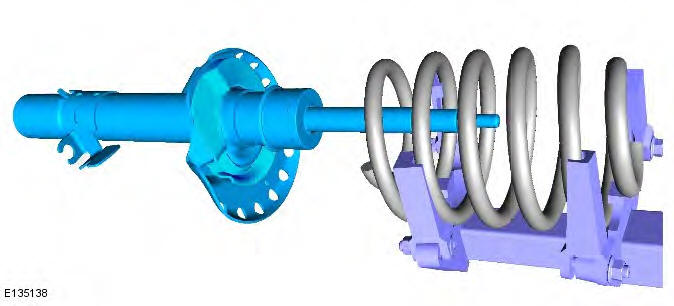
CAUTIONS: Make sure the component is aligned as shown.
Make sure that the spring is installed to the damper assembly with the paint marks (located on the spring) at the top.
9. WARNINGS:
Make sure that a new nut is installed.
Make sure to support the shock absorber.
Torque: 67 Nm

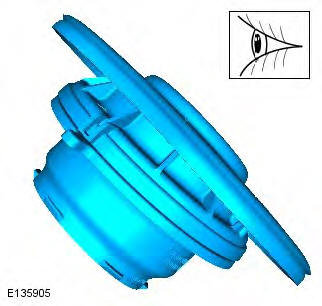
10. CAUTION: Make sure the components are aligned as shown.
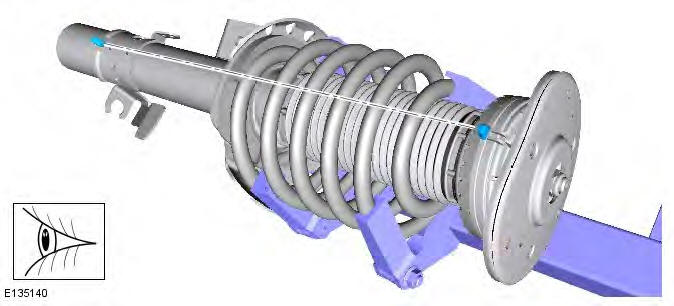
11.
12.
13. CAUTION: Make sure the components are aligned as shown.
14. Install the spring and damper assembly.
Refer to: Shock Absorber and Spring Assembly - Vehicles Without: Dynamic Suspension (204-01 Front Suspension, Removal and Installation).
15. Check the suspension system ride height.
READ NEXT:
 Shock Absorber and Spring Assembly Vehicles Without:
Dynamic Suspension
Shock Absorber and Spring Assembly Vehicles Without:
Dynamic Suspension
Special Tool(s)
205-754A
Splitter, Ball Joints
205-857
Remover, Halfshaft
JLR-204-804
Lever, Wheel Knuckle
General Equipment
Transmission jack
Wooden Block
Removal
CAUTION: Nuts and bolts must be
Front Shock Absorber Vehicles With: Dynamic
Suspension
General Equipment
Suspension Spring Compressor
Vise
Removal
WARNINGS:
Make sure the spring compressor Safe Working Load (SWL) meets or exceeds
the spring rating quoted in the
Specifcations sectio
Shock Absorber and Spring Assembly Vehicles With:
Dynamic Suspension
Special Tool(s)
205-754A
Splitter, Ball Joints
205-857
Remover, Halfshaft
JLR-204-804
Lever, Wheel Knuckle
General Equipment
Transmission jack
Wooden Block
Removal
CAUTION: Nuts and bolts must be
SEE MORE:
Electrical Precautions
General
The following guidelines are intended to make sure the safety of the operator
whilst preventing damage to the electrical
and electronic components of this vehicle.
Equipment
Prior to commencing any test procedure on the vehicle, make sure that the
relevant test equipment is working correct
Supplementary Restraint System (SRS) Precautions
WARNING: Do
not install rear facing child seats in the front passenger seat.
The SRS contains components which are potentially hazardous to service
personnel if not handled correctly. The following
guidelines and precautions are intended to alert personnel to potential sources
of danger and emph
