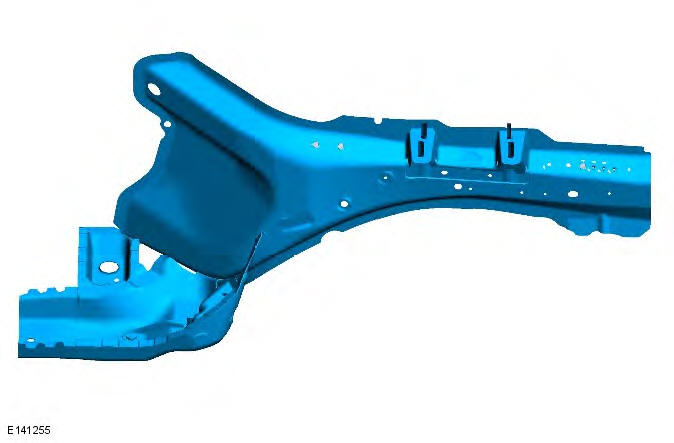
Range Rover Evoque: Front Side Member
Removal
NOTES:
The front side member is manufactured from RP260 and DP600.
The front side member long section is cut from the front side member and is manufactured from RP260.
The service panel is serviced not fully spot welded.
1. In this procedure, to make sure the vehicle is correctly aligned, it must be placed on an approved alignment jig.
2. The front side member long se is replaced in conjunction with
3. For additional information relating to this repair procedure please see the following: For additional information, refer to: Health and Safety Precautions (100-00 General Information, Description and Operation) / Body Repairs (501-25A Body Repairs - General Information, Description and Operation) / Corrosion Protection (501-25B Body Repairs - Corrosion Protection, Description and Operation) / Body and Frame (501-26 Body Repairs - Vehicle Specific Information and Tolerance Checks, Description and Operation) / Standard Workshop Practices (100-00 General Information, Description and Operation).
4. Remove the fender apron panel front reinforcement.
For additional information, refer to: Fender Apron Panel Front Reinforcement (501-27 Front End Sheet Metal Repairs, Removal and Installation).
5. Remove the radiator cooling pack.
For additional information, refer to: Radiator (303-03A Engine Cooling - TD4 2.2L Diesel, Removal and Installation).
6. Remove the engine and front suspension as an assembly.
7. LH Side: Release the battery junction box and position aside.
8. Remove the secondary bulkhead panel.
For additional information, refer to: Secondary Bulkhead Center Panel - TD4 2.2L Diesel (501-02 Front End Body Panels, Removal and Installation) / Secondary Bulkhead Center Panel - GTDi 2 0L Petrol (501-02 Front End Body Panels, Removal and Installation).
9. LH Side: Remove the secondary bulkhead panel bracket.
10. RH Side: Remove the side member insulation.
11. Release and lay aside the brake pipes.
12. Release and lay aside the wiring harness.
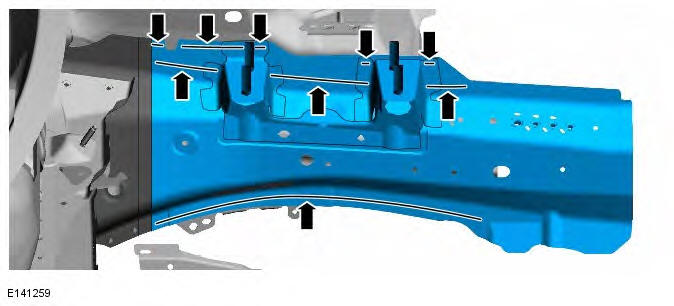
13. CAUTION: Care should be taken not to cut through into the inner reinforcements.
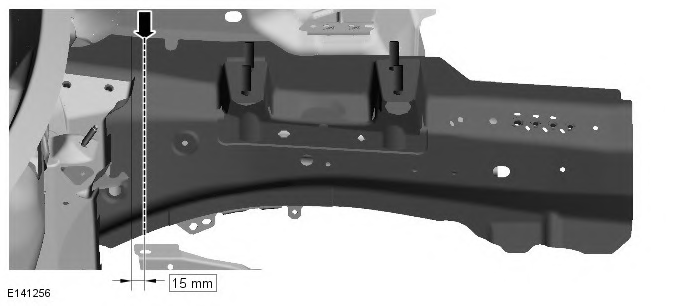
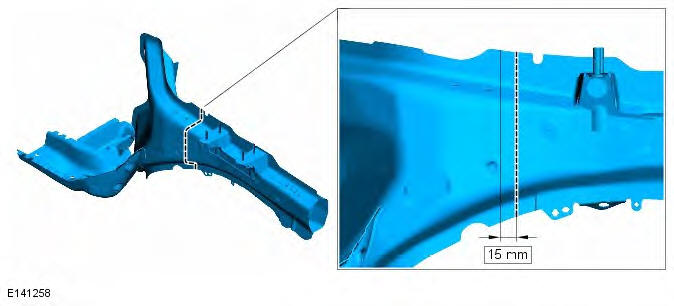
NOTE: L/H and R/H front side member joint locations are both 15mm forward of the lazer weld.
Mark out the position where the front side member long section MIG butt joint is to be made. Cut through the front side member as indicated.
14. Drill out the spot welds as indicated.
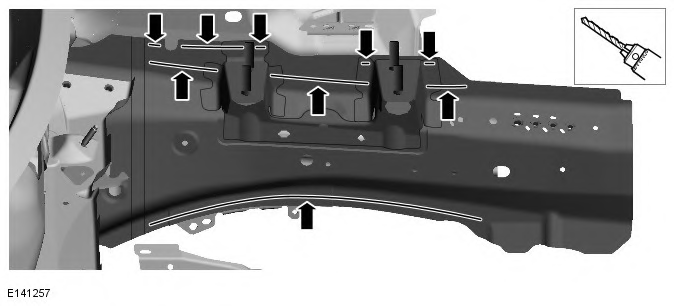
15. NOTE: Retain old front side member section for reference on installation. Separate the joints and remove the front side member section.
Installation
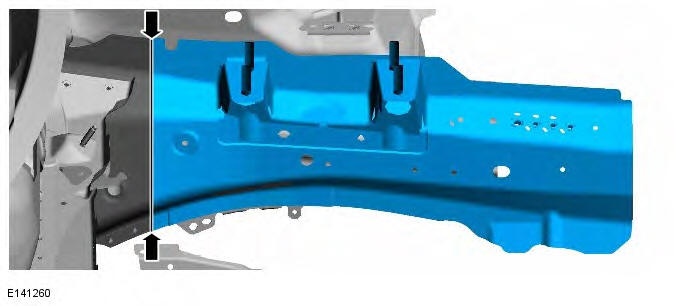
1. NOTE: Use the removed panel as reference for spot weld location and quantity. Install the missing spot welds to the new front side member long section before installation.
2. NOTE: L/H and R/H front side member joint locations are both 15mm forward of the lazer weld.
Mark out the position where the front side member long section MIG butt joint is to be made.
Cut through the new front side member as indicated.
3. NOTE: The drilled out spot welds must be replaced with MIG plug welds in the same quantities. Using the removed front side member long section as a guide, drill holes in the new front side member section as required ready for MIG plug welding.
4. Prepare the old and new panel joint surfaces.
5. Offer up the new panel and clamp into position. Check alignment, if correct, proceed to next step, if not, rectify and recheck before proceeding.
6. Tack MIG weld the front side member section butt joint.
7. MIG plug weld.
8. Dress the tack welds.
9. MIG weld the front side member butt weld.
10. Dress all welded joints.
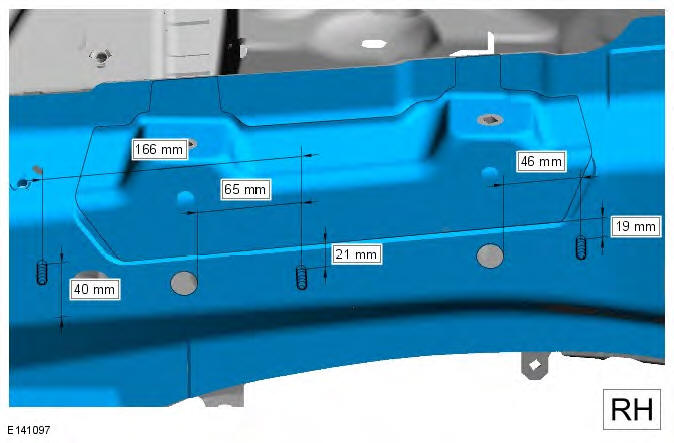
11. RH Only.
Prepare the new panel and install the weld studs in their original locations. The measurements provided in the graphic are to be used as a guide only, the components that are located/fixed to these weld studs must be offered up and cross checked for alignment prior to the installation of the weld studs to the new panel.
12. NOTE: Make sure all underbody joints are sealed following this repair procedure
The installation of associated panels and mechanical components is the reverse of removal.
READ NEXT:
 Front Side Member and Suspension Top Mount
Assembly
Front Side Member and Suspension Top Mount
Assembly
Removal
NOTES:
The front side member and suspension top mount assembly consists of the
front side member closing panel, fender apron panel front
reinforcement, fender apron lower panel, suspension to
Suspension Top Mount
Removal
NOTES:
The suspension top mount is manufactured from mild steel and RP220.
The service panel is serviced not fully spot welded.
The panel is serviced less its weld studs
1. In this procedure
Front Side Member Section
Removal
NOTES:
The front side member is manufactured from RP260 and DP600.
The front side member section is cut from the front side member and is
manufactured from RP260.
This procedure is written
SEE MORE:
Important information
The information contained in this handbook covers all vehicle derivatives and
optional equipment,
some of which may not be fitted to your vehicle. Due to printing cycles, this
handbook may include
descriptions of options before they become generally available.
The vehicle options, hardware an
Symbols used in this handbook
Safety warnings indicate either a procedure which must be followed
precisely, or
information that should be considered with great care, in order to avoid the
possibility
of personal injury.
Cautions indicate either a procedure which must be followed precisely, or
information that
should
