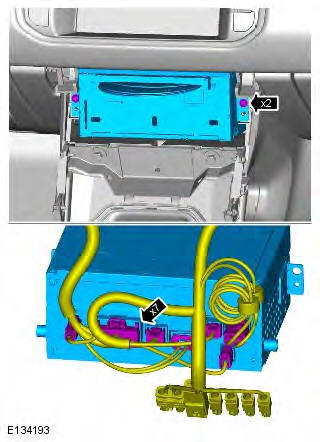
Range Rover Evoque: Heater Core and Evaporator Core Housing
Removal
NOTE: Removal steps in this procedure may contain installation details.
1. Make the SRS system safe.
Refer to: Standard Workshop Practices (100-00 General Information, Description and Operation).
2. Refer to: Instrument Panel - TD4 2.2L Diesel (501-12 Instrument Panel and Console, Removal and Installation).
Refer to: Instrument Panel - GTDi 2.0L Petrol (501-12 Instrument Panel and Console, Removal and Installation).
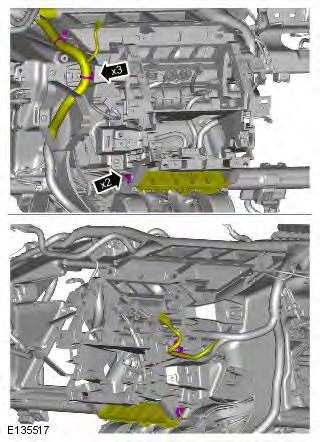
3.

4. Torque: 1 Nm
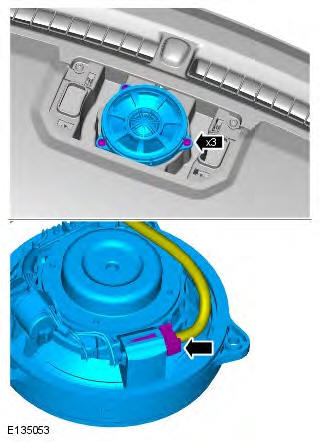
5.
6. Torque: 1.5 Nm
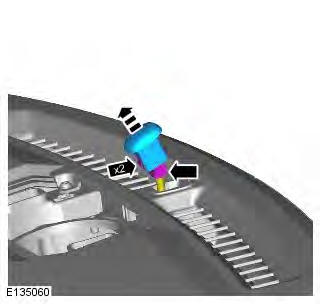
7. CAUTION: Take extra care not to damage the instrument cluster face.

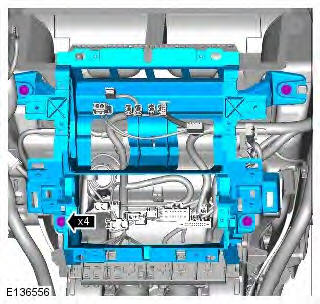
8.
9. Torque: 6 Nm
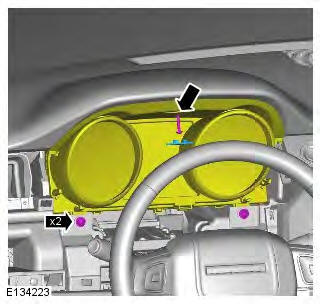
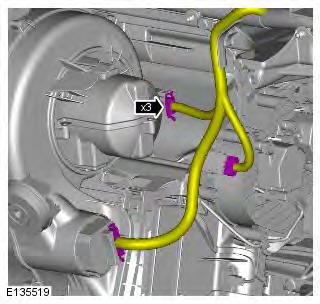
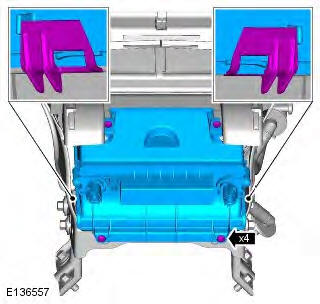
10.
11.
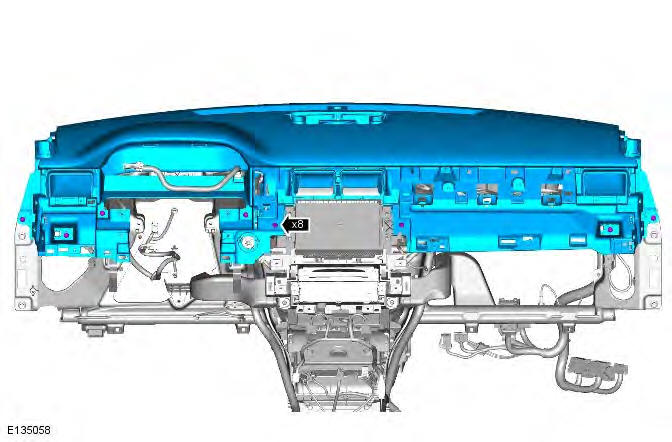
12. Torque: 6 Nm
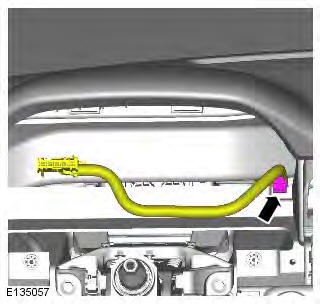
13. Torque: 6 Nm
14.
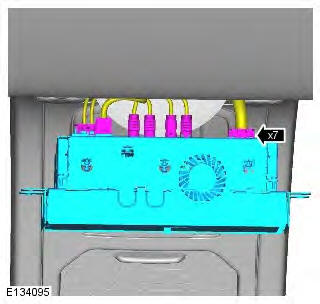
15. Torque: 6 Nm

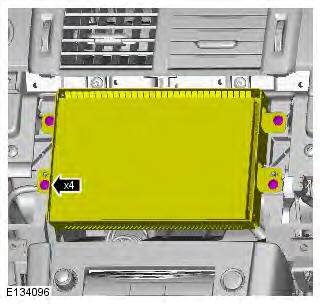
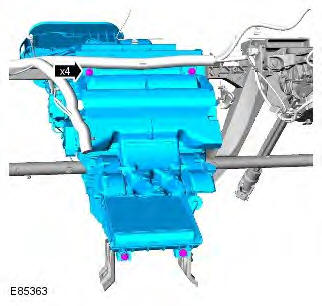
16. NOTE: With assistance remove the component.
Torque: 6 Nm
17.
18.
19. Torque: 6 Nm
20.

21. Torque: 2 Nm
22. NOTE: With assistance remove the component.
Torque: 7 Nm
Installation
1. To install, reverse the removal procedure.
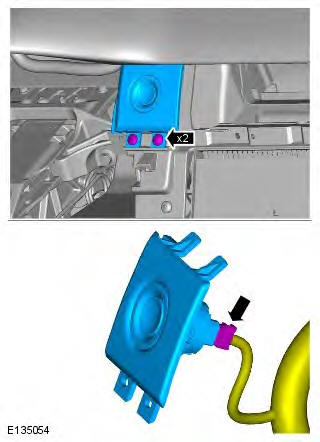
Air Conditioning (A/C) Pressure Transducer
Removal
NOTE: Removal steps in this procedure may contain installation details.
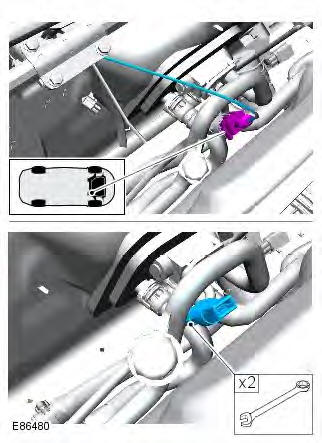
1. Refer to: Plenum Chamber (412-01 Climate Control, Removal and Installation).
2. CAUTIONS: Extreme cleanliness must be exercised when handling these components.
Make sure that all openings are sealed. Use new blanking caps.
NOTE: Some variation in the illustrations may occur, but the essential information is always correct.
Torque: 8 Nm
Installation
1. To install, reverse the removal procedure.
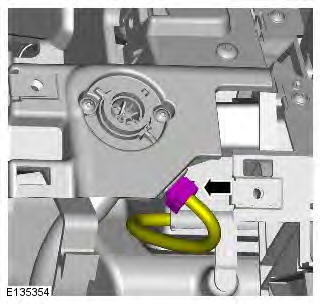
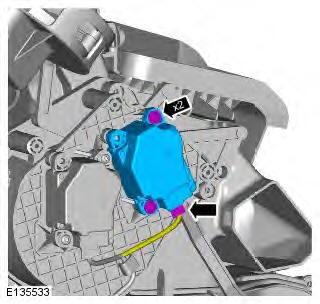
Temperature Blend Door Actuator LH LHD AWD/LHD FWD
Removal
NOTE: Removal steps in this procedure may contain installation details.
1. Make the SRS system safe.
Refer to: Standard Workshop Practices (100-00 General Information, Description and Operation).
2. Refer to: Heater Core and Evaporator Core Housing (412-01 Climate Control, Removal and Installation).
3.
Installation
1. To install, reverse the removal procedure.
2. If a new component has been installed, configure using Land Rover approved diagnostic equipment.
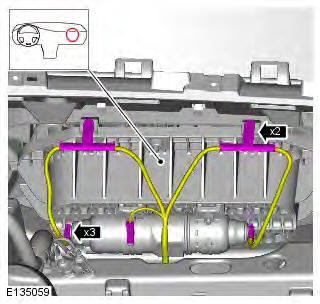
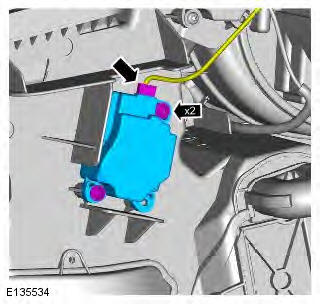
Temperature Blend Door Actuator RH
Removal
NOTE: Removal steps in this procedure may contain installation details.
1. Make the SRS system safe.
Refer to: Standard Workshop Practices (100-00 General Information, Description and Operation).
2. Refer to: Heater Core and Evaporator Core Housing (412-01 Climate Control, Removal and Installation).
3.
Installation
1. To install, reverse the removal procedure.
2. If a new component has been installed, configure using Land Rover approved diagnostic equipment.
READ NEXT:
 Defrost Vent/Register Blend Door Actuator LHD AWD/LHD
FWD
Defrost Vent/Register Blend Door Actuator LHD AWD/LHD
FWD
Removal
NOTE: Removal steps in this procedure may contain installation details.
1. Disconnect the battery ground cable.
Refer to: Specifications (414-01 Battery, Mounting and Cables,
Specifications).
Desiccant Bag GTDi 2.0L Petrol
Removal
NOTE: Removal steps in this procedure may contain installation details.
1. WARNING: Make sure to support the vehicle with axle stands.
Raise and support the vehicle.
2. Refer to: Condenser - G
Control Components FWD - Overview
OVERVIEW
The climate control system incorporates the heating, ventilation and A/C (air
conditioning) systems. There are 2 main
types of climate control system available:
a dual zone automatic syste
SEE MORE:
Important information
The information contained in this handbook covers all vehicle derivatives and
optional equipment,
some of which may not be fitted to your vehicle. Due to printing cycles, this
handbook may include
descriptions of options before they become generally available.
The vehicle options, hardware an
Symbols used in this handbook
Safety warnings indicate either a procedure which must be followed
precisely, or
information that should be considered with great care, in order to avoid the
possibility
of personal injury.
Cautions indicate either a procedure which must be followed precisely, or
information that
should
