Range Rover Evoque: Inner Quarter Panel
Removal
NOTES:
The inner quarter panel is manufactured from mild steel.
There are NVH components on this panel, they are not serviced on the new panel. If damaged, new components will be required.
1. The front inner quarter panel is replaced in conjunction with:
- Rear bumper cover
- Quarter panel
- Rear door
- Quarter glass

2. For additional information relating to this repair procedure please see the following: For additional information, refer to: Health and Safety Precautions (100-00 General Information, Description and Operation) / Body Repairs (501-25A Body Repairs - General Information, Description and Operation) / Corrosion Protection ( 501-25B Body Repairs - Corrosion Protection, Description and Operation) / Body and Frame (501-26 Body Repairs - Vehicle Specific Information and Tolerance Checks, Description and Operation) / Standard Workshop Practices (100-00 General Information, Description and Operation).
3. NOTE: You will need to use the rocker panel butt joint location in option 2 of the quarter panel procedure, to gain access to install the inner quarter panel. Remove the quarter panel.
For additional information, refer to: Quarter Panel (501-30B Rear End Sheet Metal Repairs - 5-Door, Removal and Installation).
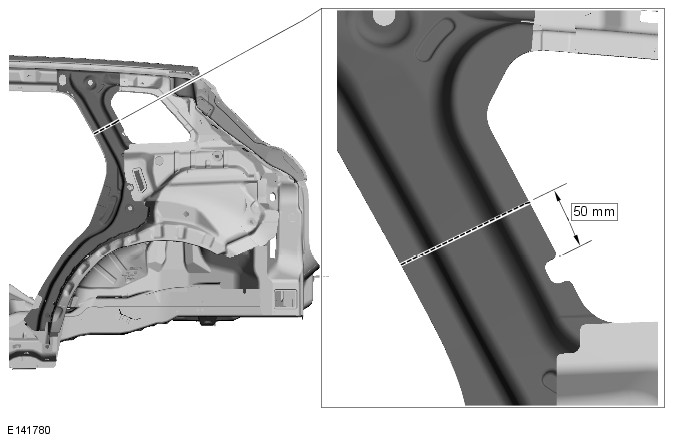
4. CAUTION: Care should be taken not to cut through into the inner panels.
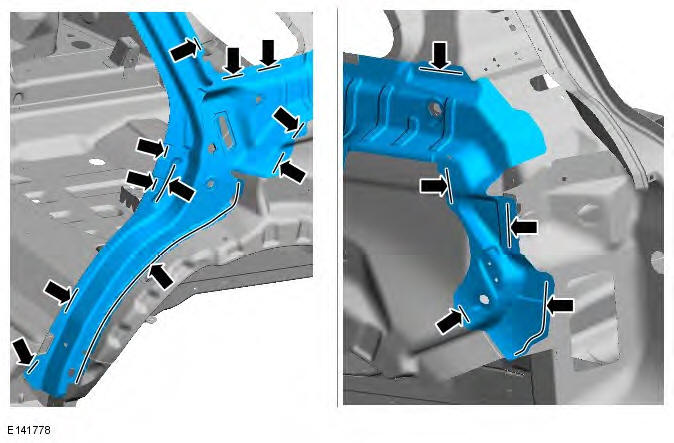
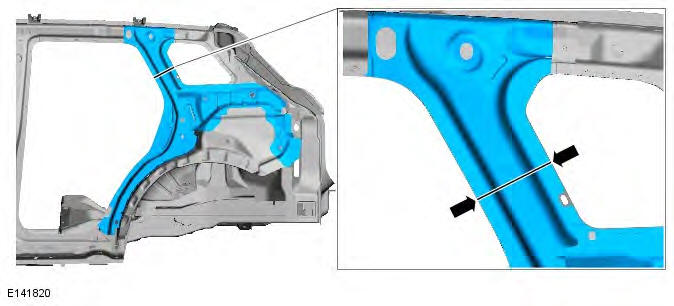
Measure, mark and cut the inner quarter panel where the MIG butt joint is to be made as indicated.
5. Drill out the spot welds.
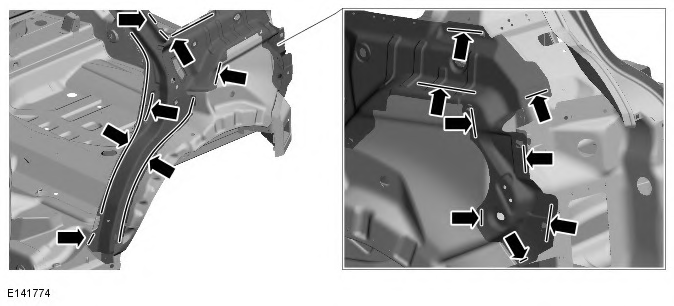
6. Separate the joints and remove the old panel, also releasing the NVH component.
Installation
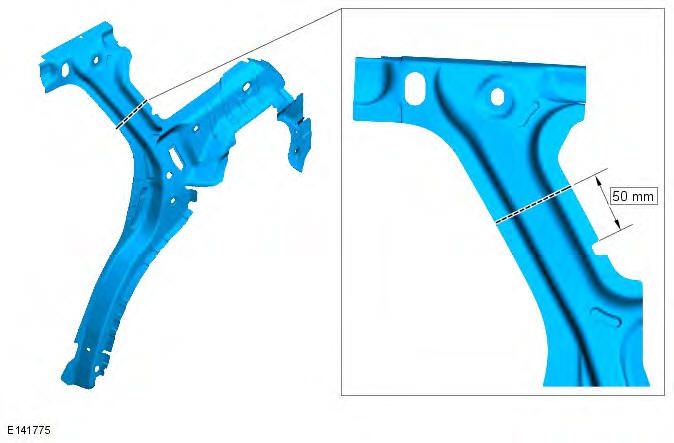
1. Measure, mark and cut the new inner quarter panel where the MIG butt joint is to be made as indicated.
2. Prepare the old and new panel joint surfaces, including NVH component.
3. NOTE: With panel in position check for access to spot weld the joints. Offer up the new panel and clamp into position. Check alignment, if correct, proceed to next step, if not, rectify and recheck before proceeding.
4. Remove the new panel.
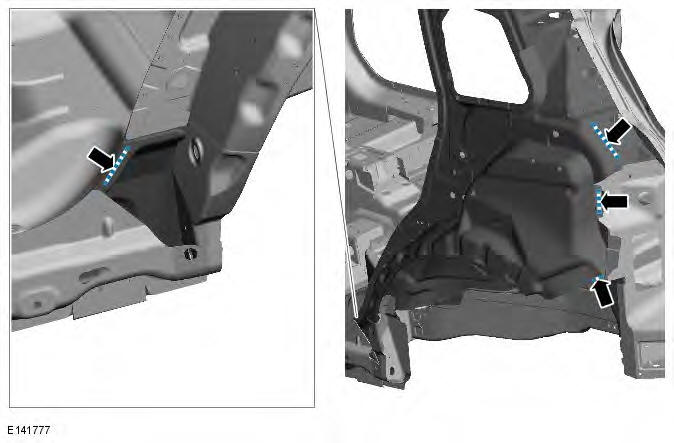
5. Drill holes in new panel ready for MIG plug welding as indicated.

6. Deburr MIG plug locations in new panel.
7.
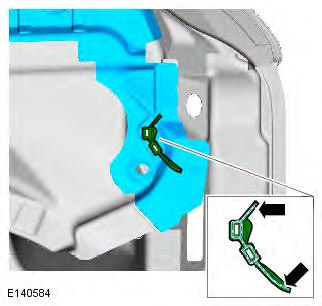
8. Apply sealer adhesive to the NVH component and install 8. to the new panel.
9. Offer up the new panel and clamp into position. Check alignment, if correct, proceed to next step, if not, rectify and recheck before proceeding.
10. Tack MIG weld the butt joint.
11. NOTES:
Spot welding is completed when the quarter panel is installed.
Joints with new panel bonding adhesive in them must be fully spot welded on installation
Spot weld.
12. MIG weld the butt joint.
13. MIG plug weld.
14. Dress the MIG welds.
15. Apply a zinc rich primer to any bare metal surfaces at this stage.
16. Apply sealer adhesive to the outer NVH component and install to new panel as indicated.
17. The installation of associated panels and mechanical components is the reverse of removal.
READ NEXT:
 Front Inner Quarter Panel
Removal
NOTES:
The front inner quarter panel is manufactured from mild steel.
The front inner quarter panel is to be unpicked from the inner quarter panel, it
is not serviced separately.
There are
Rear Inner Quarter Panel
Removal
NOTES:
The rear inner quarter panel is manufactured from mild steel.
The rear inner quarter panel is unpicked from the inner quarter panel, it is not
serviced separately.
There are NVH comp
Inner Quarter Panel and Wheelhouse
Removal
NOTES:
The inner quarter panel and wheelhouse is manufactured from mild steel.
The aid of a second technician is required to remove, offer up and align the
inner quarter panel and wheelhouse
SEE MORE:
Important information
The information contained in this handbook covers all vehicle derivatives and
optional equipment,
some of which may not be fitted to your vehicle. Due to printing cycles, this
handbook may include
descriptions of options before they become generally available.
The vehicle options, hardware an
Symbols used in this handbook
Safety warnings indicate either a procedure which must be followed
precisely, or
information that should be considered with great care, in order to avoid the
possibility
of personal injury.
Cautions indicate either a procedure which must be followed precisely, or
information that
should
