Range Rover Evoque: Rear Lower Arm FWD
Removal
NOTES:
LH illustration shown, RH is similar.
Some variation in the illustrations may occur, but the essential information is always correct.
1. WARNING: Make sure to support the vehicle with axle stands. Raise and support the vehicle.
2. Refer to: Wheel and Tire (204-04 Wheels and Tires, Removal and Installation).
3. NOTE: All wheel drive transmission illustrations shown, front wheel drive transmission is similar.

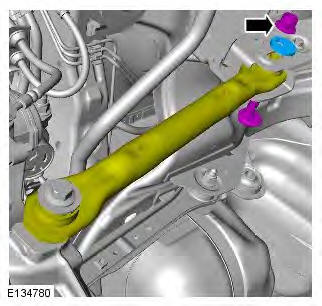
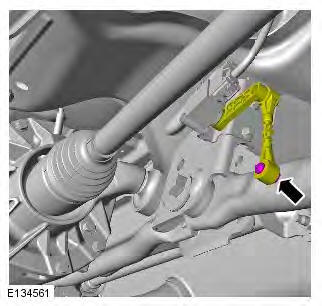
4. CAUTION: Note the fitted position of the special washer.
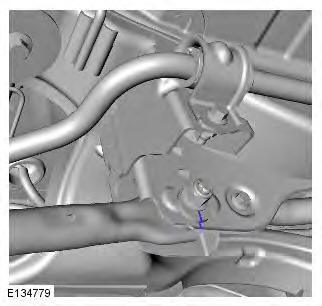
5.

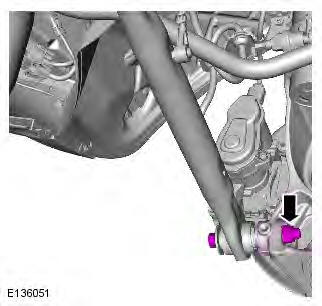
6.
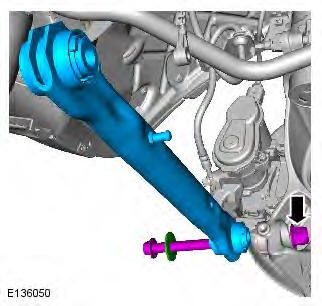
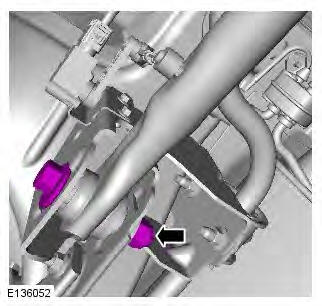
7. NOTE: Do not disassemble further if the component is removed for access only.

Installation
1. NOTE: This step is only required if previously removed.
2. CAUTION: Only tighten the nut and bolt finger-tight at this stage.

3. CAUTION: Only tighten the nut and bolt finger-tight at this stage.
4. CAUTION: Nuts and bolts must be tightened with the weight of the vehicle on the suspension. Support weight of vehicle on a jack at the rear hub.
5.
6. Torque: 175 Nm
7. CAUTION: Note the fitted position of the special washer.

8. Torque: 175 Nm
9. Refer to: Wheel and Tire (204-04 Wheels and Tires, Removal and Installation).
10. Check and if necessary, adjust the rear wheel alignment
READ NEXT:
 Rear Suspension FWD
Component Location
Stabilizer link
RH (right-hand) spring and damper assembly
Stabilizer bar
LH (left-hand) spring and damper assembly
Wheel knuckle
Stub axle and locknut
Hub
Longitudinal li
Wheels and Tires
Wheel and Tire
Removal
NOTE: Removal steps in this procedure may contain installation details.
1. WARNING: Make sure to support the vehicle with axle stands.
Raise and support the vehicle.
2. NOTE: Ma
Vehicle Dynamic Suspension
Vehicle Dynamic Suspension - Component
Location
COMPONENT LOCATION
RH (right-hand) rear spring and damper assembly
RH rear height sensor
LH (left-hand) rear spring and damper assembly
LH rear he
SEE MORE:
To erase all programming
For first time programming, ensure that the
engine is switched off:
1. Ensure that the ignition is on (but with the
engine switched off).
2. Press and hold the two outer HomeLink
buttons. Keep the buttons pressed until the
indicator lamp begins to flash (this will take
approximately 20 second
Information and assistance
It is recommended that when
you sell or
dispose of the vehicle, the programmed
HomeLink buttons be erased for
security purposes.
For information on the range of available
compatible products or accessories, or for
assistance, you should contact your Dealer/
Authorised Repairer.
You can als
