Range Rover Evoque: Rear Side Member Section
Removal
NOTES:
The rear side member section is manufactured from RP260, with its inner reinforcement manufactured from DP600.
The rear side member section is cut from the rear side member service panel, the section also includes the upper and lower side extensions.
1. In this procedure, to make sure the vehicle is correctly aligned, it must be placed on an approved alignment jig.
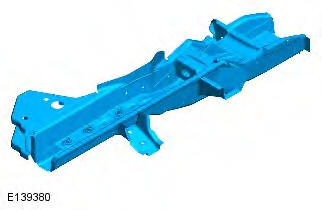
2. The rear side member section is replaced in conjunction with:
- Rear bumper cover
- Rear bumper
- Rear lamp mounting panel.
- Back panel
- Rear bumper mounting
- Inner back panel assembly
- Spare wheel well
- Rear side member closing panel
- Rear side member upper side extension.
- Rear side member lower side extension.
- Fuel tank
- Rear subframe and suspension assembly
3. For additional information relating to this repair procedure please see the following: For additional information, refer to: Health and Safety Precautions (100-00 General Information, Description and Operation) / Body Repairs (501-25A Body Repairs - General Information, Description and Operation) / Corrosion Protection (501-25B Body Repairs - Corrosion Protection, Description and Operation) / Body and Frame (501-26 Body Repairs - Vehicle Specific Information and Tolerance Checks, Description and Operation) / Standard Workshop Practices (100-00 General Information, Description and Operation).
4. Remove the rear side member closing panel.
For additional information, refer to: Rear Side Member Closing Panel (501-30B Rear End Sheet Metal Repairs - 5-Door, Removal and Installation).
5. Remove the rear side member upper side extension.
For additional information, refer to: Rear Side Member Upper Side Extension (501-30B Rear End Sheet Metal Repairs - 5-Door, Removal and Installation).
6. Remove the rear side member lower side extension.
For additional information, refer to: Rear Side Member Lower Side Extension (501-30B Rear End Sheet Metal Repairs - 5-Door, Removal and Installation).
7. Mark out the position where the rear side member section MIG butt joint is to be made.
Cut through the rear side member at this point, also cutting through the rear side member inner reinforcement as indicated.
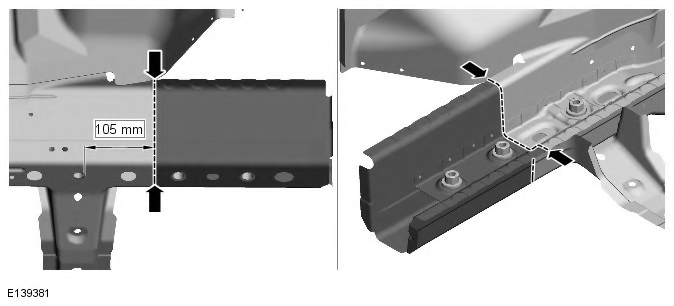
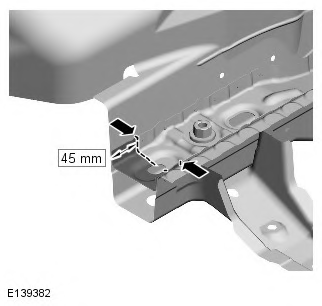
8. CAUTION: Care should be taken not to cut into the rear side member when cutting the rear side member inner reinforcement. Mark out the position where the rear side member inner reinforcement section MIG butt joint is to be made. Cut through the rear side member inner reinforcement as indicated.
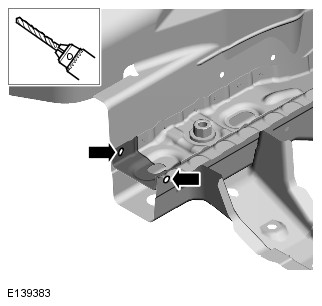
9. Drill out the spot welds as indicated.
10. Separate the joints and remove the rear side member inner reinforcement remnant.
Installation
1. NOTE: Retain the upper side member extension for reinstallation. Drill out spot welds and remove the upper side member extension panel from the new panel.
2. CAUTION: Care should be taken not to cut into the rear side member inner reinforcement when cutting the rear side member. Mark out the position on the rear side member service panel, where the section MIG butt joints are to be made and cut the panel at the points indicated.
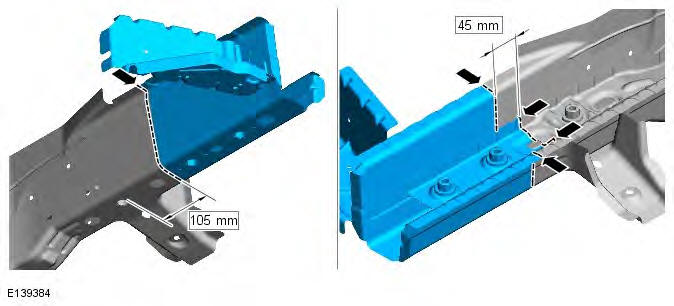
3. Drill out the spot welds as indicated.
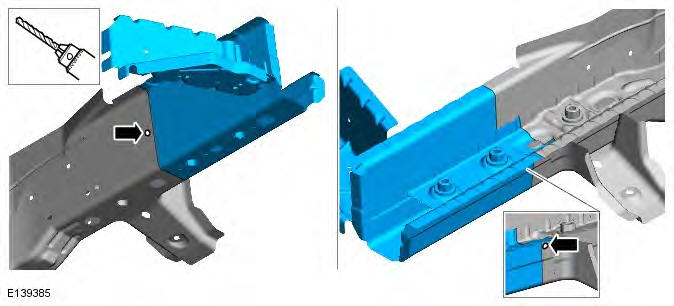
4. Separate the joints from the rear side member inner 4. reinforcement.
5. Prepare the panel joint surfaces of the old and new rear side member.
6. Offer up the new rear side member section and clamp into position. Check alignment, if correct, proceed to next step, if not rectify and recheck before proceeding.
7. Tack MIG weld the rear side member section butt joint.
8. Tack MIG weld the rear side member inner reinforcement section butt joint.
9. MIG plug weld.
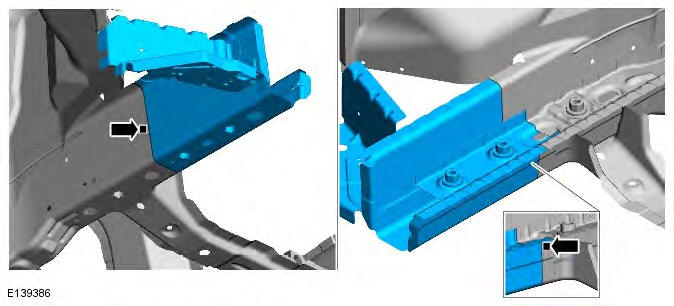
10. Dress the tack welds and both MAG plug welds.
11. MIG weld the rear side member and inner reinforcement butt welds.
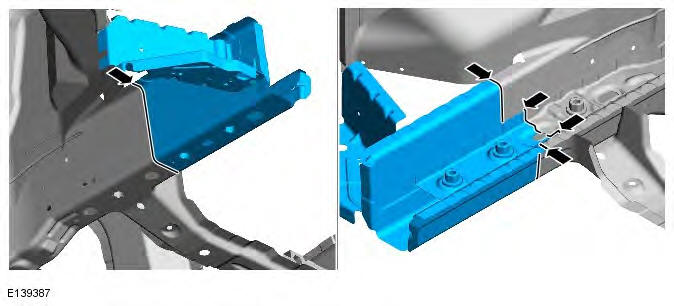
12. Dress the rear side member section butt joints.
13. Apply a zinc rich primer to any bare metal surfaces at this stage.
14. NOTE: Refer to rear side member upper extension panel procedure. Reinstall the rear side member upper extension panel.
For additional information, refer to: Rear Side Member Upper Side Extension (501-30B Rear End Sheet Metal Repairs - 5-Door, Removal and Installation).
15. NOTE: Make sure all underbody joints are sealed following this repair procedure
The installation of associated panels and mechanical components is the reverse of removal.

