Range Rover Evoque: Steering Column Switches
Torque Specifications

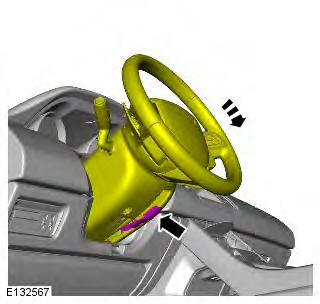
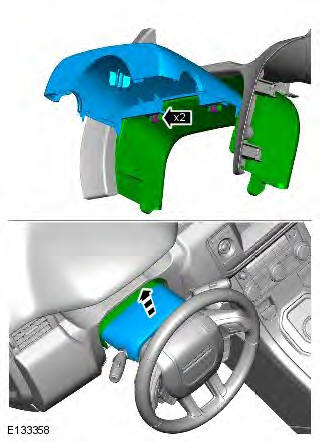
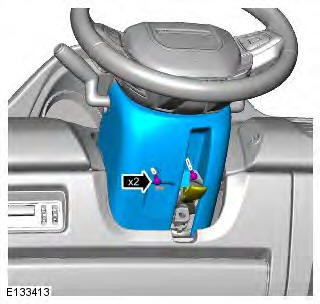
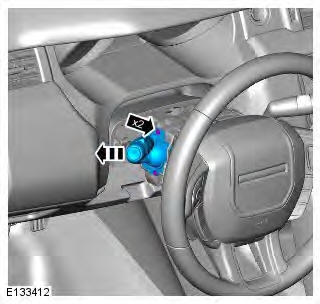
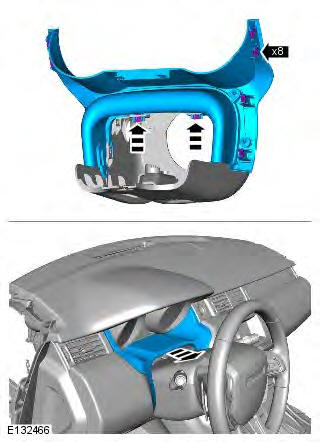
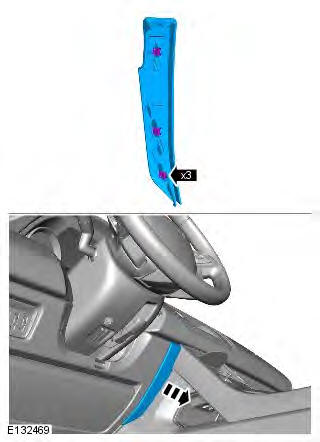
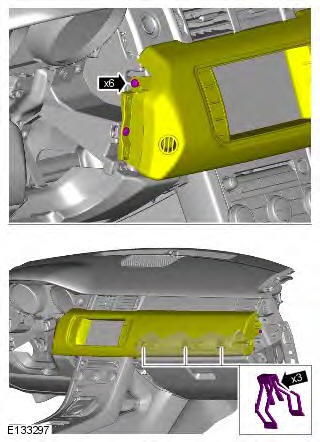
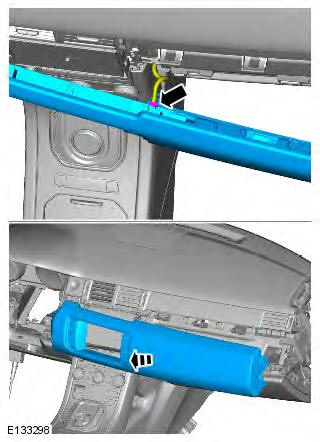
Steering Column Multifunction Switch
Removal
NOTES:
Removal steps in this procedure may contain installation details.
Removal of the windshield wiper switch assembly is identical to this procedure.
1.
2.
3.
4.
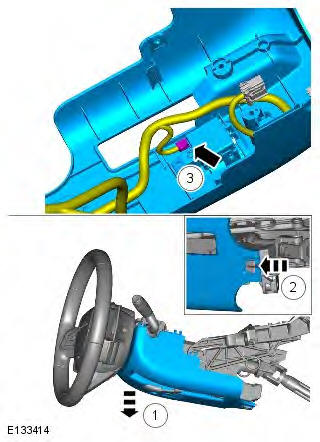
5.
Installation
1. To install, reverse the removal procedure.
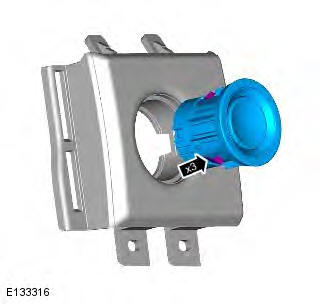
Ignition Switch
Removal
NOTE: Removal steps in this procedure may contain installation details.
1.

2.
3. CAUTION: LH illustration shown, RH is similar.
NOTE: The step must be carried out on both sides.
4.

5. Torque: 6 Nm
6.
7. Torque: 1.5 Nm

8.
Installation
1. To install, reverse the removal procedure.
Steering Column Lock Module
Removal
NOTES:
Removal steps in this procedure may contain installation details.
The steering column lock module is retained with 2 patch locked, tamper proof bolts.
1. Refer to: Steering Column (211-04 Steering Column, Removal and Installation).
2. Using a suitable stud extraction tool, remove the tamper proof bolts.

Installation
1. CAUTION: Tighten the new tamper proof bolts until the hexagon shears. To install, reverse the removal procedure.
2. Using the Land Rover approved diagnostic system, calibrate a new module.
3. If a new component is installed, the soft lock stop reset routine should be completed on the power steering system, using the approved diagnostic tool.
READ NEXT:
 Engine System - General Information
Cylinder Head Gasket Selection TD4
2.2L Diesel
Special Tool(s)
303-979
Measuring Bridge, Piston Protusion
1. CAUTION: Make sure that the surface is clean and
free of foreign material.
Zero the gauge o
SEE MORE:
Important information
The information contained in this handbook covers all vehicle derivatives and
optional equipment,
some of which may not be fitted to your vehicle. Due to printing cycles, this
handbook may include
descriptions of options before they become generally available.
The vehicle options, hardware an
Symbols used in this handbook
Safety warnings indicate either a procedure which must be followed
precisely, or
information that should be considered with great care, in order to avoid the
possibility
of personal injury.
Cautions indicate either a procedure which must be followed precisely, or
information that
should
