Range Rover Evoque: Windshield Glass
Removal
CAUTIONS:
Always protect paintwork and glass when removing exterior components.
Always protect the interior components when removing body glass.
Lay the glass on felt covered supports. Do not stand on edge as this can cause chips which subsequently develop into cracks.
NOTES:
The cutting blades used in this procedure are from the standard BTB glass removal kit.
Some variation in the illustrations may occur, but the essential information is always correct.
1. Refer to: Interior Rear View Mirror (501-09 Rear View Mirrors, Removal and Installation).
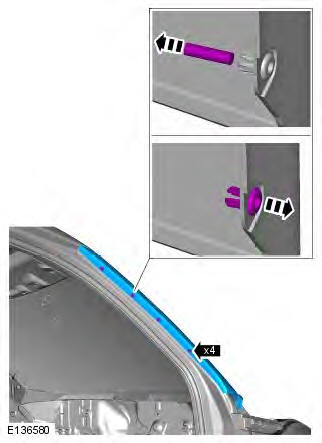
2. NOTE: The procedure must be carried out on both sides.
Refer to: A-Pillar Trim Panel (501-05 Interior Trim and Ornamentation, Removal and Installation).
3. Refer to: Plenum Chamber (412-01 Climate Control, Removal and Installation).
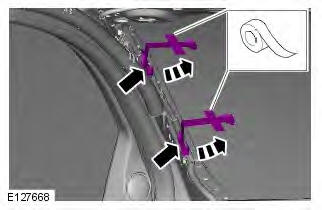
4. NOTES:
The procedure must be carried out on both sides.
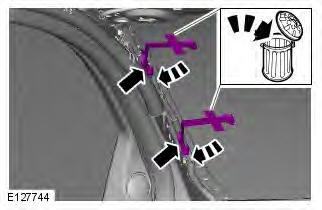
Discard the retaining clips.
Make sure that the centre part of the clip is fully removed from the outer part of the clip. It is not possible to prevent the centre part of the clip falling into the body of the vehicle.
5. NOTE: The procedure must be carried out on both sides. Disconnect the heating element electrical connectors.
6. NOTE: The procedure must be carried out on both sides.
7. WARNING: Wear safety goggles and protective gloves.
CAUTIONS:
Protect the surrounding paintwork to avoid damage.
Protect the surrounding components.
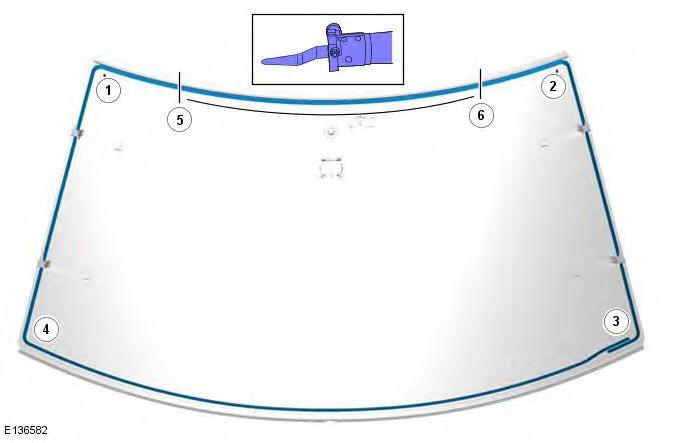
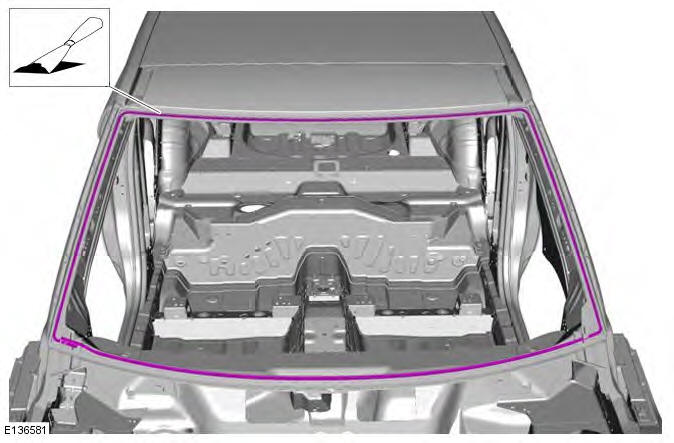
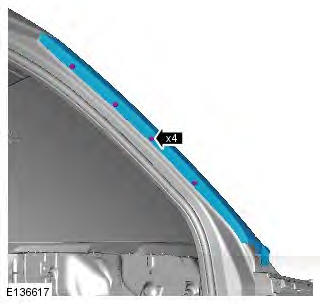
NOTE: Windshield glass shown removed for clarity.
- Cut between points 3 and 4, use a WK1S blade, reverse cut with the flat side against the body.
- Cut the bottom corner at points 3 and 4, use a WK1S blade.
- Cut between points 4 and 1, use a WK24ZRS blade against the body and a WK11B controller arm set to 26mm cut depth.
- Cut between points 3 and 2, use a WK24ZRS blade against the body and a WK11B controller arm set to 26mm cut depth.
- Cut between points 5 and 6, use a WK24RS.
- Cut between points 1 and 2, use a WK1S blade, reverse cut with the flat side against the windshield glass and a WK11B controller arm set to 26mm cut depth.
- Cut the top corner at points 1 and 2, use a WK1S blade.
- Cut any adhesive from the windshield to allow removal, use a WK1S blade.
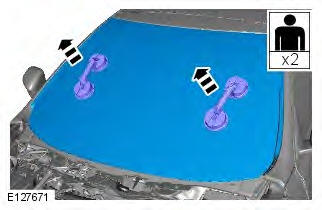
8. WARNING: This step requires the aid of another technician.
Installation
CAUTION: Make sure that a Hi-modulus sealer (for example, Wurth Ultimate adhesive) is used when bonding the component to the vehicle.
1. CAUTIONS:
Make sure that the mating faces are clean and free of foreign material.
Correct preparation of body apertures 'post painting' to ensure satisfactory glass adhesion, must be carried out in line with industry practise.
- Prepare the window glass, window glass flange and trimmed PU adhesive in accordance with the instructions included with the PU adhesive kit.
2. CAUTION: Touching the adhesive surface will impair rebonding.
- Apply a continuous bead of sealant to the windshield glass.

3. WARNING: This step requires the aid of another technician.
CAUTIONS:
Make sure that the component is correctly located on the locating dowels.
Make sure that equal pressure is applied to the full length of the component.
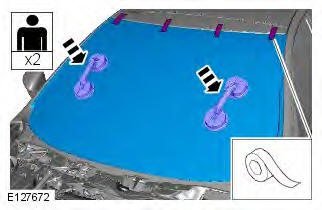
- With assistance, install and align the windshield glass.
- Lightly press the window glass to seat the sealer.
- Secure the windshield glass in position using tape.
- If the ambient temperature falls below 10 degrees C, apply warm air (25 degrees C) continuously for 15 minutes.
4. CAUTION: Make sure that no excess sealant residue is evident.
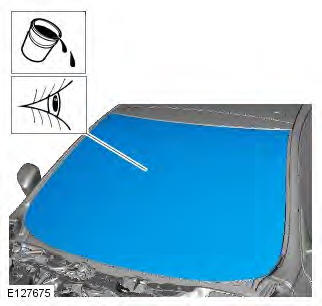
- If water is used as a means for the leak check, then allow sealant to dry before testing.
- Spray water around the windshield glass, mark any area that leaks. Dry the windshield glass and sealant before applying additional sealant.
5. NOTE: The procedure must be carried out on both sides.
6. NOTE: The procedure must be carried out on both sides. Connect the heating element electrical connectors.
7. NOTE: The procedure must be carried out on both sides.
8. Refer to: Plenum Chamber (412-01 Climate Control, Removal and Installation).
9. NOTE: The procedure must be carried out on both sides. Refer to: A-Pillar Trim Panel (501-05 Interior Trim and Ornamentation, Removal and Installation).
10. Refer to: Interior Rear View Mirror (501-09 Rear View Mirrors, Removal and Installation).
READ NEXT:
 Front Door Window Regulator and Motor
Removal
NOTE: Removal steps in this procedure may contain installation details.
1. WARNING: To avoid accidental deployment, the restraints
control module backup power supply must be depleted. Wait at
Glass Roof Panel
Removal
CAUTIONS:
Always protect paintwork and glass when removing exterior components.
Always protect the interior components when removing body glass.
Measure all gaps between the glass roof panel
Glass Roof Panel Blind
Removal
CAUTION: When removing and installing the glass roof panel blind, extreme
cleanliness must be observed at all
times.
NOTE: Removal steps in this procedure may contain installation details.
A
SEE MORE:
Gear shift indicator
The gear shift indicator
illuminates
briefly at the recommended gear
change point (upshift).
The shift indicator will not illuminate while
Cruise control is active and is not being
overridden by pressing the throttle pedal.
Note: This warning indicator is only a guide. It
remains the respo
Foot brakes
Do not rest your foot on the
brake
pedal while the vehicle is in motion.
Never allow the vehicle to coast
(freewheel) with the engine turned off.
The engine must be running to provide
full braking assistance. The brakes
will still function with the engine off,
but far more pressure will be
