Range Rover Evoque: Balance Shaft Assembly
Special Tool(s)
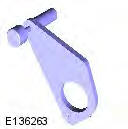 JLR-303-1595
Alignment Tool, Crankshaft Damper
Removal
NOTES:
Some illustrations may show the engine removed for clarity.
Some variation in the illustrations may occur, but the essential information is always correct.
Removal steps in this procedure may contain installation details.
Some illustrations may show the engine removed for clarity.
1. Refer to: Air Conditioning (A/C) System Recovery, Evacuation and Charging - GTDi 2.0L Petrol (412-00 Climate Control System - General Information, General Procedures).
2. WARNING: Make sure to support the vehicle with axle stands. Raise and support the vehicle.
3. Refer to: Engine Undershield (501-02 Front End Body Panels, Removal and Installation).
4. WARNING: Avoid skin contact with the specified material.
CAUTIONS:
Hot fluid.
Be prepared to collect escaping fluids.
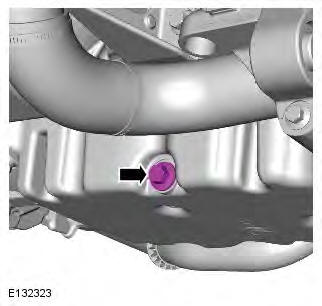
NOTE: Collect the engine oil in a clean container.

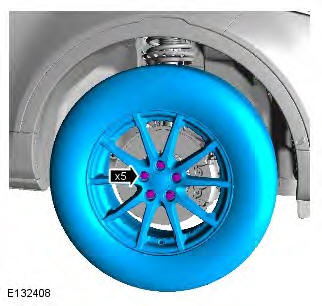
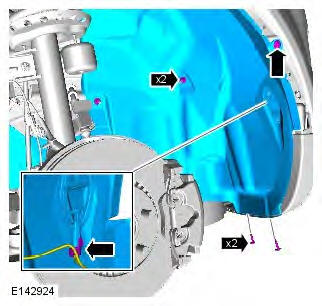
5. Remove the RH front wheel and tyre.
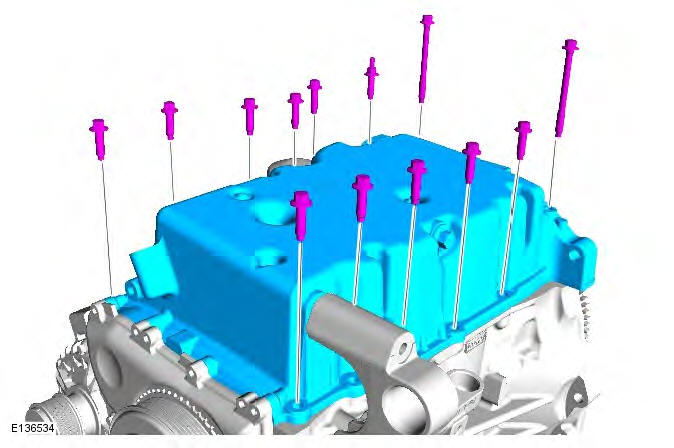
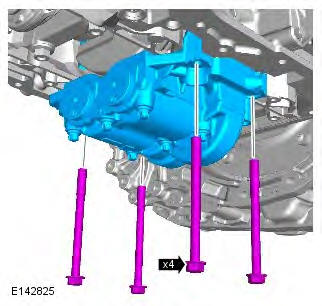
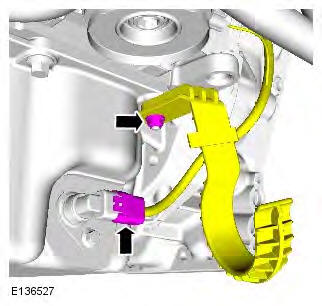
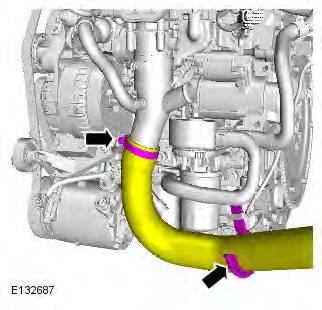
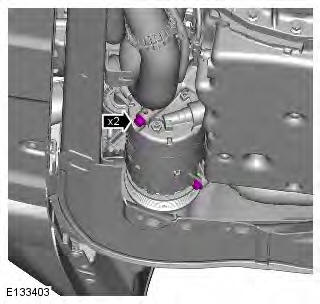
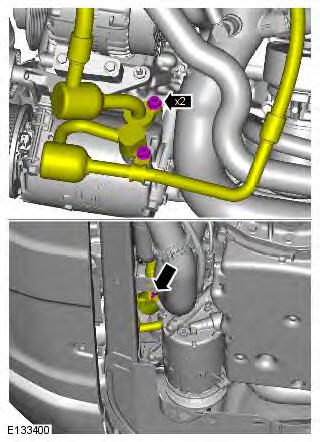
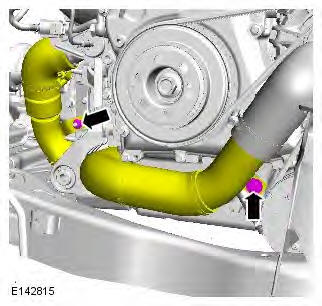
6.
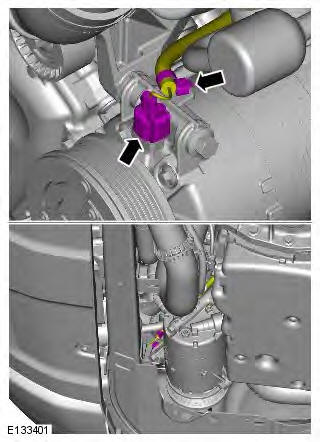
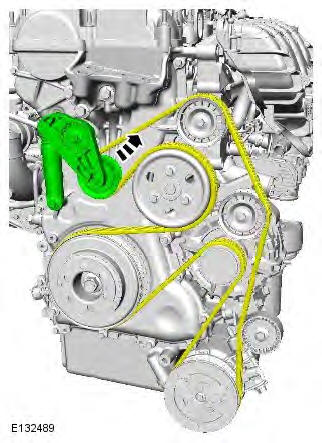
7. Release the accessory drive belt from the A/C compressor pulley.

8.
9. CAUTIONS:
Lubricate the new seals with clean refrigerant oil.
Make sure that all openings are sealed. Use new blanking caps.

10.

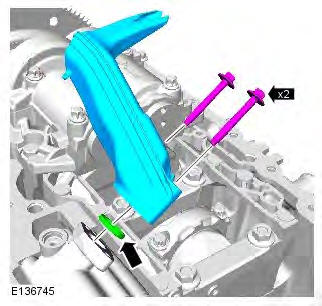
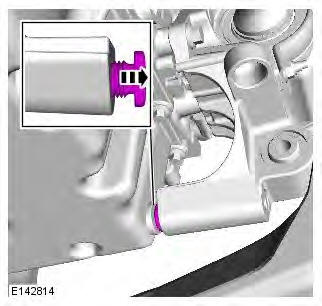
11. NOTE: Loosen the bolt, but do not fully remove.

12.

13.
14.

15.

16.

17.
18.
19.
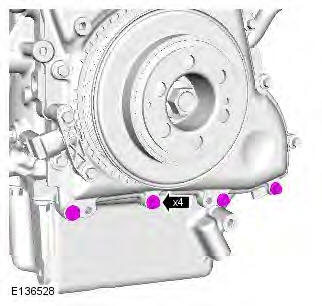
20. NOTES:
Make sure that all traces of the old sealant are removed from the mating faces.
Engine shown removed for clarity.
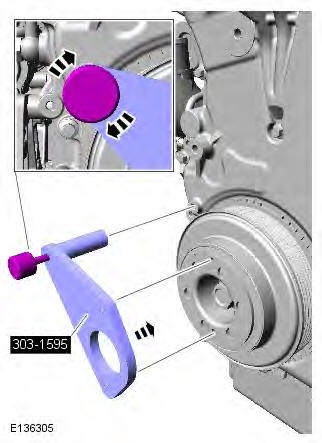
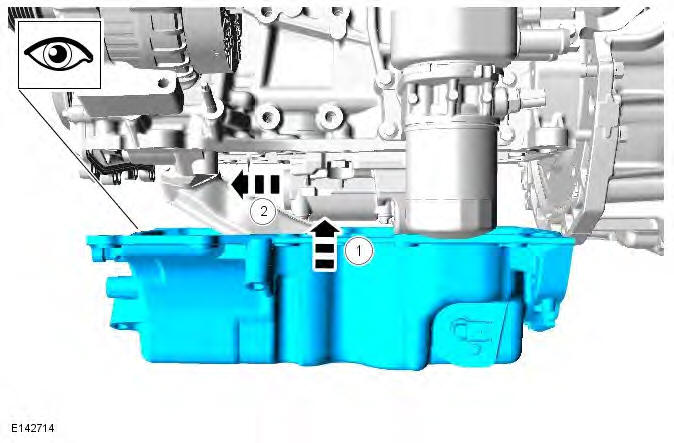
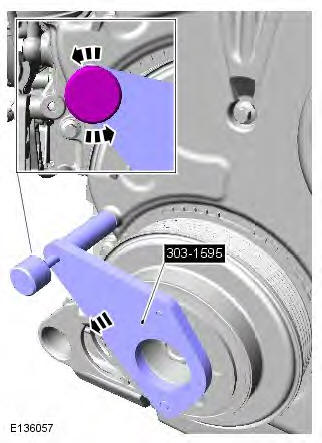
21. Rotate the engine clockwise to align and install the special tool.
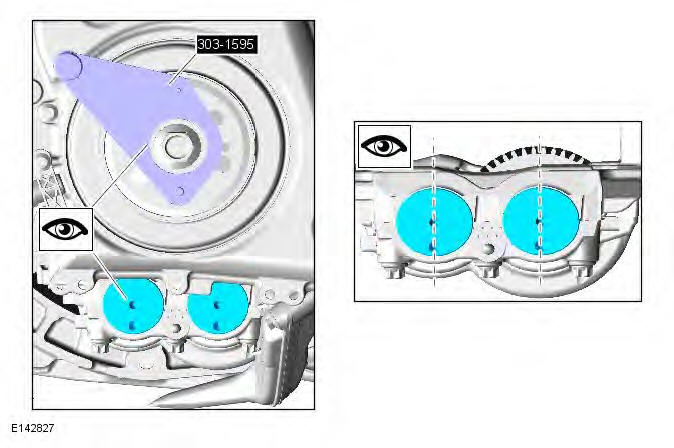
Special Tool(s): JLR-303-1595
22. CAUTION: Note the orientation of the outer holes on the balance shafts. Make sure that the balance shafts are aligned to the position shown prior to removal.
23.
24.
25.

Installation
1. CAUTION: When removing the sealant from the mating faces, make sure that crankshaft rear seal mating face is not damaged. Make sure that all traces of the old sealant are removed from the mating faces.
2.
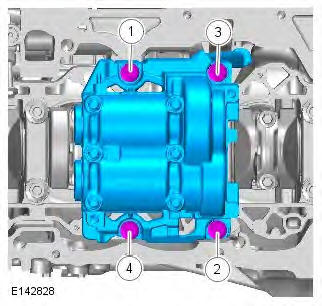
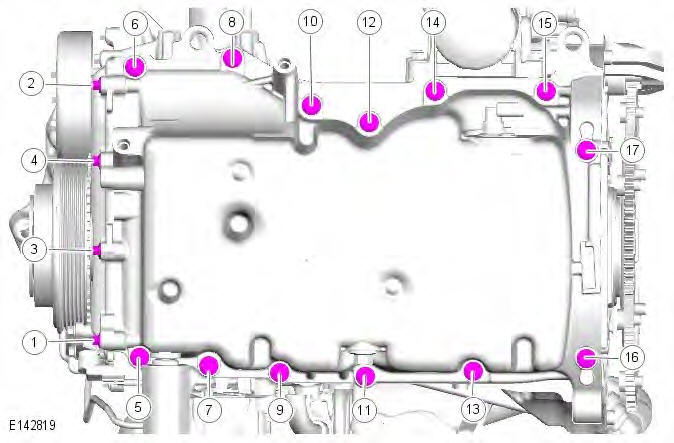
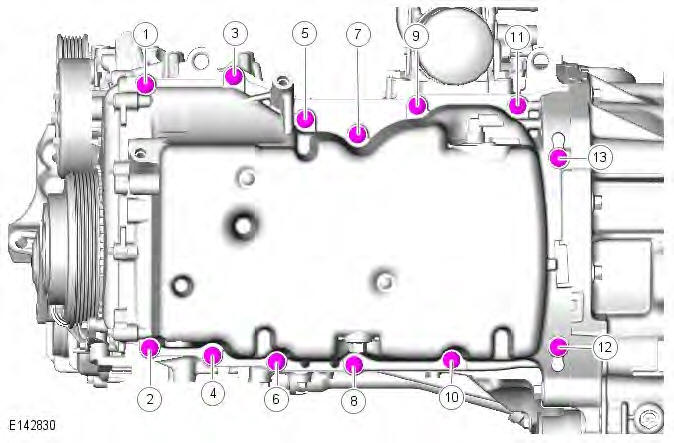
3. NOTE: Tighten the retaining bolts in the sequence illustrated.
Torque:
- Stage 1: 25 Nm
- Stage 2: 42 Nm
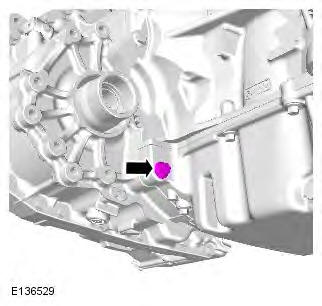
4. Torque: 10 Nm

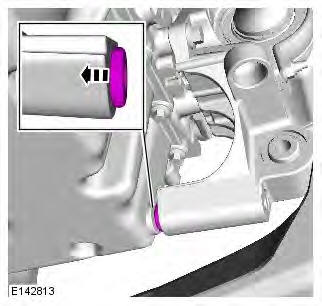
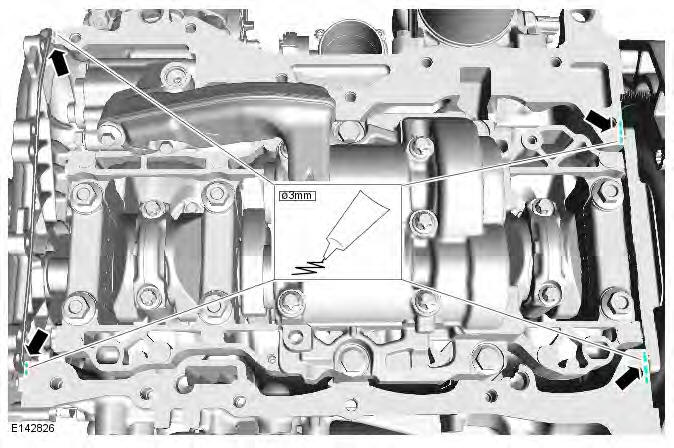
5. CAUTION: Make sure all mating faces are clean and dry before applying sealant.
NOTE: Apply sealant WSE-M4G323-A6 in a 2-3mm diameter on the engine block as shown. The component must be installed and tightened within 10 minutes of sealant application.
6. CAUTION: Make sure all mating faces are clean and dry before applying sealant.
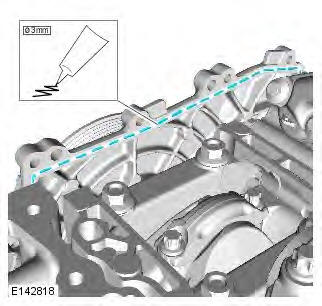
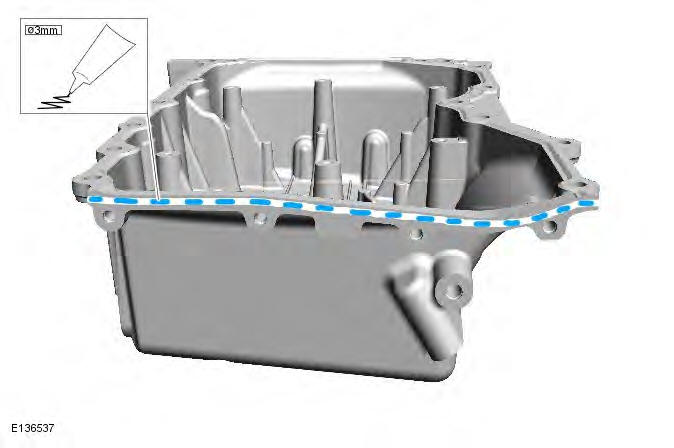
NOTE: Apply sealant WSE-M4G323-A6 in a 2-3mm diameter on the engine front cover as shown. The component must be installed and tightened within 10 minutes of sealant application.
7. CAUTION: Make sure all mating faces are clean and dry before applying sealant.
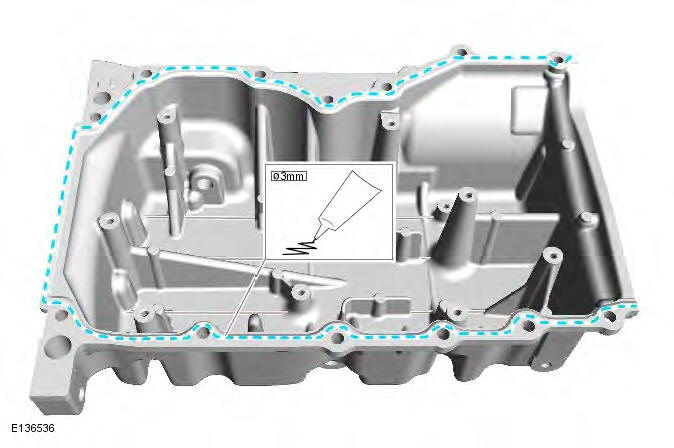
NOTE: Apply sealant WSE-M4G323-A6 in a 2-3mm diameter on the engine oil sump as shown. The component must be installed and tightened within 10 minutes of sealant application.
8. CAUTION: Make sure all mating faces are clean and dry before applying sealant.
NOTE: Apply sealant WSE-M4G323-A6 in a 2-3mm diameter on the engine front cover as shown. The component must be installed and tightened within 10 minutes of sealant application.
9. CAUTION: Extreme care is required during assembly so that the sealant is not smeared. If the sealant is smeared, the mating faces must be cleaned and new sealant must be applied.
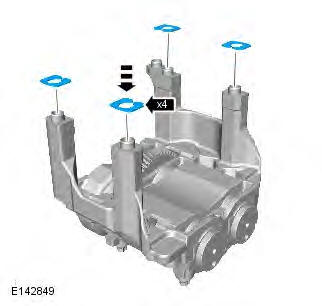
10. CAUTION: Only tighten the bolts finger-tight at this stage.
NOTE: Tighten the retaining bolts in the sequence illustrated.
11. Torque: 10 Nm

12. NOTE: Tighten the retaining bolts in the sequence illustrated.
Torque:
- Stage 1: 5 Nm
- Stage 2: 10 Nm
- Stage 3: 20 Nm
13. Remove the special tool.
14. Torque: 48 Nm

15. Torque: 48 Nm
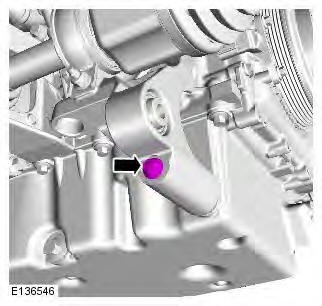
16. Torque: 8 Nm
17.
18. Torque: 4 Nm
19. Torque: 35 Nm

20. CAUTION: Make sure that the component is clean, free of foreign material and lubricant.
- Torque: 20 Nm
21. Torque: 25 Nm

22. Torque: 25 Nm
23. CAUTIONS:
Lubricate the new seals with clean refrigerant oil.
Make sure that all blanking caps are removed.
Torque: 24 Nm
24.

25. Install the accessory drive belt to the A/C compressor pulley.
26. Torque:
- Bolts 25 Nm
27.

28. Refer to: Engine Undershield (501-02 Front End Body Panels, Removal and Installation).
29. Lower the vehicle.
30. Install the RH front wheel and tyre.

31. Refill engine with the oil previously collected.
32. Refer to: Air Conditioning (A/C) System Recovery, Evacuation and Charging - GTDi 2.0L Petrol (412-00 Climate Control System - General Information, General Procedures).
READ NEXT:
 Engine - Diagnosis and Testing
Principles of Operation
For a detailed description of the engine system, refer to the relevant
Description and Operation section in the workshop
manual. REFER to: (303-01B Engine - GTDi 2.0L Petrol)
Engine Timing
Special Tool(s)
303-1565
Locking Tool, Camshaft
308-511
Installer, Transmission Output Shaft Seal
JLR-303-1594
Locking Tool, Driveplate
JLR-303-748
Locking Tool, Crankshaft
Activation
1.
2. Install t
SEE MORE:
Important information
The information contained in this handbook covers all vehicle derivatives and
optional equipment,
some of which may not be fitted to your vehicle. Due to printing cycles, this
handbook may include
descriptions of options before they become generally available.
The vehicle options, hardware an
Symbols used in this handbook
Safety warnings indicate either a procedure which must be followed
precisely, or
information that should be considered with great care, in order to avoid the
possibility
of personal injury.
Cautions indicate either a procedure which must be followed precisely, or
information that
should
