Range Rover Evoque: Climate Control Assembly
Removal
NOTE: Removal steps in this procedure may contain installation details.
All vehicles
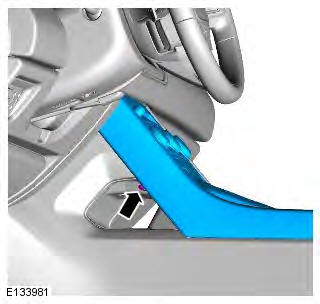
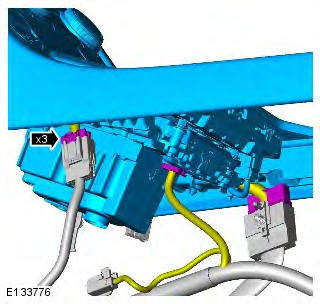
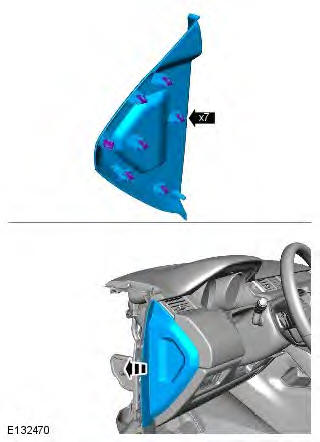
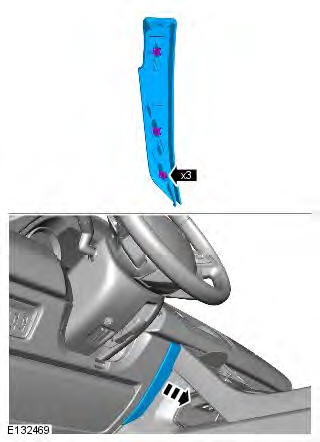
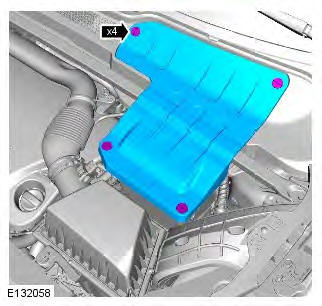
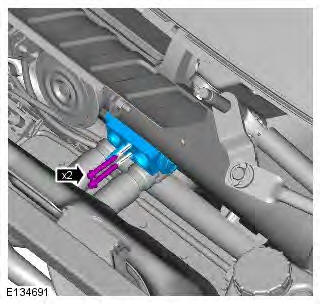
1. CAUTION: LH illustration shown, RH is similar.
NOTE: The procedure must be carried out on both sides.
Torque: 1.9 Nm
Vehicles with manual transmission
2. Refer to: Gearshift Lever Knob (308-06 Manual Transmission/Transaxle External Controls, Removal and Installation).
3.
All vehicles
4.
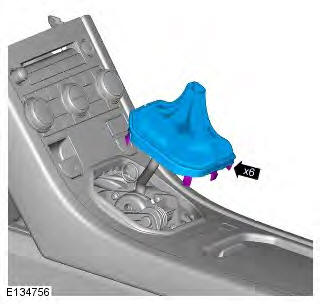
Vehicles with manual transmission
5.
Vehicles with automatic transmission
6.
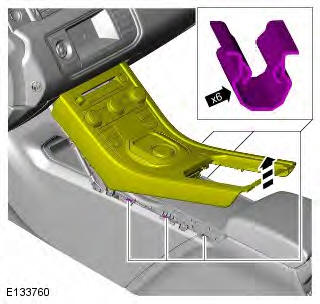
All vehicles
7.
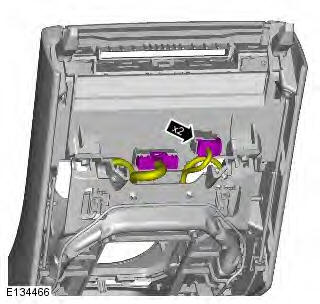
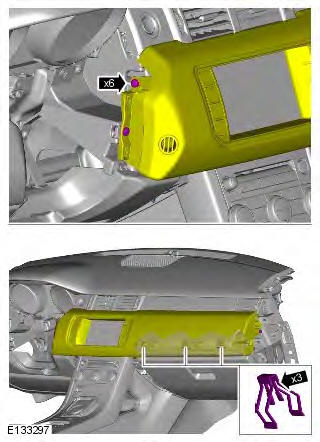
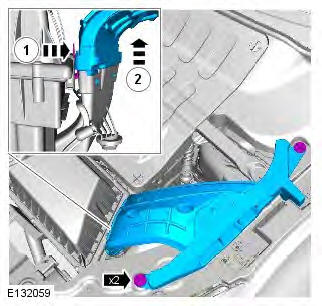
8. NOTE: Some variation in the illustrations may occur, but the essential information is always correct.
Torque: 1.1 Nm
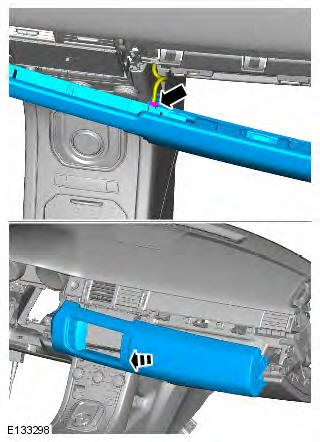
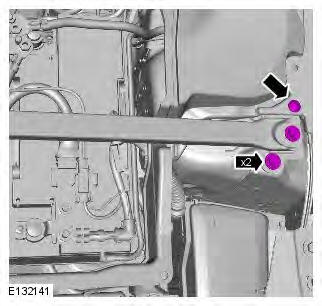
9. NOTE: Some variation in the illustrations may occur, but the essential information is always correct.
Torque: 1.1 Nm
Installation
1. To install, reverse the removal procedure.
2. If a new component has been installed, configure using Land Rover approved diagnostic equipment.
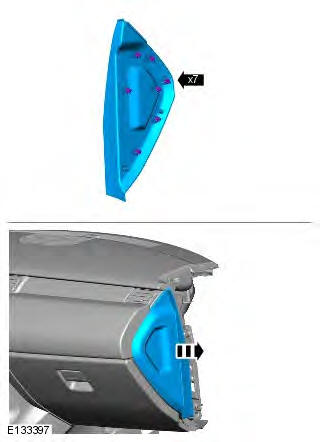
Driver Side Register
Removal
NOTE: Removal steps in this procedure may contain installation details.
1.

2.
3.

4.
5. Torque: 4 Nm
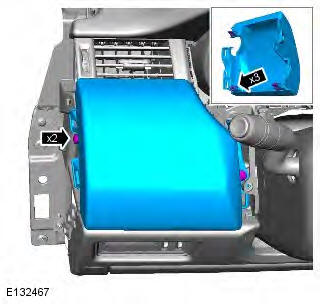
6. CAUTION: Care must be taken to avoid damaging the driver side register internal components.
Torque: 1.5 Nm
Installation
1. To install, reverse the removal procedure.
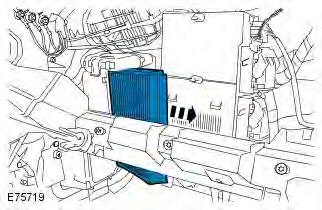
Pollen Filter
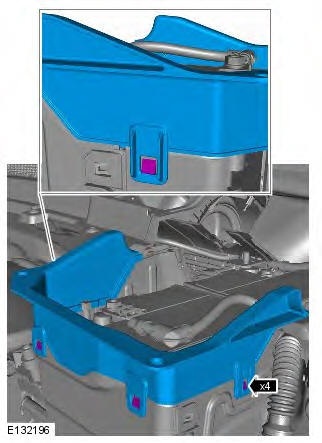
Removal
NOTE: Removal steps in this procedure may contain installation details.
All vehicles
1. NOTE: LHD illustration shown, RHD is similar.
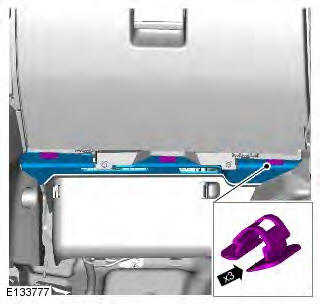
2. NOTE: LHD illustration shown, RHD is similar.
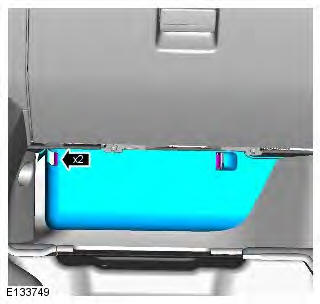
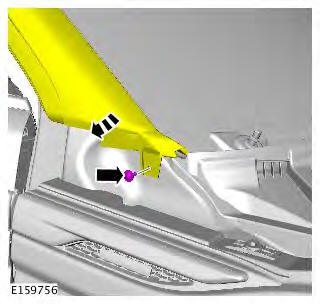
Left-hand drive vehicles
3. CAUTION: Take extra care not to damage the wiring harnesses.
Torque: 10 Nm
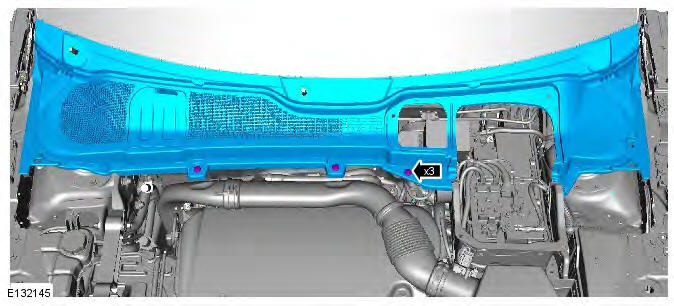
All vehicles
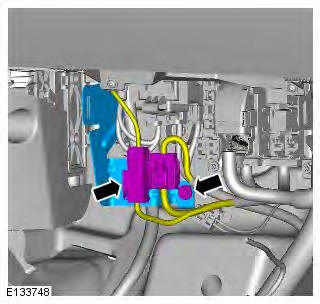
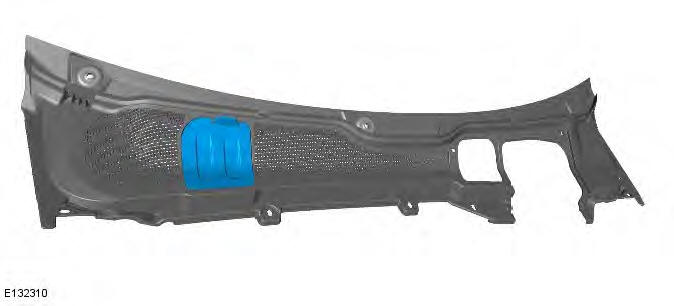
4. NOTE: LHD illustration shown, RHD is similar.
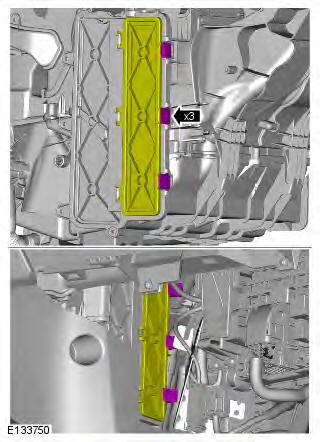
5. NOTE: LHD illustration shown, RHD is similar.
Installation
1. CAUTION: Take extra care not to damage the pollen filter.
To install, reverse the removal procedure.
Passenger Side Register
Removal
NOTE: Removal steps in this procedure may contain installation details.
1.
2.
3.
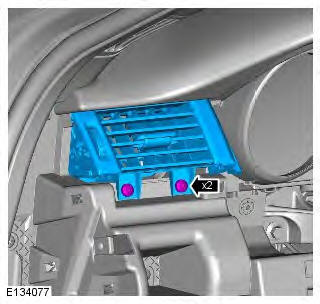
4. NOTES: Left-hand shown, right-hand similar.
The step must be carried out on both sides.
5. Torque: 4 Nm
6.
7. Torque: 1.5 Nm

8. CAUTION: Care must be taken to avoid damaging the passenger side register internal components.
Torque: 1.5 Nm
Installation
1. To install, reverse the removal procedure.
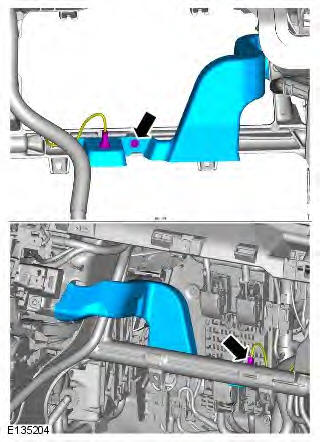
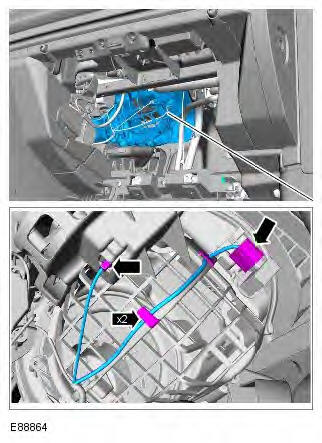
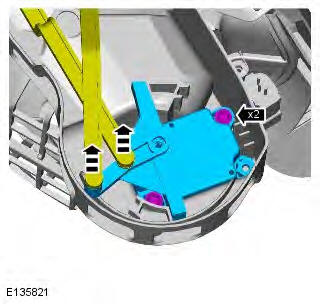
Recirculation Blend Door Actuator
Removal
NOTES: LHD shown, RHD is similar.
Removal steps in this procedure may contain installation details.
1. Disconnect the battery ground cable.
Refer to: Specifications (414-01 Battery, Mounting and Cables, Specifications).
2. Refer to: Central Junction Box (CJB) (418-00 Module Communications Network, Removal and Installation).
3.
4.
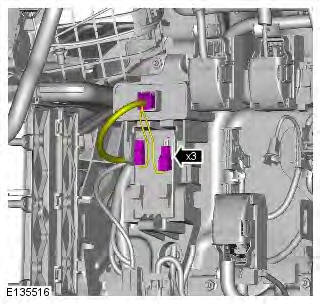
5. Torque: 10 Nm
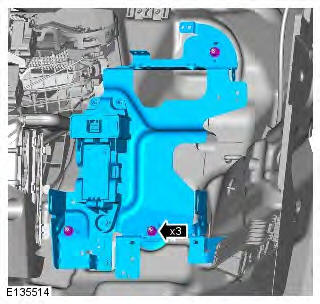
6.
7.
8.
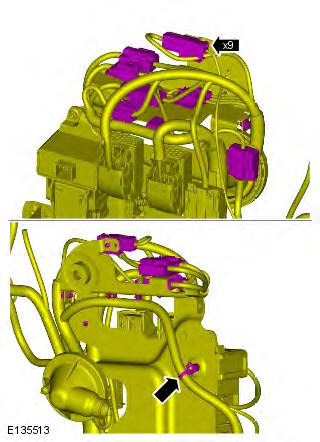
9.
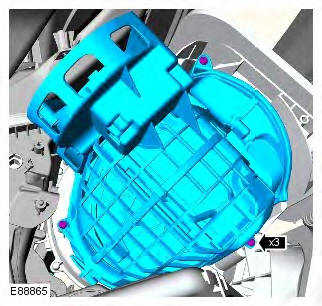
10.
Installation
1. To install, reverse the removal procedure.
Plenum Chamber
Removal
NOTES: Removal steps in this procedure may contain installation details.
RHD illustration shown, LHD is similar.
1. Refer to: Wiper Pivot Arm (501-16 Wipers and Washers, Removal and Installation).
2. Repeat the above procedure for the other wiper arm.
3.
4.
5. Torque: 25 Nm
6. Torque: 25 Nm
7.
8. NOTE: Repeat the above step for the other side.
9.
10. NOTE: Do not disassemble further if the component is removed for access only.
Installation
1. To install, reverse the removal procedure.
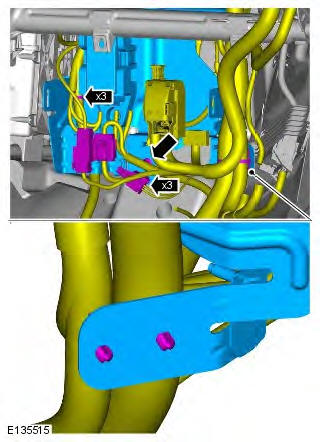
Thermostatic Expansion Valve TD4 2.2L Diesel
Removal
NOTE: Removal steps in this procedure may contain installation details.
1. Disconnect the battery ground cable.
Refer to: Specifications (414-01 Battery, Mounting and Cables, Specifications).
2. Refer to: Air Conditioning (A/C) System Recovery, Evacuation and Charging - TD4 2.2L Diesel (412-00 Climate Control System - General Information, General Procedures).
3. Refer to: Engine Control Module (ECM) (303-14A Electronic Engine Controls - TD4 2.2L Diesel, Removal and Installation).
4. CAUTIONS: Make sure that all openings are sealed. Use new blanking caps.
Lubricate the new seals with clean refrigerant oil.
NOTE: Install new O-ring seals.
Torque: 9 Nm

5. Torque: 4 Nm
Installation
1. To install, reverse the removal procedure.
READ NEXT:
 Evaporator LHD
Removal
NOTES:
The removal of this component involves cutting an aperture in the evaporator
housing wall and cutting through the
high and low pressure A/C lines. A service repair kit is supplied to c
Evaporator RHD
Removal
NOTES:
The removal of this component involves cutting an aperture in the evaporator
housing wall and cutting through the
high and low pressure A/C lines. A service repair kit is supplied to c
Evaporator Temperature Sensor
Removal
NOTE: Removal steps in this procedure may contain installation details.
1. Disconnect the battery ground cable.
Refer to: Specifications (414-01 Battery, Mounting and Cables,
Specifications).
SEE MORE:
Battery and Charging System - General Information
Battery Care
Requirements
1. INTRODUCTION
This document sets out the requirements for care and maintenance of batteries
and thereby the standard of battery care
at dealers and retailers for new vehicles
This applies to all types of 12 Volt Lead Acid Batteries used in Jaguar and Land
Rover vehicles
Battery - Diagnosis and Testing
Principles of Operation
For a detailed description of the battery system and operation, refer to the
relevant Description and Operation section of
the workshop manual. REFER to: (414-01 Battery, Mounting and Cables)
Inspection and Verification
CAUTION: Diagnosis by substitution from a donor vehicle
