Range Rover Evoque: Evaporator Temperature Sensor
Removal
NOTE: Removal steps in this procedure may contain installation details.
1. Disconnect the battery ground cable.
Refer to: Specifications (414-01 Battery, Mounting and Cables,
Specifications).
2. Refer to: Floor Console Upper Section (501-12 Instrument Panel and
Console, Removal and Installation).
3.
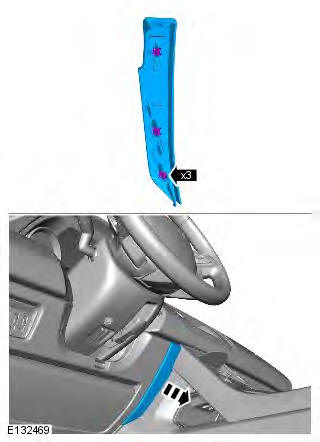
4.
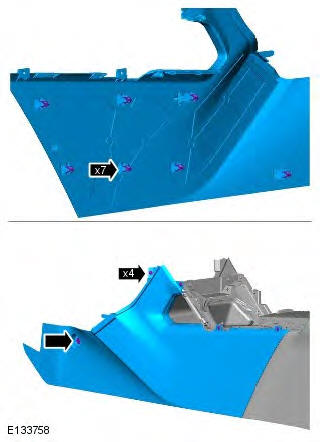
5.
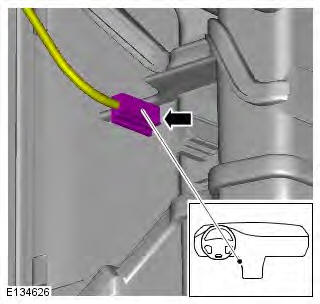
6.
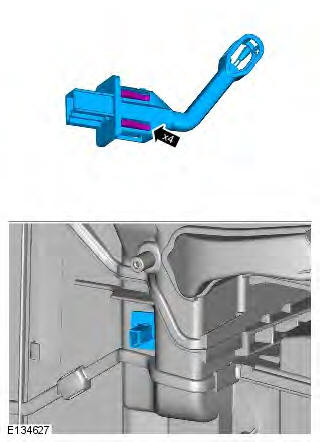
Installation
1. To install, reverse the removal procedure.
Heater Core TD4 2.2L Diesel
Removal
NOTE: Removal steps in this procedure may contain installation details.
1. Disconnect the battery ground cable.
Refer to: Specifications (414-01 Battery, Mounting and Cables,
Specifications).
2. Refer to: Cooling System Partial Draining, Filling and Bleeding
(303-03A Engine Cooling - TD4 2.2L Diesel, General Procedures).
3. Refer to: Electric Booster Heater (412-02 Auxiliary Climate Control,
Removal and Installation).
4. CAUTION: Be prepared to collect escaping coolant.
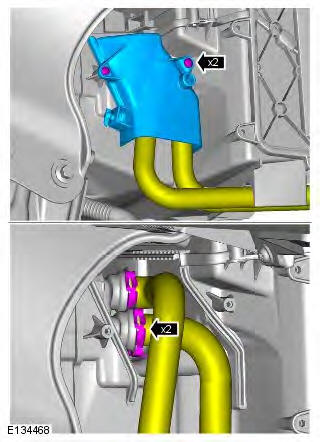
5.
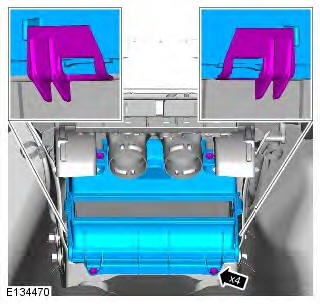
6. CAUTION: Be prepared to collect escaping coolant.
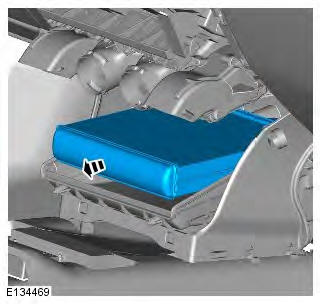
Installation
1. To install, reverse the removal procedure.
READ NEXT:
Removal
CAUTION: Make sure that all openings are sealed. Use new blanking caps.
NOTES:
Removal steps in this procedure may contain installation details.
Some variation in the illustrations may occur
Removal
NOTE: Removal steps in this procedure may contain installation details.
1. Make the SRS system safe.
Refer to: Standard Workshop Practices (100-00 General Information,
Description and Operati
Removal
NOTE: Removal steps in this procedure may contain installation details.
1. Disconnect the battery ground cable.
Refer to: Specifications (414-01 Battery, Mounting and Cables,
Specifications).
SEE MORE:
Engine Upper Support Insulator
Removal
NOTES:
Removal steps in this procedure may contain installation details.
Some variation in the illustrations may occur, but the essential information is
always correct.
1. Refer to: Engine Mount RH (303-01B Engine - GTDi 2.0L Petrol,
Removal and Installation)
Component Location
Steering gear
Rubber seal assembly
Heat shield
Overview
The vehicle is fitted with EPS (electric power steering), provided by a ZF
Servolectric steering gear unit with variable
ratio, rack and pinion steering and speed sensitive power assistance. Power
assistance is from a
© 2011-2026 Copyright www.rrevoque.org


