Range Rover Evoque: Exterior Trim and Ornamentation
Torque Specifications

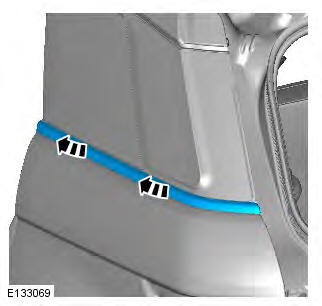
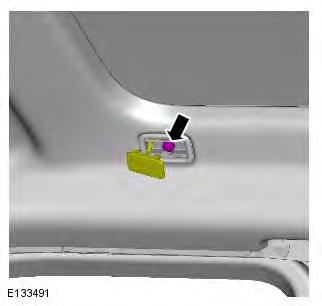
Rear Quarter Panel Moulding
Removal
NOTE: Removal steps in this procedure may contain installation details.
1.
2. NOTE: Discard the retaining clips.
- Make sure that the centre part of the clip is fully removed from the outer part of the clip. It is not possible to prevent the centre part of the clip falling into the body of the vehicle.
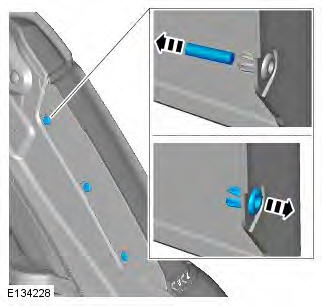
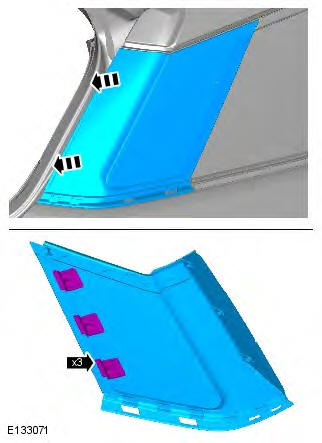
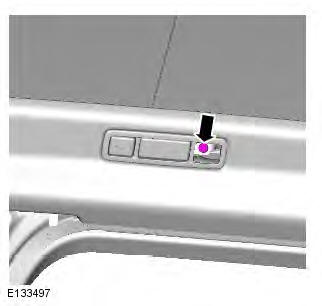
3. CAUTION: Take extra care not to damage the component.
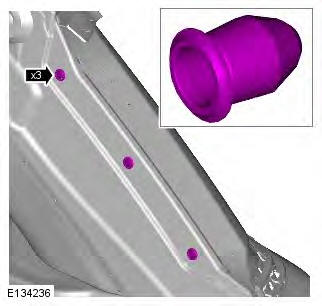
4. NOTE: Discard the sealing plug.
Installation
1. To install, reverse the removal procedure.
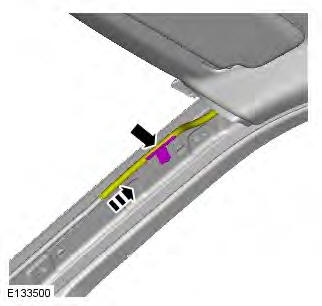
Rear Spoiler
Removal
All vehicles
1. NOTE: The procedure must be carried out on both sides.
Refer to: A-Pillar Trim Panel (501-05 Interior Trim and Ornamentation, Removal and Installation).
3-door
NOTE: The procedure must be carried out on both sides.
2. Refer to: B-Pillar Upper Trim Panel - 3-Door (501-05 Interior Trim and Ornamentation, Removal and Installation).
5-door
3. NOTE: The procedure must be carried out on both sides.
Refer to: B-Pillar Upper Trim Panel - 5-Door (501-05 Interior Trim and Ornamentation, Removal and Installation).
All vehicles
4. NOTE: The procedure must be carried out on both sides.
Refer to: C-Pillar Upper Trim Panel (501-05 Interior Trim and Ornamentation, Removal and Installation).
5. NOTE: The procedure must be carried out on both sides.
Refer to: D-Pillar Trim Panel (501-05 Interior Trim and Ornamentation, Removal and Installation).
6. Refer to: Overhead Console (501-12 Instrument Panel and Console, Removal and Installation).
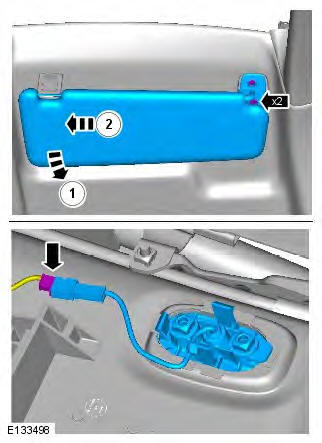
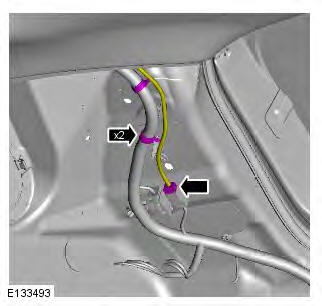
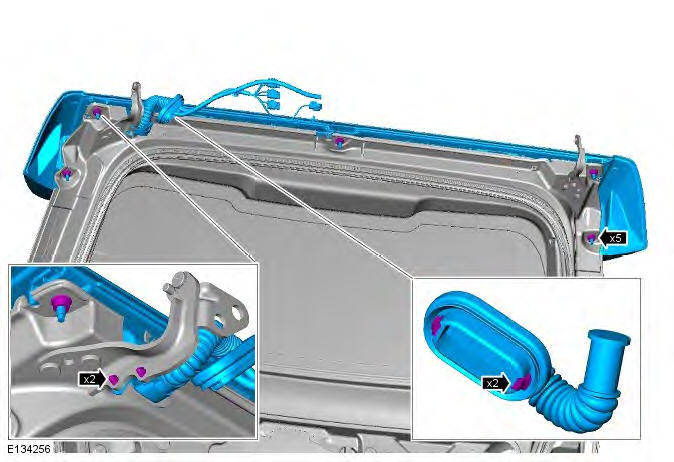
7. NOTE: The step must be carried out on both sides.
8. NOTE: The step must be carried out on both sides.
9. NOTE: The step must be carried out on both sides.
10. NOTE: The step must be carried out on both sides.
11.
12.
13. NOTE: The procedure must be carried out on both sides.

14. NOTE: The step must be carried out on both sides.
15. NOTE: The step must be carried out on both sides.
16.
17. NOTE: This step requires the aid of another technician.
Lower the headliner for access.
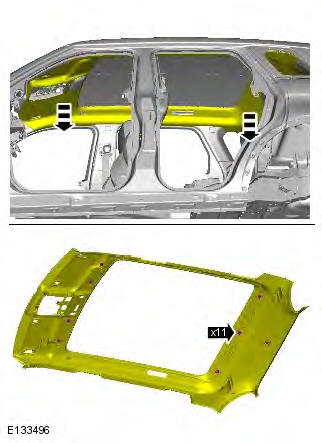
18.
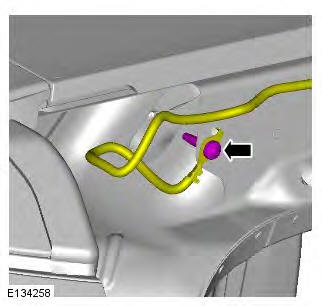
19. NOTE: The step must be carried out on both sides.
Torque: 10 Nm
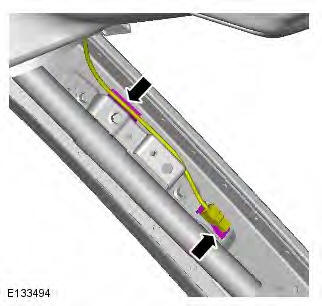
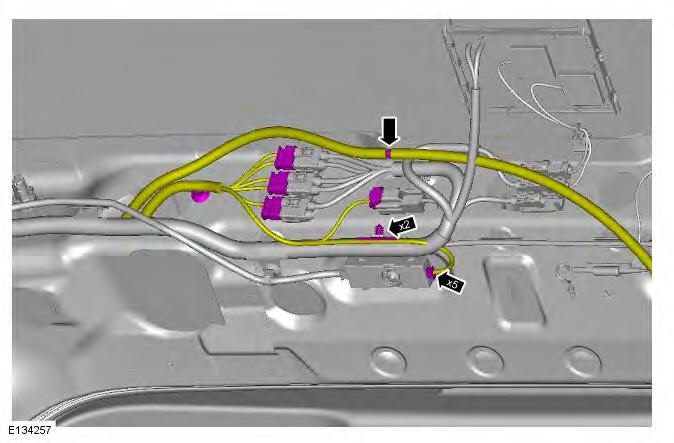
20. CAUTION: Take extra care not to damage the 20. wiring harnesses.
Installation
1. NOTE: Do not tighten the rear spoiler retaining nuts at this stage.
To install, reverse the removal procedure.
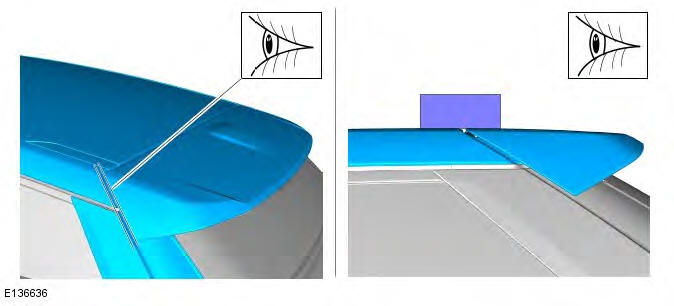
2. NOTE: Make sure that the gap is even between the rear spoiler and the rear quarter panel moulding and the rear spoiler is flush with the roof panel (use a suitable plastic straight edge).
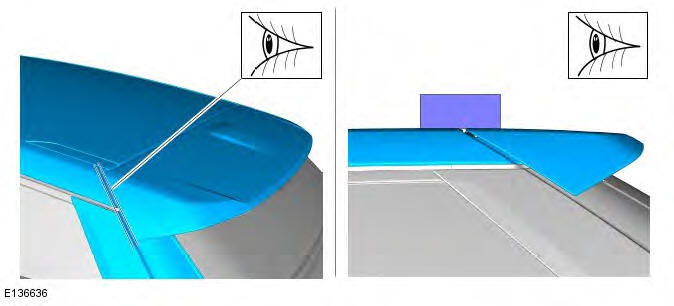
3. NOTES:
Rear spoiler shown removed for clarity.
Loosen the rear spoiler retaining nuts.

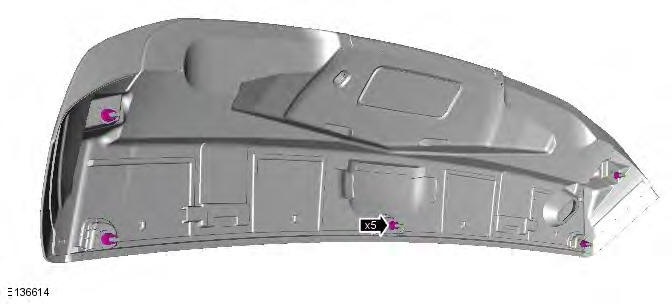
4. NOTE: Rear spoiler shown removed for clarity.
Adjust the rear spoiler by rotating the adjustment studs clockwise and counter clockwise as necessary.

5. NOTE: Rear spoiler shown removed for clarity.
Torque: 7 Nm
6. NOTE: Make sure that the gap is even between the rear spoiler and the rear quarter panel moulding and the rear spoiler is flush with the roof panel (use a suitable plastic straight edge).
If the rear spoiler is not correctly adjusted, follow Steps 3 to 6 of the installation procedure until correct alignment is achieved.
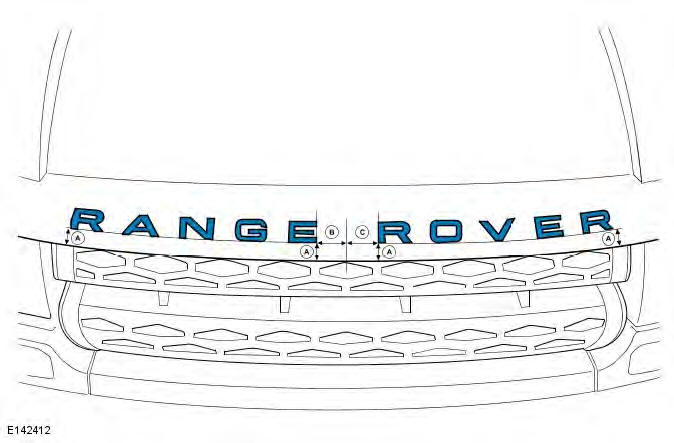
Hood Badge
Removal
1. CAUTION: Remove any excessive adhesive from the hood.
Using a suitable tool or plastic spatula, remove the hood badge(s).
Installation
1. Clean the area prior to installation of the hood badge.
2. CAUTION: Using the centre of the grill as a starting point, install the hood badge to the dimensions shown.
- A - 25 mm / 0.9 inch
- B - 40 mm / 1.6 inch
- C - 50 mm / 1.9 inch
READ NEXT:
 Rear View Mirrors
Rear View Mirrors - Component Location
NOTE: RHD (right-hand drive) installation shown, LHD (left-hand drive)
installation similar.
DDM (driver door module)
Driver exterior mirror
Exterior mirro
Seats - Diagnosis and Testing
Principle of Operation
For a detailed description of the seating systems and operation, refer to the
relevant Description and Operation section of
the workshop manual. REFER to: Seats (501-10 Seating
SEE MORE:
Important information
The information contained in this handbook covers all vehicle derivatives and
optional equipment,
some of which may not be fitted to your vehicle. Due to printing cycles, this
handbook may include
descriptions of options before they become generally available.
The vehicle options, hardware an
Symbols used in this handbook
Safety warnings indicate either a procedure which must be followed
precisely, or
information that should be considered with great care, in order to avoid the
possibility
of personal injury.
Cautions indicate either a procedure which must be followed precisely, or
information that
should
