Range Rover Evoque: Front End Body Panels
Torque Specifications
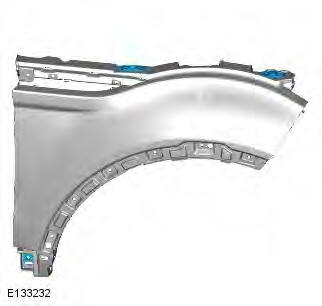
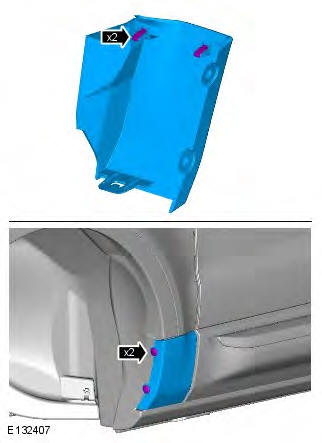
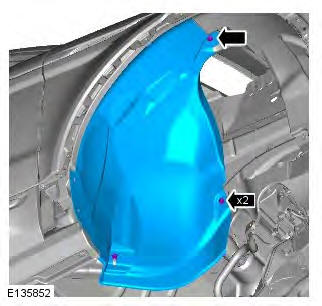
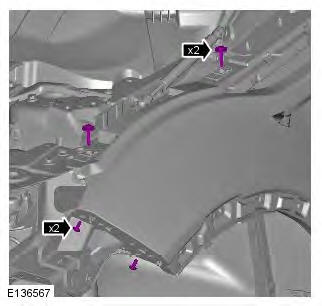
Fender
Removal
NOTE: Removal steps in this procedure may contain installation details.
1. Refer to: Front Bumper Cover (501-19 Bumpers, Removal and Installation).
2. WARNING: Make sure to support the vehicle with axle stands.
Raise and support the vehicle.
3.
4.
5.
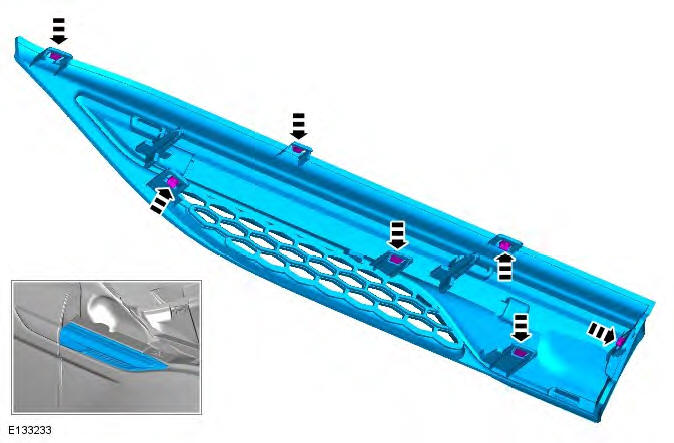
6. Torque: 4.1 Nm
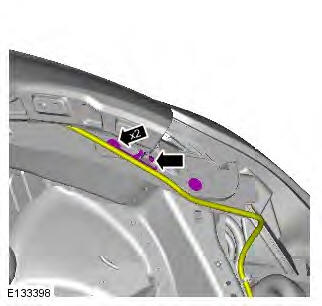
7. Torque: 4.1 Nm
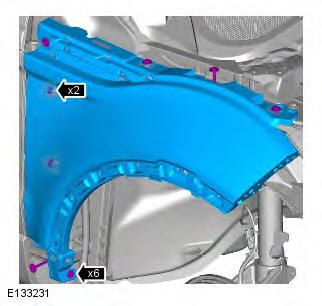
8. NOTE: Do not disassemble further if the component is removed for access only.
Installation
1. To install, reverse the removal procedure.
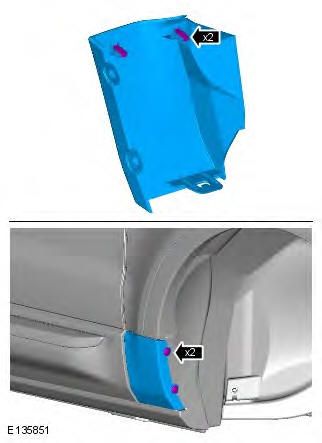
Fender Splash Shield
Removal
NOTE: Removal steps in this procedure may contain installation details.
1. Open the front door.
2. WARNING: Make sure to support the vehicle with axle stands.
Raise and support the vehicle.
3. Refer to: Wheel and Tire (204-04 Wheels and Tires, Removal and Installation).
4. CAUTION: Take extra care not to damage the component.
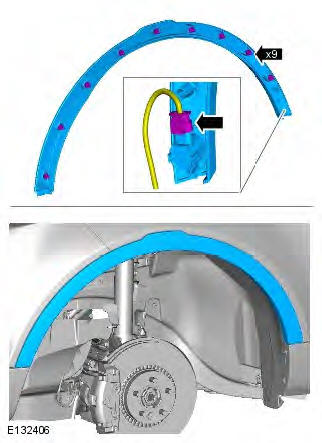
5.
6.
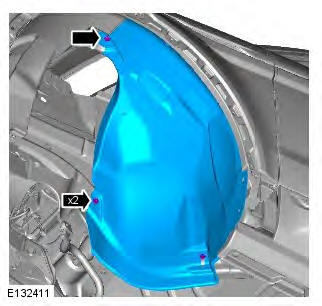
7.
8.
Installation
1. To install, reverse the removal procedure.
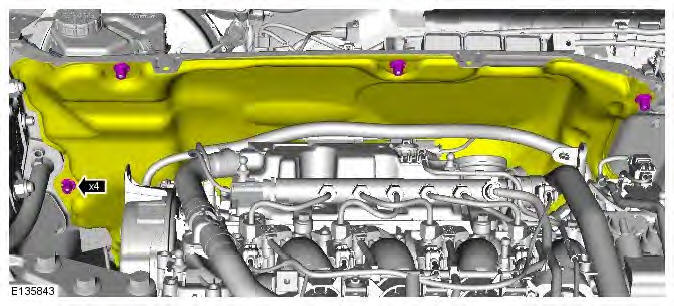
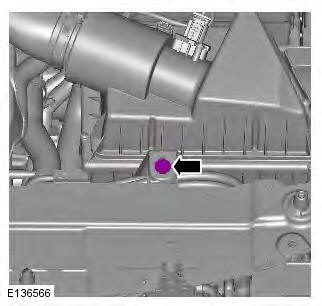
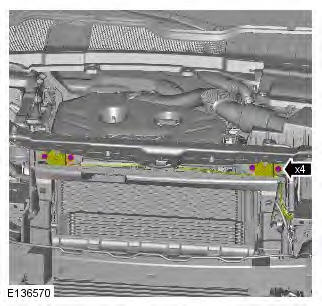
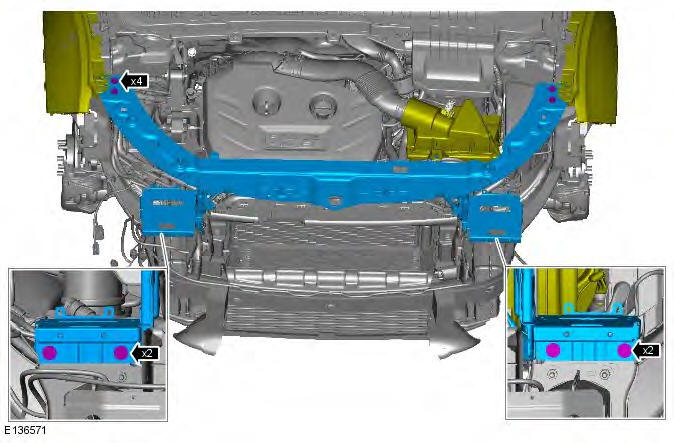
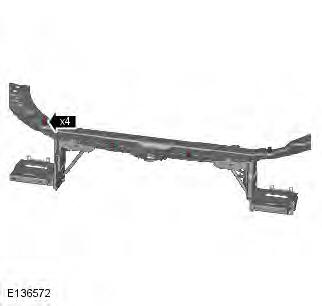
Engine Undershield
Removal
NOTE: Removal steps in this procedure may contain installation details.
1. WARNING: Do not work on or under a vehicle supported only by a jack. Always support the vehicle on safety stands.
Raise and support the vehicle.
2. Torque: 60 Nm
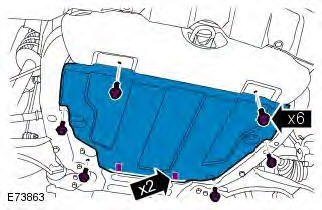
Installation
1. To install, reverse the removal procedure.
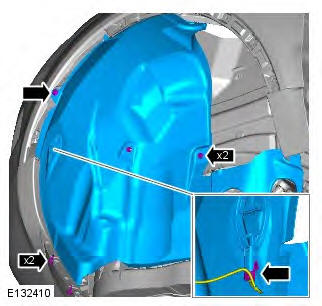
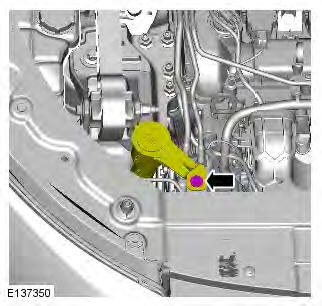
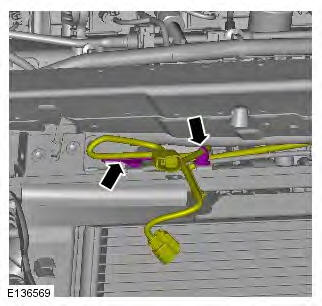
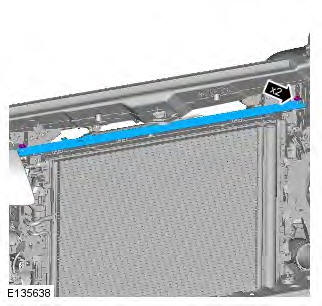
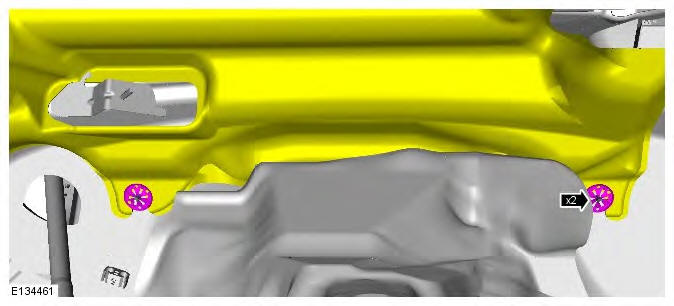
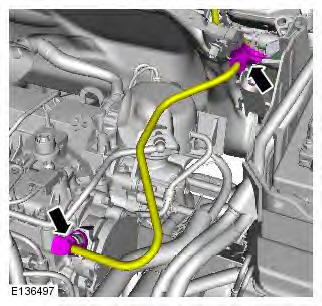
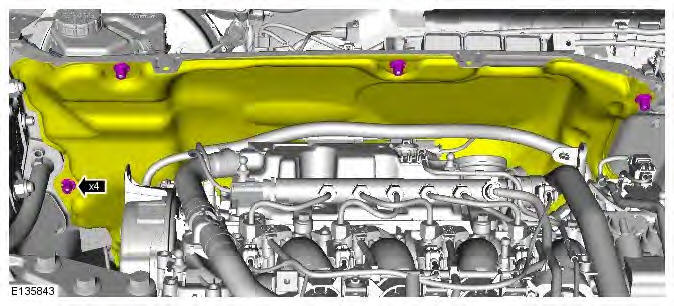
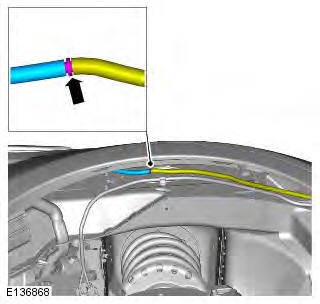
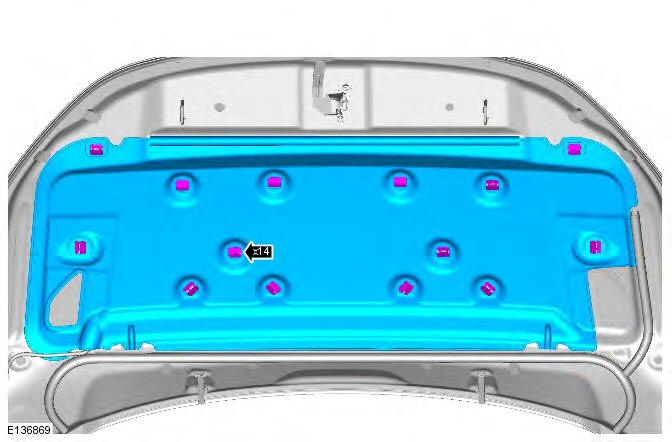
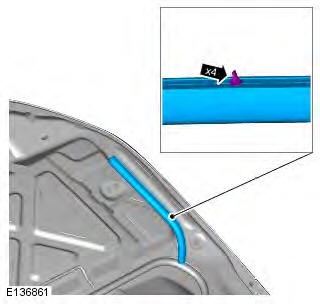
Secondary Bulkhead Center Panel TD4 2.2L Diesel
Removal
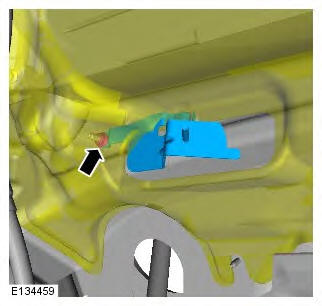
CAUTION: Make sure that all openings are sealed. Use new blanking caps.
NOTE: Removal steps in this procedure may contain installation details.
1. WARNING: Make sure to support the vehicle with axle stands.
Raise and support the vehicle.
2. Disconnect the battery ground cable.
Refer to: Specifications (414-01 Battery, Mounting and Cables, Specifications).
3. Refer to: Engine Cover - TD4 2 2L Diesel (501-05 Interior Trim and Ornamentation, Removal and Installation).
4. Remove the right-hand front wheel and tire.
Refer to: Wheel and Tire (204-04 Wheels and Tires, Removal and Installation).
5. Refer to: Engine Undershield (501-02 Front End Body Panels, Removal and Installation).
6. Open the front 6. door for access.
7.
8.
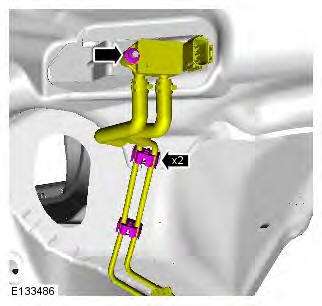
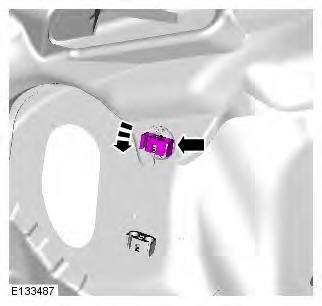
9. Torque: 6 Nm
10.
11.

12. Torque: 8 Nm
13. Refer to: Plenum Chamber (412-01 Climate Control, Removal and Installation).
14.
15.
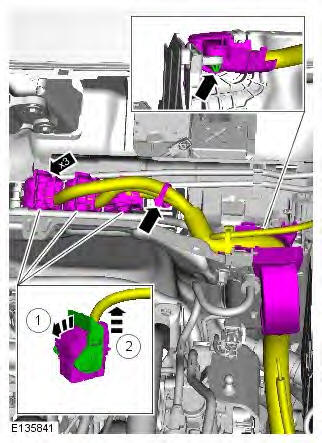
16.
17. Torque: 10 Nm
18.
19. Torque: 10 Nm
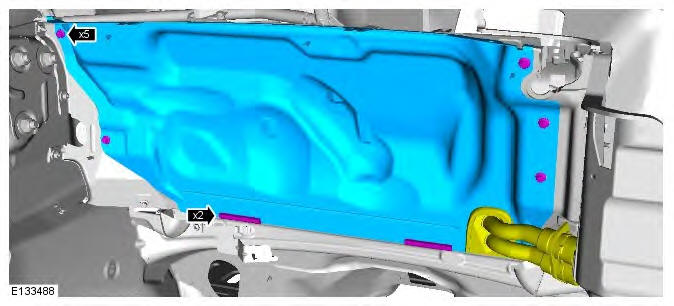
20.

Installation
1. To install, reverse the removal procedure.
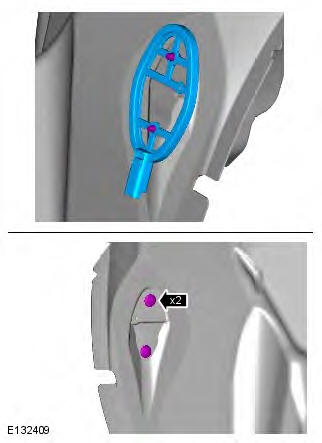
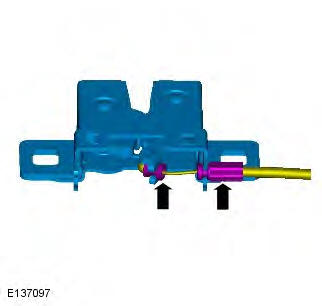
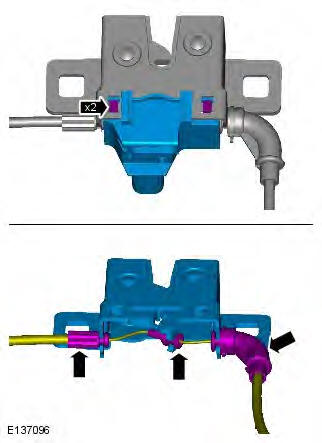
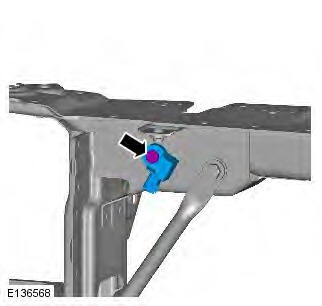
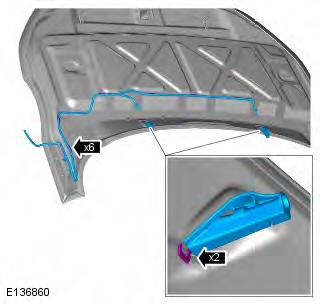
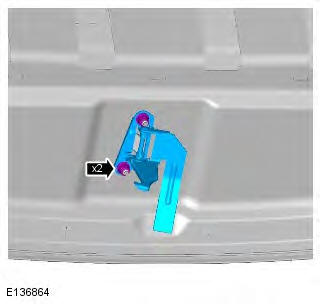
Hood Latch Panel
Removal
NOTES:
Removal steps in this procedure may contain installation details.
Replacement of the vehicle identification plate is required if the hod latch panel is being replaced.
1. WARNING: Make sure to support the vehicle with axle stands.
Raise and support the vehicle.
2. Refer to: Front Bumper Cover (501-19 Bumpers, Removal and Installation).
3. NOTE: The step must be carried out on both sides.
Torque: 4.5 Nm

4. NOTE: The step must be carried out on both sides.
Torque: 4.5 Nm

5. Torque: 4.5 Nm
6.
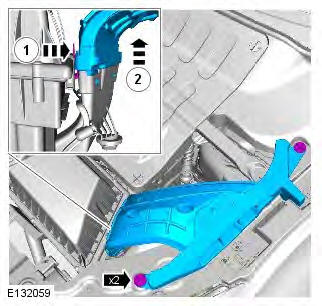
7. Torque: 10 Nm
8. Torque: 7 Nm
9. Torque: 10 Nm
10.
11. Torque: 5 Nm
12.

13. Torque: 10 Nm
14.
15.
16.
17. NOTES:
LH illustration shown, RH is similar.
The step must be carried out on both sides.
Torque: 4.1 Nm
18. CAUTION: Protect the surrounding paintwork to avoid damage.
Torque: 25 Nm
19. NOTE: Do not disassemble further if the component is removed for access only.
20. NOTE: LH illustration shown, RH is similar.
Torque: 10 Nm
Installation
1. To install, reverse the removal procedure.
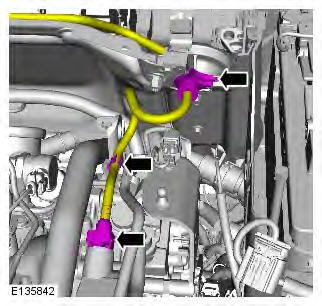
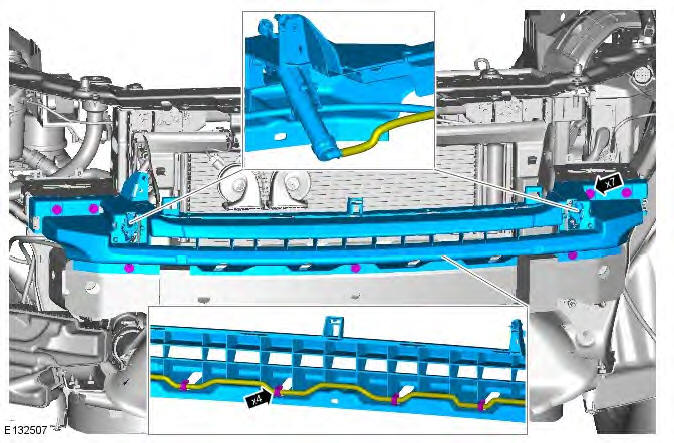
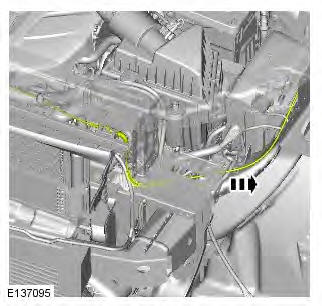
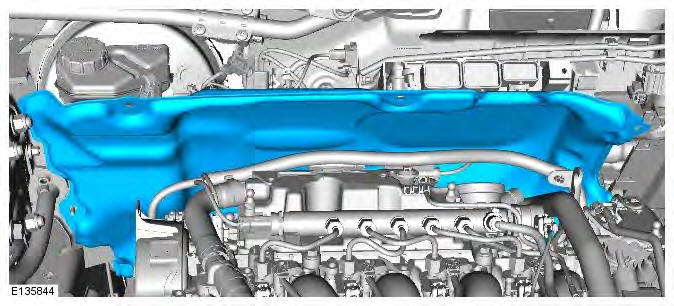
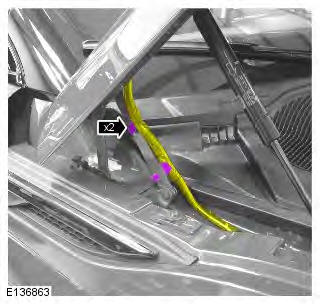
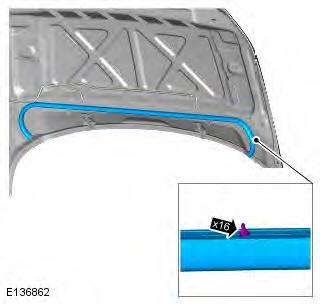
Secondary Bulkhead Center Panel GTDi 2.0L Petrol
Removal
CAUTION: Make sure that all openings are sealed. Use new blanking caps.
NOTES:
Removal steps in this procedure may contain installation details.
Some variation in the illustrations may occur, but the essential information is always correct.
1. WARNING: Make sure to support the vehicle with axle stands.
Raise and support the vehicle.
2. Disconnect the battery ground cable.
Refer to: Specifications (414-01 Battery, Mounting and Cables, Specifications).
3. Refer to: Engine Undershield (501-02 Front End Body Panels, Removal and Installation).
4.
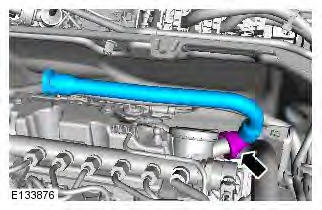
5. Refer to: Air Cleaner Intake Pipe (303-12B Intake Air Distribution and Filtering - GTDi 2.0L Petrol, Removal and Installation).
6. Refer to: Plenum Chamber (412-01 Climate Control, Removal and Installation).
7.
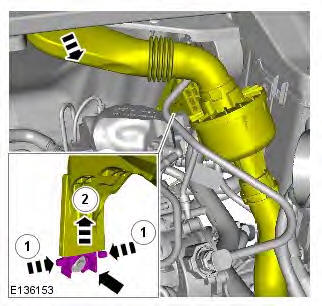
8.
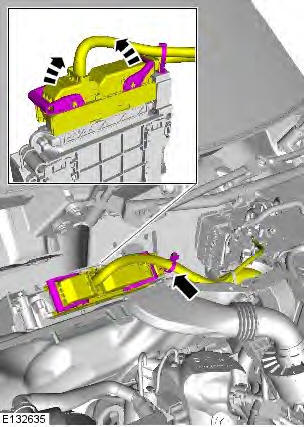
9.
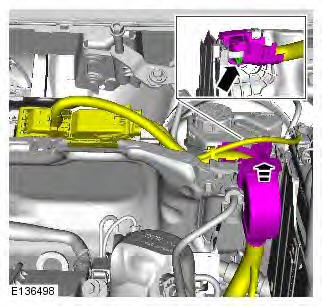
10.
11.
12. Torque: 10 Nm

13.
Installation
1. To install, reverse the removal procedure.
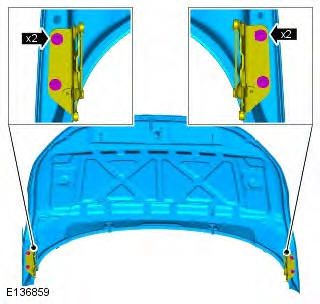
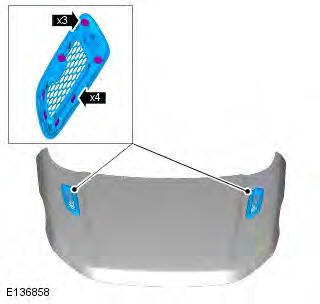
Hood
Removal
NOTE: Removal steps in this procedure may contain installation details.
1. NOTE: The hood is manufactured 1. from aluminium.
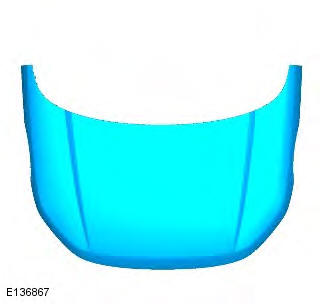
All vehicles
2. Refer to: Fender Splash Shield (501-02 Front End Body Panels, Removal and Installation).
3. Refer to: Health and Safety Precautions (100-00 General Information, Description and Operation).
4. Refer to: Body Repairs (501-25A Body Repairs - General Information, Description and Operation).
5. Refer to: Corrosion Protection (501-25B Body Repairs - Corrosion Protection, Description and Operation).
6. Refer to: Body and Frame (501-26 Body Repairs - Vehicle Specific Information and Tolerance Checks, Description and Operation).
7. NOTE: Make sure that all openings are sealed. Use new blanking caps.
8.
9. WARNING: This step requires the aid of another technician.
Torque: 17 Nm
10. Torque: 24 Nm
11. NOTE: Do not disassemble further if the component is removed for access only.
12.
13.
14. Torque: 17 Nm
3-door
15. CAUTION: Make sure to protect the paintwork.
Installation
1. To install, reverse the removal procedure.
2. NOTE: Check the gap and profiles of the hood are correct.
READ NEXT:
 Liftgate Alignment, Front Door
Liftgate Alignment
NOTE: Some variation in the illustrations may occur, but the essential
information is always correct.
1. With the liftgate closed, check the alignment of the
liftgate to the roof p
Power Liftgate Switch, Liftgate
Power Liftgate Switch
Removal
NOTE: Removal steps in this procedure may contain installation details.
1.
2. Torque: 4 Nm
3. Torque: 4 Nm
4.
Installation
1. To install, reverse the removal procedur
SEE MORE:
Important information
The information contained in this handbook covers all vehicle derivatives and
optional equipment,
some of which may not be fitted to your vehicle. Due to printing cycles, this
handbook may include
descriptions of options before they become generally available.
The vehicle options, hardware an
Symbols used in this handbook
Safety warnings indicate either a procedure which must be followed
precisely, or
information that should be considered with great care, in order to avoid the
possibility
of personal injury.
Cautions indicate either a procedure which must be followed precisely, or
information that
should
