Range Rover Evoque: Power Liftgate Switch, Liftgate
Power Liftgate Switch
Removal
NOTE: Removal steps in this procedure may contain installation details.
1.
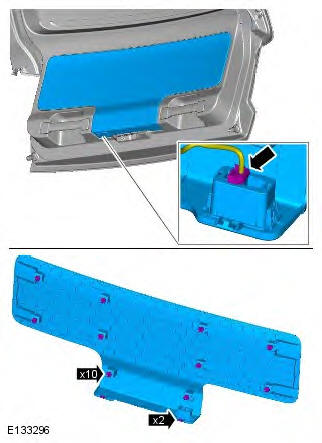
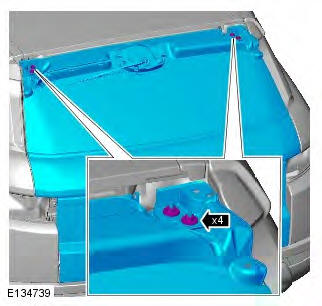
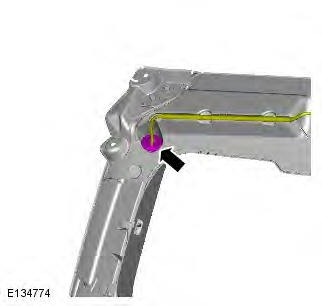
2. Torque: 4 Nm
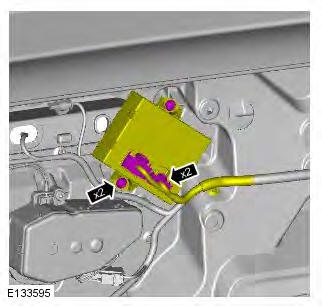
3. Torque: 4 Nm
4.
Installation
1. To install, reverse the removal procedure.
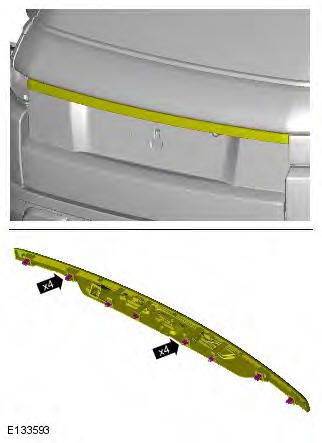
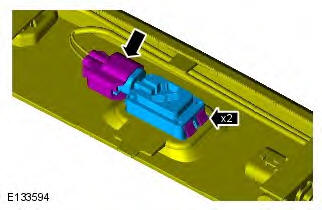
Liftgate
Removal
CAUTION: The headliner must be lowered as a complete unit to gain access to the electrical connections. Partial lowering of the headliner may cause damage.
NOTE: Removal steps in this procedure may contain installation details.
1. Refer to: Rear Spoiler (501-08 Exterior Trim and Ornamentation, Removal and Installation).
2.
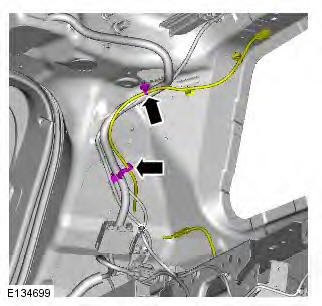
3.
4.
5. Support the liftgate in the open position.
6. CAUTIONS:
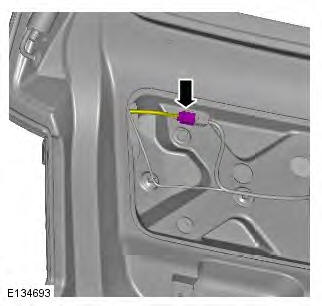
Use a suitable sharp pointed hook, release the retaining clip (do not fully remove the clip).
Protect the surrounding paintwork to avoid damage.
Protect the surrounding components.
NOTES:
The step must be carried out on both sides.
Note the orientation of the clip.
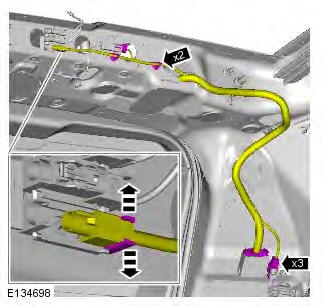
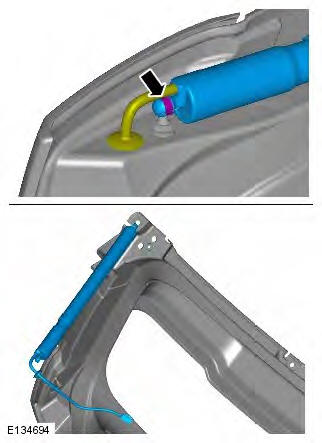
7. CAUTIONS:
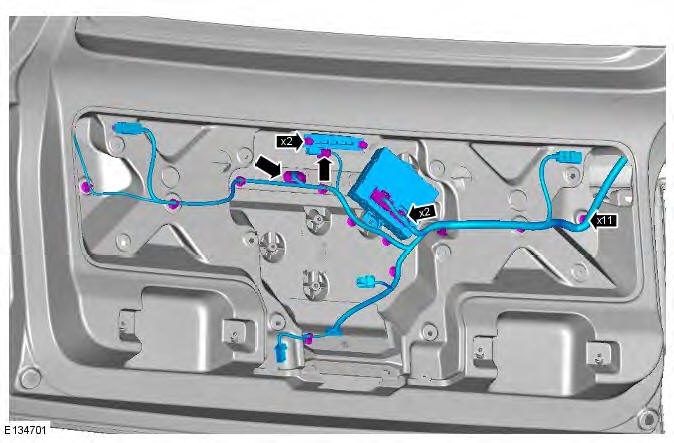
Take extra care not to damage the wiring harnesses.
Make sure the tailgate harnesses are withdrawn through the body harness apertures when removing the tailgate.
NOTES:
This step requires the aid of another technician.
Note the position of the wiring harnesses to aid installation.
8. NOTE: Do not disassemble further if the component is removed for access only.
Refer to: Liftgate Window Glass (501-11 Glass, Frames and Mechanisms, Removal and Installation).
9. NOTE: The step must be carried out on both sides.
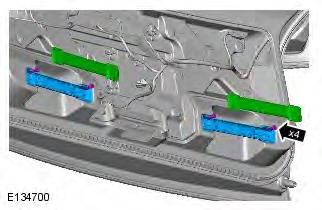
10. CAUTIONS:
Use a suitable sharp pointed hook, release the retaining clip (do not fully remove the clip).
Protect the surrounding paintwork to avoid damage.
Protect the surrounding components.
NOTES:
The step must be carried out on both sides.
Note the orientation of the clip.
11. Refer to: Liftgate Latch (501-14 Handles, Locks, Latches and Entry Systems, Removal and Installation).
12. Torque: 5 Nm
13.
14.
15.

16. Refer to: Rear Window Wiper Motor (501-16 Wipers and Washers, Removal and Installation).
Installation
1. NOTE: Make sure that the clips are installed in the correct orientation.
To install, reverse the removal procedure.
2. Check the liftgate alignment.
Refer to: Liftgate Alignment (501-03 Body Closures, General Procedures).
READ NEXT:
 Rear Door
Removal
NOTES:
Removal steps in this procedure may contain installation details.
Some variation in the illustrations may occur, but the essential information is
always correct.
1. Disconnect the bat
Fuel Filler Door
Removal
CAUTION: Make sure to protect the paintwork.
1.
Installation
1.
Fuel Filler Door Assembly
Removal
WARNING: Avoid flames, sparks or lighted substances.
CAUTION: Extreme cleanliness must be ex
Body Closures - Component Location, System Operation and Component
Description
Component Location
Powered Tailgate - Component Location
Tailgate module
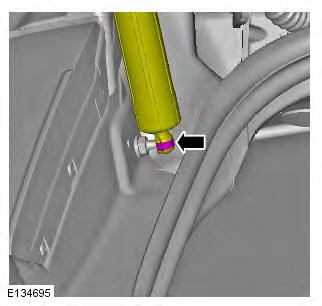
Powered strut
Tailgate open button
Tailgate close button
Latch assembly
Powered cinch motor
Powered strut
OVERVIEW
Ta
SEE MORE:
Important information
The information contained in this handbook covers all vehicle derivatives and
optional equipment,
some of which may not be fitted to your vehicle. Due to printing cycles, this
handbook may include
descriptions of options before they become generally available.
The vehicle options, hardware an
Symbols used in this handbook
Safety warnings indicate either a procedure which must be followed
precisely, or
information that should be considered with great care, in order to avoid the
possibility
of personal injury.
Cautions indicate either a procedure which must be followed precisely, or
information that
should
