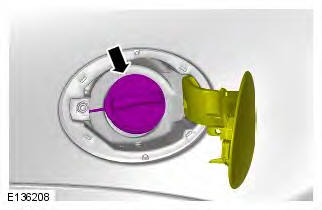
Range Rover Evoque: Fuel Filler Door
Removal
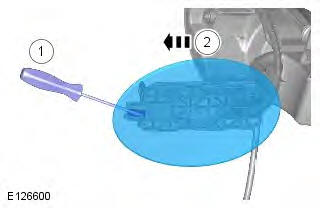
CAUTION: Make sure to protect the paintwork.
1.

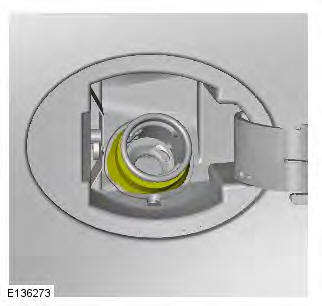
Installation
1.

Fuel Filler Door Assembly
Removal
WARNING: Avoid flames, sparks or lighted substances.
CAUTION: Extreme cleanliness must be exercised when handling these components.
NOTES:
Removal steps in this procedure may contain installation details.
Some variation in the illustrations may occur, but the essential information is always correct.
Make sure that all openings are sealed. Use new blanking caps.
1. Remove the rear wheel.
Refer to: Wheel and Tire (204-04 Wheels and Tires, Removal and Installation).
2.
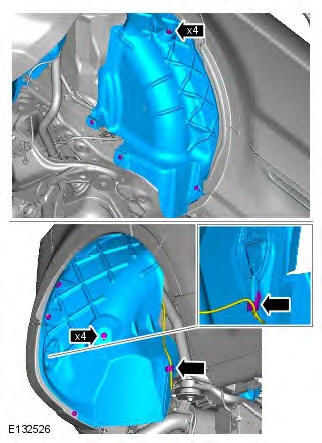
3.
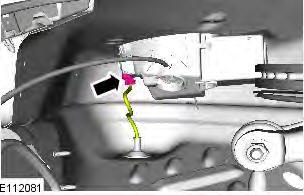
4.
5.
6.

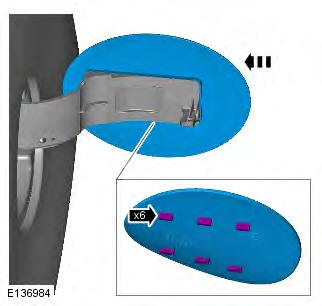
7. CAUTION: Make sure to protect the paintwork.
NOTE: Do not disassemble further if the component is removed for access only.
Installation
1.
2. To install, reverse the removal procedure.
READ NEXT:
 Body Closures - Component Location, System Operation and Component
Description
Body Closures - Component Location, System Operation and Component
Description
Component Location
Powered Tailgate - Component Location
Tailgate module
Powered strut
Tailgate open button
Tailgate close button
Latch assembly
Powered cinch motor
Powered strut
OVERVIEW
Ta
A-Pillar Trim Panel, B-Pillar Upper Trim Panel 5-Door
A-Pillar Trim Panel
Removal
NOTE: Removal steps in this procedure may contain installation details.
1. Torque: 6 Nm
Installation
1. To install, reverse the removal procedure.
B-Pillar Upper Trim Pane
SEE MORE:
Transmission Vehicles With: M66 6-Speed
Manual Transmission AWD - Removal
Removal
Special Tool(s)
205-857
Remover, Halfshaft
303-021
Engine support bracket
303-662
Support Beam Arm and Hook Assembly, Engine
General Equipment
Transmission jack
NOTE: Some variation in the illustrations may occur, but the essential
information is always correct.
1. Disconnect the battery
Transmission Vehicles With: M66 6-Speed
Manual Transmission AWD - Installation
Installation
Special Tool(s)
303-021
Engine support bracket
303-662
Support Beam Arm and Hook Assembly, Engine
NOTE: Some variation in the illustrations may occur, but the essential
information is always correct.
1. NOTE: This step is only required if previously
removed.
2. NOTE: This step is only
