Range Rover Evoque: Glass Roof Panel Blind Motor
Removal
NOTES:
Removal steps in this procedure may contain installation details.
Some variation in the illustrations may occur, but the essential information is always correct.
All vehicles
1. NOTE: The step must be carried out on both sides. Refer to: A-Pillar Trim Panel (501-05 Interior Trim and Ornamentation, Removal and Installation).
3-door
2. NOTE: The procedure must be carried out on both sides. Refer to: B-Pillar Upper Trim Panel - 5-Door (501-05 Interior Trim and Ornamentation, Removal and Installation).
5-door
3. NOTE: The procedure must be carried out on both sides. Refer to: B-Pillar Upper Trim Panel - 5-Door (501-05 Interior Trim and Ornamentation, Removal and Installation).
4. NOTE: The procedure must be carried out on both sides. Refer to: C-Pillar Upper Trim Panel (501-05 Interior Trim and Ornamentation, Removal and Installation).
All vehicles
5. NOTE: The procedure must be carried out on both sides. Refer to: D-Pillar Trim Panel (501-05 Interior Trim and Ornamentation, Removal and Installation).
6. Refer to: Overhead Console (501-12 Instrument Panel and Console, Removal and Installation).
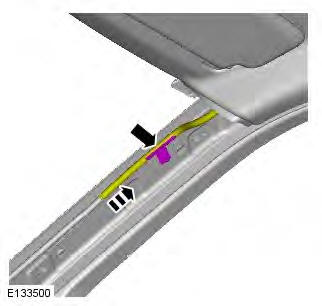
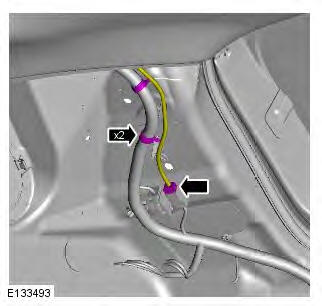
7. NOTE: The step must be carried out on both sides.
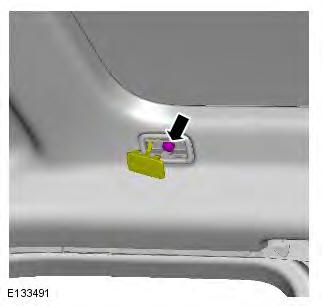
8. NOTE: The step must be carried out on both sides.
9. NOTE: The step must be carried out on both sides.
10. NOTE: The step must be carried out on both sides.
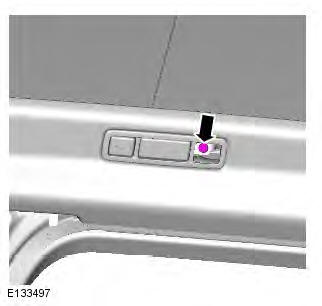
11.
12.
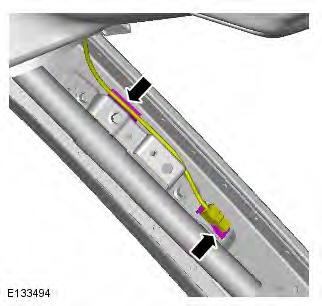
13. NOTE: The step must be carried out on both sides.
14. NOTE: The step must be carried out on both sides.

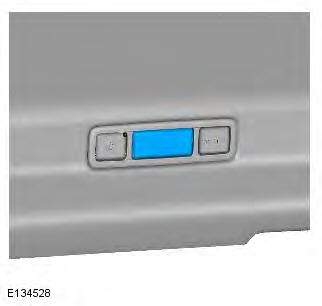
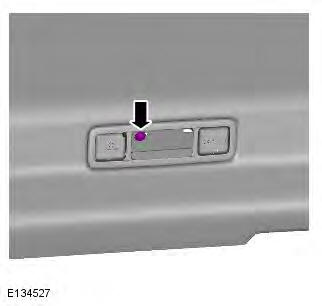
15. NOTE: The step must be carried out on both sides.
16.
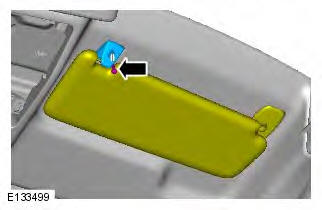
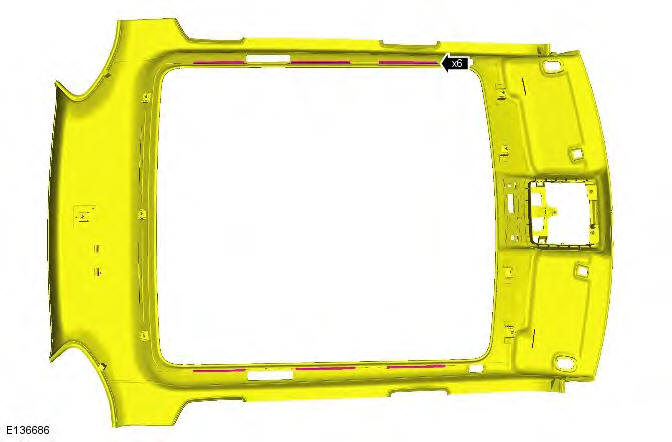
17. CAUTION: Do not use excessive force to release the headliner from the side retaining brackets.
NOTES:
Headliner shown removed for clarity.
Vehicles with glass roof panel only.
Release the headliner from the retaining brackets using a suitable plastic trim tool.
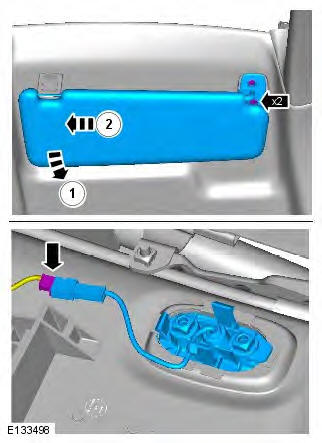
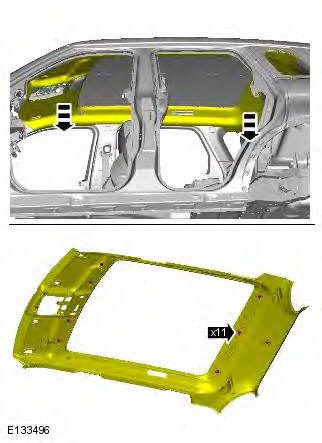
18. CAUTION: Extra care must be taken at this point, as the headliner is still retained by a locating clip at the rear and the 3 retaining clips at the front.
NOTE: This step requires the aid of another technician.
Lower the headliner for access.
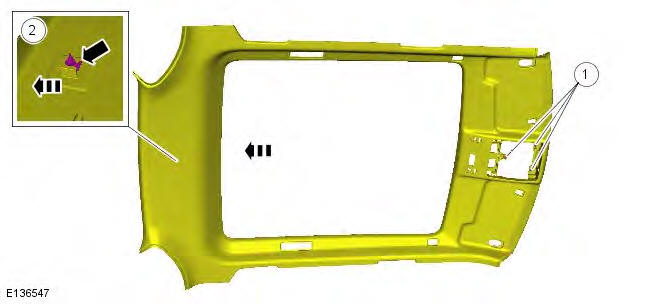
19. NOTES:
Headliner shown removed for clarity.
This step requires the aid of another technician.
- Release the headliner from the 3 front retaining clips (1) and slide rear wards to detatch from the locating clip (2).
- Lower the headliner for access.
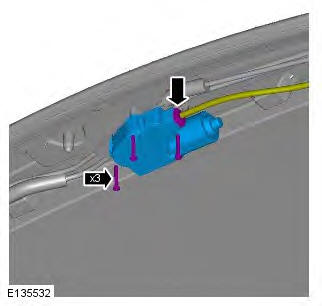
20. Torque: 3.5 Nm
Installation
1. To install, reverse the removal procedure.
READ NEXT:
 Rear Quarter Window Glass 5-Door
Removal
1. Refer to: Rear Quarter Panel Moulding (501-08 Exterior Trim and
Ornamentation, Removal and Installation).
2. Refer to: C-Pillar Upper Trim Panel (501-05 Interior Trim and
Ornamentation, Rem
Instrument Panel TD4 2.2L Diesel
Removal
NOTE: Removal steps in this procedure may contain installation details.
All vehicles
1. Make the SRS system safe.
Refer to: Standard Workshop Practices (100-00 General Information,
Descriptio
SEE MORE:
Important information
The information contained in this handbook covers all vehicle derivatives and
optional equipment,
some of which may not be fitted to your vehicle. Due to printing cycles, this
handbook may include
descriptions of options before they become generally available.
The vehicle options, hardware an
Symbols used in this handbook
Safety warnings indicate either a procedure which must be followed
precisely, or
information that should be considered with great care, in order to avoid the
possibility
of personal injury.
Cautions indicate either a procedure which must be followed precisely, or
information that
should
