Range Rover Evoque: Rear Quarter Window Glass 5-Door
Removal
1. Refer to: Rear Quarter Panel Moulding (501-08 Exterior Trim and Ornamentation, Removal and Installation).
2. Refer to: C-Pillar Upper Trim Panel (501-05 Interior Trim and Ornamentation, Removal and Installation).
3. Refer to: D-Pillar Trim Panel (501-05 Interior Trim and Ornamentation, Removal and Installation).
4. Refer to: Loadspace Trim Panel (501-05 Interior Trim and Ornamentation, Removal and Installation).
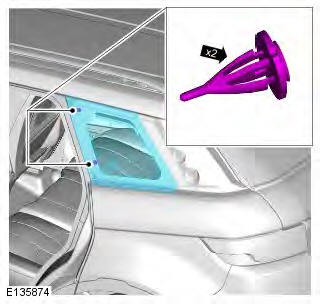
5.
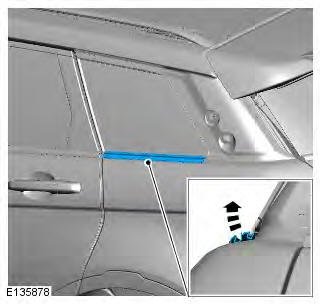
6.

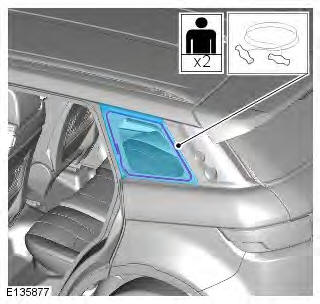
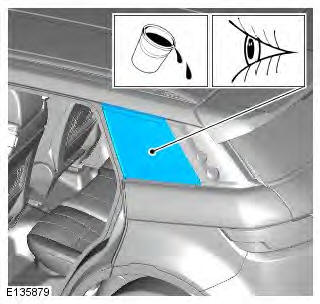
7. CAUTIONS:
Protect the surrounding components.
Protect the surrounding paintwork to avoid damage.
Pull glazing wire through windshield sealant to the inside of the vehicle.
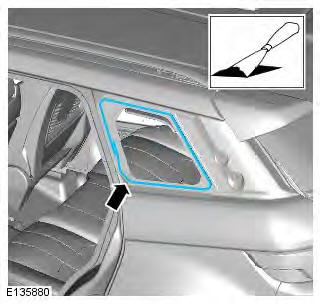
8.

Installation
1. CAUTIONS:
Make sure that the mating faces are clean and free of foreign material.
Correct preparation of body apertures 'post painting' to ensure satisfactory glass adhesion, must be carried out in line with industry practise.
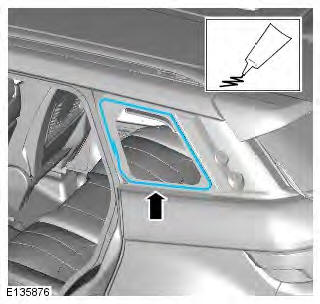
2. NOTE: Make sure that a Hi-modulus sealer (for example, Wurth Ultimate adhesive) is used when bonding the component to the vehicle.
Prepare the window glass, window glass flange and trimmed PU adhesive in accordance with the instructions included with the PU adhesive kit.
3.
4. Test the sealer for leaks, apply additional sealer if necessary. If water is used, allow sealer to dry before testing. Spray water around the glass and check for leaks. Mark any area that leaks. Dry the glass and sealer then apply additional sealer.
5. To install, reverse the removal procedure.
Fixed Window Glass
Principles of Operation
For a detailed description of the Glass, Frames and Mechanisms and operation, refer to the relevant Description and Operation section of the workshop manual.
Inspection and Verification
NOTES:
Check and rectify basic faults before beginning diagnostic routines involving pinpoint tests.
Refer to Section 100-00 General Information for window glass health and safety precautions.
1. Verify the customer concern.
2. Visually inspect for obvious mechanical faults.
Visual Inspection

3. If an obvious cause for an observed or reported concern is found, correct the cause (if possible) before proceeding to the next step.
4. If the cause is not visually evident, verify the symptom and refer to the Symptom Chart.
Warranty Repairs
NOTES:
The warranty period for the windshield is twelve months with the exception of delamination and electrical faults.
Warranty repairs should be completed using genuine parts, in accordance with the Warranty Policy and Procedures Manual.
1. Draw a line around the windshield damage using a marker pen.
2. Photograph the entire windshield. If the damage extends behind any trim, remove the trim and take further photographs.
3. Photograph the trademark logo and code to validate the windshield as factory fitment.
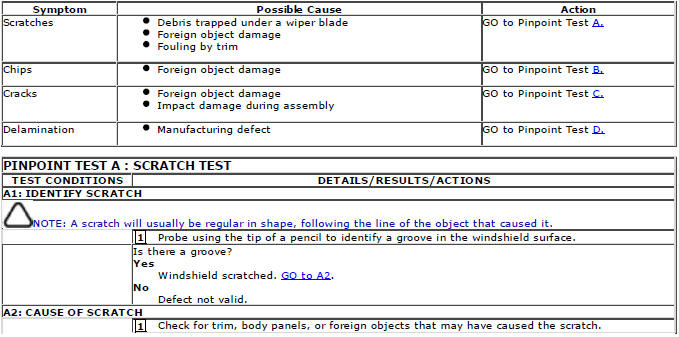
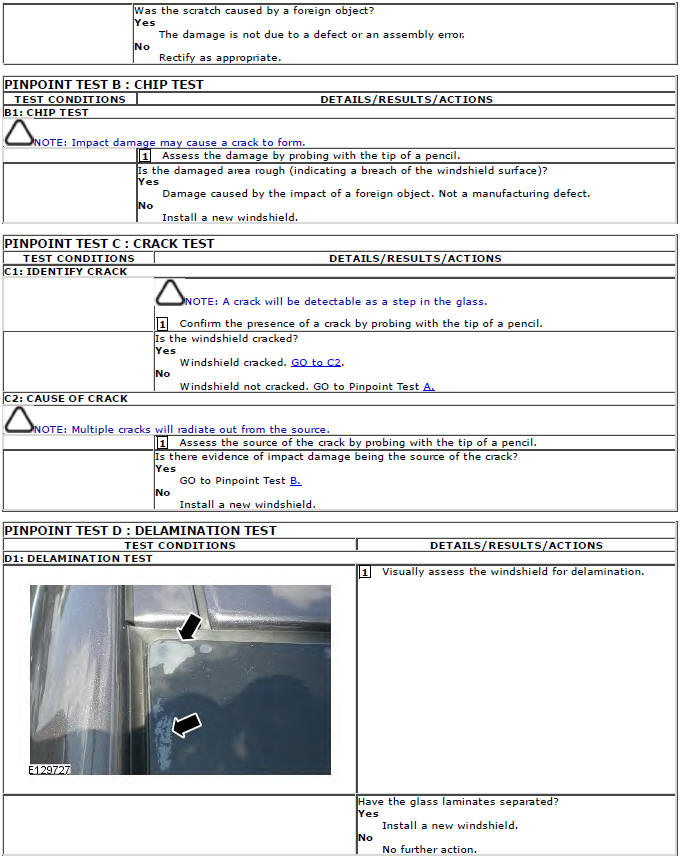
Symptom Chart
DTC Index
For a complete list of all Diagnostic Trouble Codes (DTCs) that could be logged on this vehicle, please refer to Section 100-00.
READ NEXT:
 Instrument Panel TD4 2.2L Diesel
Removal
NOTE: Removal steps in this procedure may contain installation details.
All vehicles
1. Make the SRS system safe.
Refer to: Standard Workshop Practices (100-00 General Information,
Descriptio
Instrument Panel GTDi 2.0L Petrol
Removal
NOTE: Removal steps in this procedure may contain installation details.
1. Make the SRS system safe.
Refer to: Standard Workshop Practices (100-00 General Information,
Description and Operati
SEE MORE:
Important information
The information contained in this handbook covers all vehicle derivatives and
optional equipment,
some of which may not be fitted to your vehicle. Due to printing cycles, this
handbook may include
descriptions of options before they become generally available.
The vehicle options, hardware an
Symbols used in this handbook
Safety warnings indicate either a procedure which must be followed
precisely, or
information that should be considered with great care, in order to avoid the
possibility
of personal injury.
Cautions indicate either a procedure which must be followed precisely, or
information that
should
