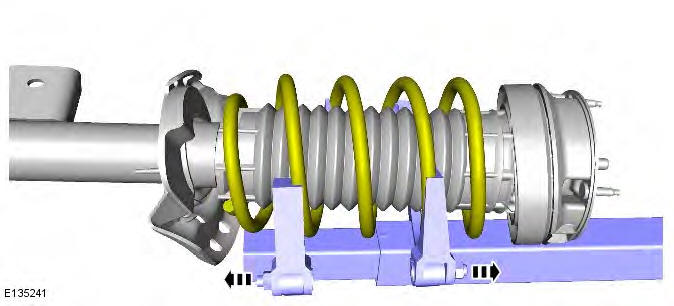
Range Rover Evoque: Rear Shock Absorber Vehicles With: Dynamic Suspension
General Equipment
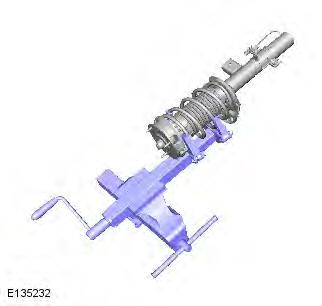
- Suspension Spring Compressor
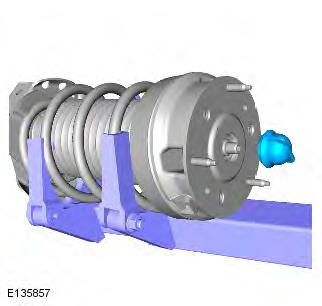
- Vise
Removal
WARNINGS:
Make sure the spring compressor Safe Working Load (SWL) meets or exceeds the spring rating quoted in the Specifcations section.
Always follow the spring compressor manufacturer's instructions.
The spring is under extreme tension, care must be taken at all times. Failure to follow these instuctions may result in personal injury.
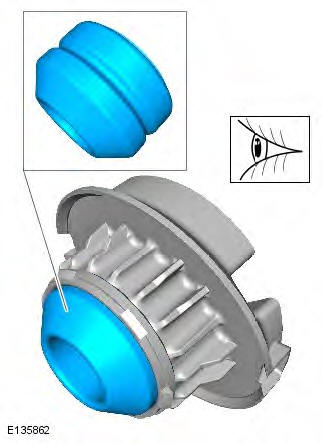
1. WARNING: Make sure to support the vehicle with axle stands. Raise and support the vehicle.
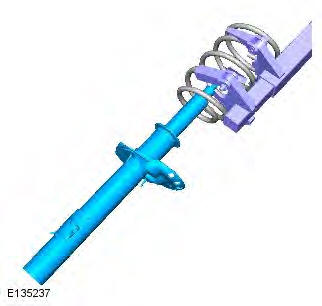
2. Refer to: Shock Absorber and Spring Assembly - Vehicles With: Dynamic Suspension (204-02 Rear Suspension, Removal and Installation).
3.
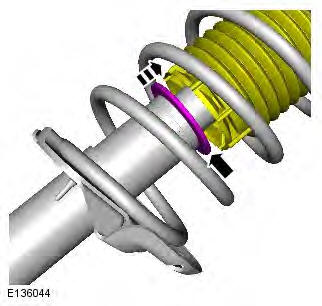
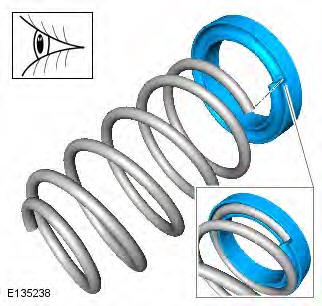
4. CAUTION: Mark the components to aid installation.
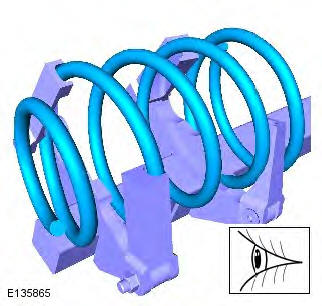
5.
- General Equipment: Suspension Spring Compressor
- General Equipment: Vise
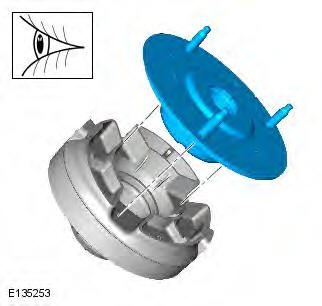
6.
7.
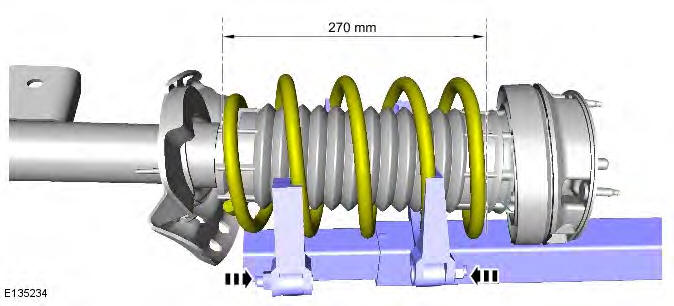
8. WARNING: Make sure to support the shock absorber.
CAUTION: Discard the nut.
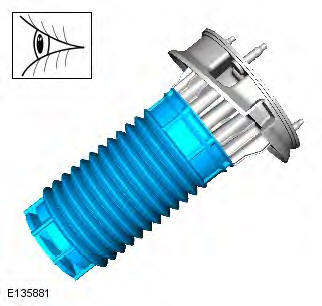
9.
10.

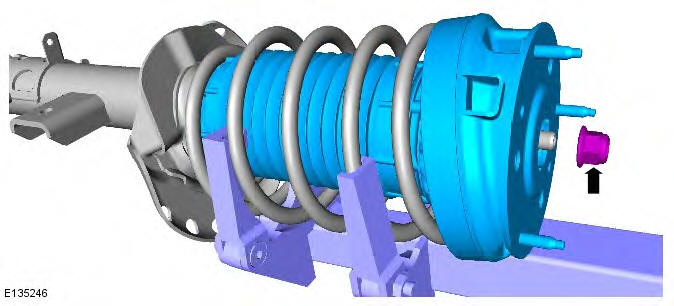
Installation
1. Make sure the correct vehicle suspension components are installed.
Refer to: Specifications (204-00 Suspension System - General Information, Specifications).
2. Inspect the component and install a new one if damaged.
3. Inspect the component and install a new one if damaged.
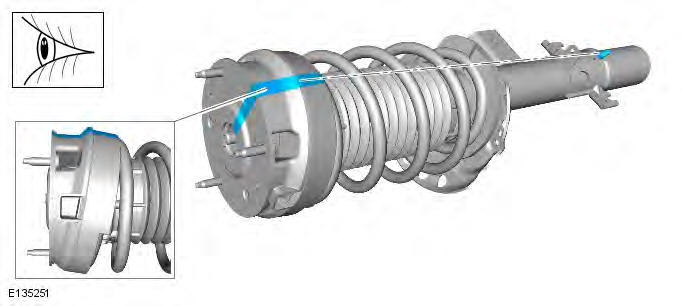
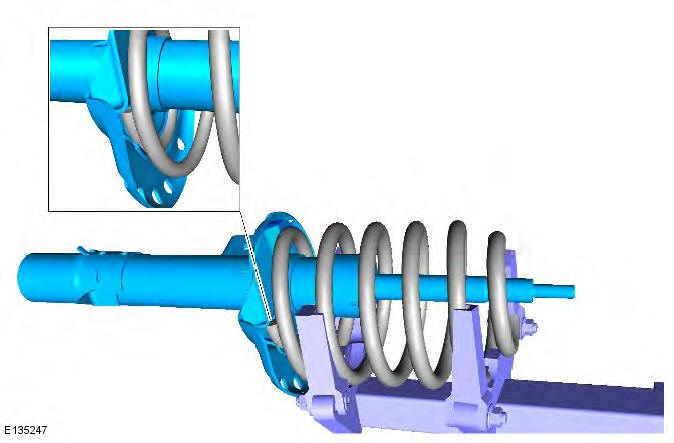
4. CAUTION: Make sure the component is aligned as shown.
NOTE: Make sure that the component is installed to the position noted on removal. Inspect the component and install a new one if damaged.
5. Inspect the component and install a new one if damaged.
6. Inspect the component and install a new one if damaged.

7. Inspect the component and install a new one if damaged.
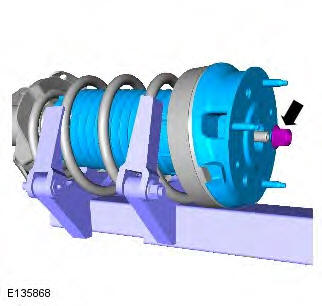
8. CAUTION: Make sure the component is aligned as shown.
- Inspect the component and install a new one if damaged.
- Make sure that the correct spring and isolator are fitted according to the vehicle specifications.
9. WARNING: Make sure to support the shock absorber.
CAUTIONS:
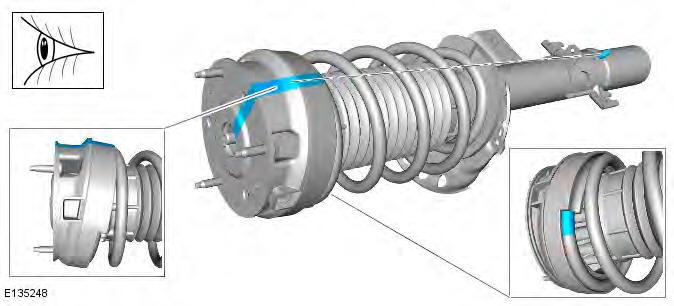
Make sure the component is aligned as shown.
Make sure that the spring is installed to the damper assembly with the paint marks (located on the spring) at the top.
10. WARNINGS:
Make sure that a new nut is installed.
Make sure to support the shock absorber.
Torque: 67 Nm
11.

12. CAUTION: Make sure the components are aligned as shown.
13.
14.

15. CAUTION: Make sure the components are aligned as shown.
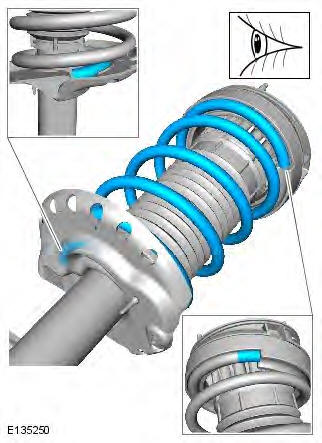
16. CAUTION: Make sure the components are aligned as shown.

17. Refer to: Shock Absorber and Spring Assembly - Vehicles With: Dynamic Suspension (204-02 Rear Suspension, Removal and Installation).
18. Check the suspension system ride height.
READ NEXT:
 Shock Absorber and Spring Assembly Vehicles With:
Dynamic Suspension
Shock Absorber and Spring Assembly Vehicles With:
Dynamic Suspension
Special Tool(s)
JLR-204-804
Lever, Wheel Knuckle
General Equipment
Transmission jack
Wooden Block
Removal
CAUTIONS:
Nuts and bolts must be tightened with the weight of the vehicle on the
suspensi
Spring Vehicles Without: Dynamic Suspension
Removal
WARNINGS:
Make sure the spring compressor Safe Working Load (SWL) meets or exceeds
the spring rating quoted in the
Specifcations section.
Always follow the spring compressor manufacturer's i
Rear Lower Arm FWD
Removal
NOTES:
LH illustration shown, RH is similar.
Some variation in the illustrations may occur, but the essential information is
always correct.
1. WARNING: Make sure to support the vehicle with
SEE MORE:
Checking the tyre pressures
Tyre information label location.
Tyre pressures should be
checked
regularly using an accurate pressure
gauge, when the tyres are cold.
The following procedure should be used to
check and adjust the tyres pressures.
1. Remove the valve cap.
2. Firmly attach a tyre pressure gauge/inflator
Replacement tyres
Do not fit cross ply tyres.
Do not fit tubed tyres.
Do not rotate tyres around the vehicle.
If the use of tyres not recommended by
Land Rover is unavoidable, ensure
that you read and fully comply with the
tyre manufacturer’s instructions.
Ideally, tyres should be replaced in sets of 4. If
t
