Range Rover Evoque: Roof Front Panel Vehicles With: Sliding Roof Opening Panel
Removal
NOTES:
The roof front panel is manufactured from mild steel.
The 4 x screw in studs must be replaced in the installation of the roof front panel.
1. The roof front panel is replaced in conjunction with:
- Windshield
- Headliner
- Moonroof
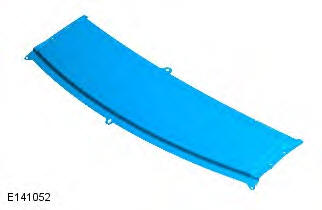
2. For additional information relating to this repair procedure please see the following: For additional information, refer to: Health and Safety Precautions (100-00 General Information, Description and Operation) / Body Repairs (501-25A Body Repairs - General Information, Description and Operation) / Corrosion Protection (501-25B Body Repairs - Corrosion Protection, Description and Operation) / Body and Frame (501-26 Body Repairs - Vehicle Specific Information and Tolerance Checks, Description and Operation) / Standard Workshop Practices (100-00 General Information, Description and Operation).
3. Remove both front seats.
For additional information, refer to: Front Seat (501-10 Seating, Removal and Installation).
4. Remove the moonroof.
For additional information, refer to: Glass Roof Panel (501-11 Glass, Frames and Mechanisms, Removal and Installation).
5. Remove both side air curtain modules.
For additional information, refer to: Side Air Curtain Module (501-20B Supplemental Restraint System, Removal and Installation).
6. Release and lay aside the wiring harness.
7. NOTE: The 4 x screw in studs must be replaced in the installation of the roof front panel. Remove 4 screw in studs from the roof front panel.
8. Using the ESN50, remove the self piercing rivets from the roof front panel.
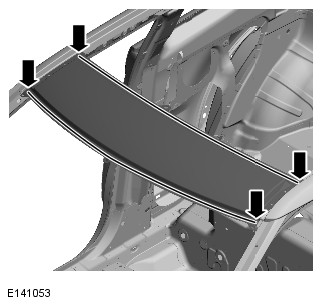
9. Separate the joints and remove the old panel.
Installation
1. Prepare the old and new panel joint surfaces.
2. Clean out the threads on the 4 x screw in stud captive nut inserts.
3. Offer up the new panel and clamp into position. Check alignment, if correct, proceed to next step, if not, rectify and recheck before proceeding.
4. Remove the new panel.
5. Apply sealer adhesive to roof front header rail as indicated.
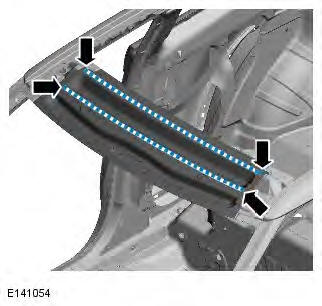
6. NOTE: Care must be taken not to contaminate the threads on the 4 x screw in stud captive nut inserts with adhesive. Apply panel bonding adhesive to spot welded/bonded areas as indicated. Use the bond path shown in the graphic as a guide, the panel bond adhesive must only be applied in the areas where spot welding is accessible for the installation of the new panel. It is not to be applied in any areas of MIG welding/brazing installation joints, leave a 30mm gap, so it does not affect the MIG weld/braze joint on installation.
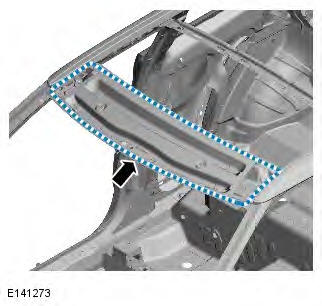
7. With the aid of a second technician offer up the new panel and clamp into position. Check alignment, if correct, proceed to next step, if not, rectify and recheck before proceeding.
8. Loosely install the new 4 x screw in studs.
9. CAUTION: Beware of the removed self piercing rivet holes. Install spot welds adjacent to the removed self piercing rivet holes where access is available.
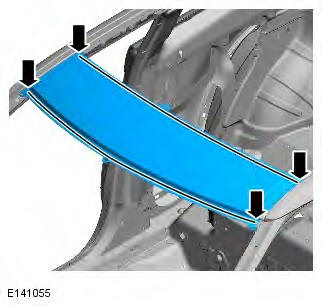
10. Tighten the new 4 x screw in studs to 13Nm.
11. Remove any excess adhesive.
12. Dress all welded joints.
13. NOTE: Make sure all upper body joints are sealed following this repair procedure
The installation of associated panels and mechanical components is the reverse of removal.
Roof
Roof service panels - Fixed Roof
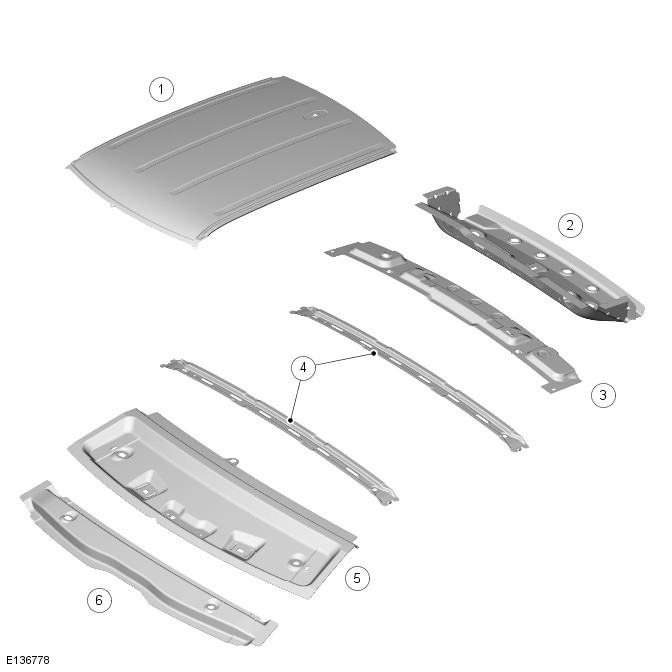
- Roof panel (aluminium AC600)
- Outer rear roof panel
- Inner rear roof panel
- Roof reinforcement elements
- Front lower roof panel
- Front upper roof panel
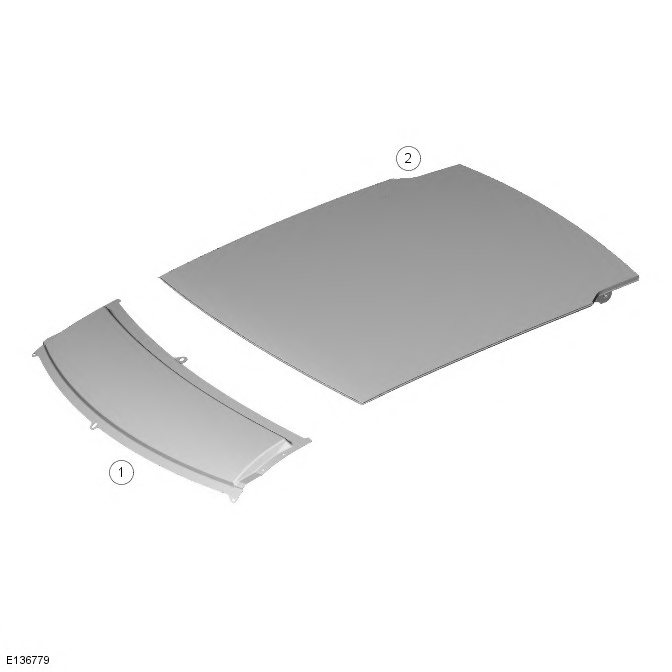
- Front outer roof panel (MS3 mild steel)
- Glass roof
Galvanic Corrosion
For additional information, refer to: Corrosion Protection (501-25B Body Repairs - Corrosion Protection, Description and Operation).
Time schedules, roof panels
The following times relate to the replacement of the roof panels as single panels. The published times include the removal of Mechanical, Electrical and Trim, (MET), items, plus paint times based on Metallic Clear Over Base Paint, (blends to adjacent panels are not included). A corrosion protection time is included where appropriate.
The times were generated by Thatcham, (the Motor Insurance Repair Research Centre), and are to be used as a guide only, based on new undamaged panels. Job allowances are not included, as a guide Thatcham recommend 0.3 hours to be added to single panel times.
Single panel times - Fixed Roof

Single panel times - Glass Roof


