Range Rover Evoque: Front/Rear Door Window Glass
Land Rover Range Rover Evoque L538 (2011–2018) Service Manual / Body and Paint / Glass, Frames and Mechanisms / Front/Rear Door Window Glass
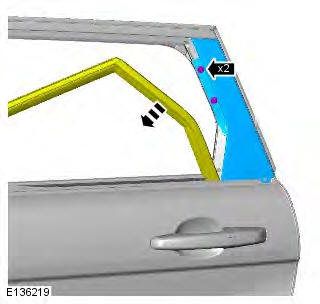
Front Door Window Glass
Special Tool(s)
 501-114
Release Lever, Door Glass
Removal
NOTE: Removal steps in this procedure may contain installation details.
1. Torque: 1 Nm
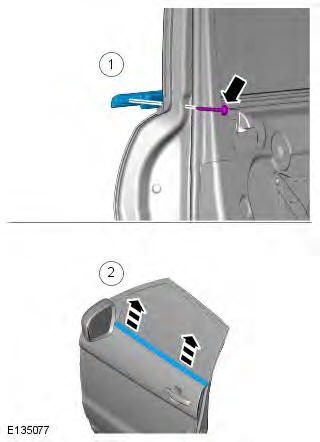
2. Special Tool(s): 501-114
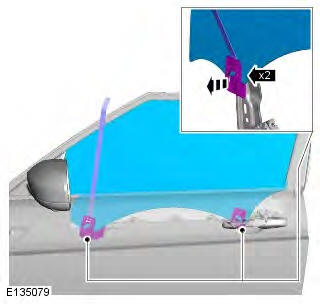
3.
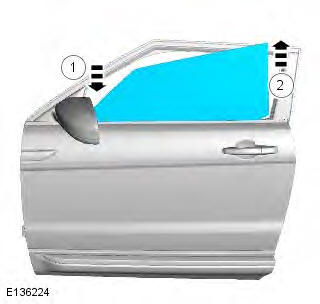
Installation
1. NOTE: An audible click is heard when the clips are fully latched.
To install, reverse the removal procedure.
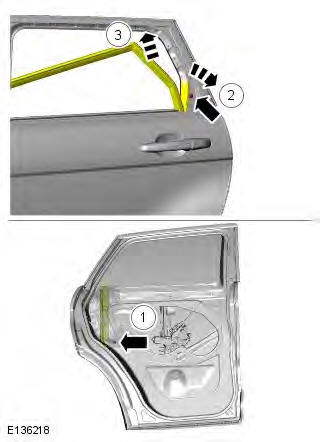
Rear Door Window Glass
Removal
NOTE: Removal steps in this procedure may contain installation details.
1. Refer to: Rear Door Trim Panel (501-05 Interior Trim and Ornamentation, Removal and Installation).
2. Torque: 1 Nm
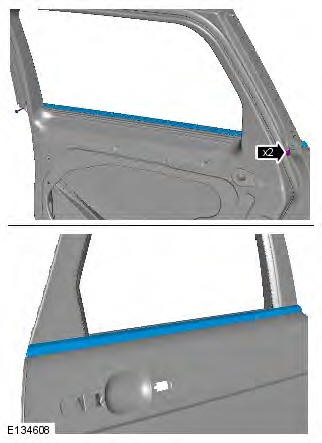
3. Torque: 1.2 Nm
4. NOTE: Loosen the lower bolt, but do not fully remove.
Torque: 1.2 Nm
5.
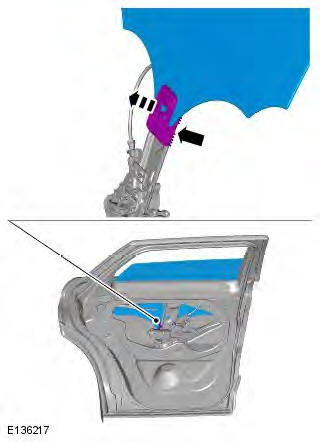
6.
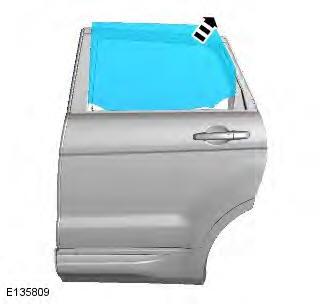
Installation
1. NOTE: An audible click is heard when the clips are fully latched.
To install, reverse the removal procedure.
READ NEXT:
 Rear Quarter Window Glass 3-Door
Removal
1. Refer to: Rear Quarter Panel Moulding (501-08 Exterior Trim and
Ornamentation, Removal and Installation).
2. Refer to: B-Pillar Upper Trim Panel - 3-Door (501-05 Interior Trim and
Ornamenta
Liftgate Window Glass
Removal
1. Refer to: Rear Spoiler (501-08 Exterior Trim and Ornamentation,
Removal and Installation).
2.
3.
4. CAUTION: The step must be carried out on both
sides.
5. CAUTIONS:
Protect the surroun
Windshield Glass
Removal
CAUTIONS:
Always protect paintwork and glass when removing exterior components.
Always protect the interior components when removing body glass.
Lay the glass on felt covered supports. Do no
SEE MORE:
Sensor blockage
If one of the sensors is completely obscured
the BSM system is automatically disabled, the
warning indicator dot is displayed in the
exterior mirror and the message BSM sensor
blocked appears in the message centre.
Note: Blockage testing is only initiated when
vehicle speed is above 32km/h (20
System fault
If a fault with one of the radar sensors is
detected, an amber warning indicator dot is
displayed in the exterior mirror and the
message BSM not available is displayed in the
message centre.
Note: Even if the detected fault only affects the
radar sensor on one side of the vehicle, the
whole s
© 2011-2026 Copyright www.rrevoque.org - 0.0034
