Range Rover Evoque: Headliner
Removal
NOTES:
Removal steps in this procedure may contain installation details.
Vehicles with glass roof panel shown, vehicles without glass roof panel similar.
All vehicles
1. Refer to: Windshield Glass (501-11 Glass, Frames and Mechanisms, Removal and Installation).
3-door
2. NOTE: The procedure must be carried out on both sides.
Refer to: B-Pillar Upper Trim Panel - 3-Door (501-05 Interior Trim and Ornamentation, Removal and Installation).
5-door
3. NOTE: The procedure must be carried out on both sides.
Refer to: B-Pillar Upper Trim Panel - 5-Door (501-05 Interior Trim and Ornamentation, Removal and Installation).
4. NOTE: The procedure must be carried out on both sides.
Refer to: C-Pillar Upper Trim Panel (501-05 Interior Trim and Ornamentation, Removal and Installation).
All vehicles
5. NOTE: The procedure must be carried out on both sides.
Refer to: D-Pillar Trim Panel (501-05 Interior Trim and Ornamentation, Removal and Installation).
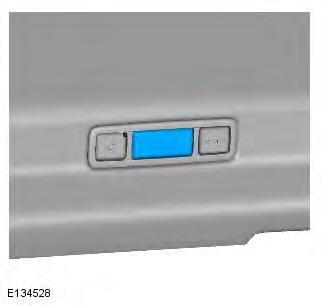
6. Refer to: Overhead Console (501-12 Instrument Panel and Console, Removal and Installation).
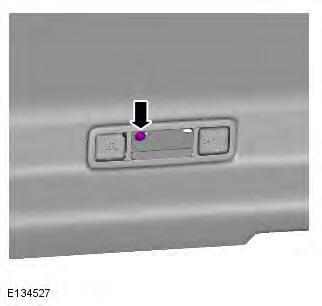
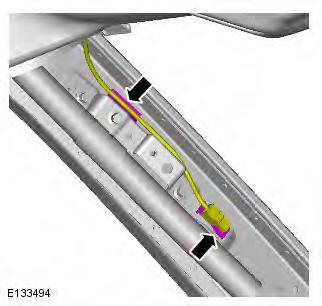
7. NOTE: The step must be carried out on both sides.

8. NOTE: The step must be carried out on both sides.
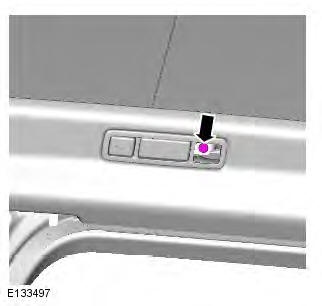
9. NOTE: The step must be carried out on both sides.
10. NOTE: The step must be carried out on both sides.
11.
12.
13. NOTE: The procedure must be carried out on both sides.
14. NOTE: The step must be carried out on both sides.
15. NOTE: The step must be carried out on both sides.
16.

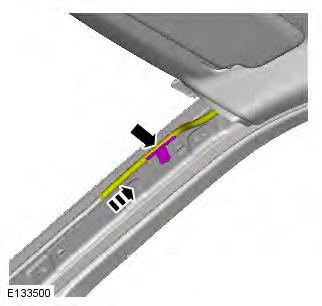
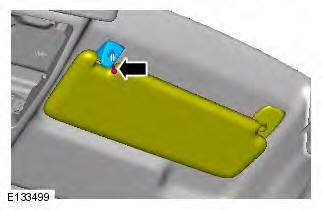
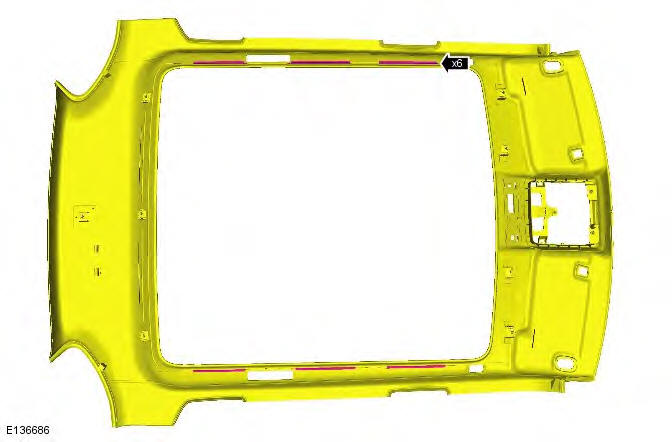
17. CAUTION: Do not use excessive force to release the headliner from the side retaining brackets.
NOTES:
Headliner shown removed for clarity.
Vehicles with glass roof panel only.
- Release the headliner from the retaining brackets using a suitable plastic trim tool.
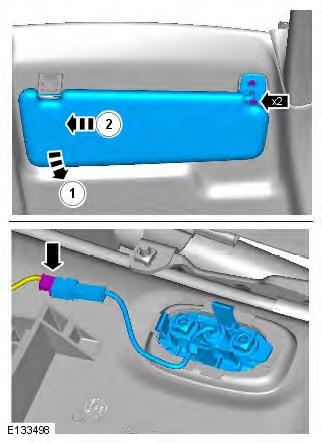
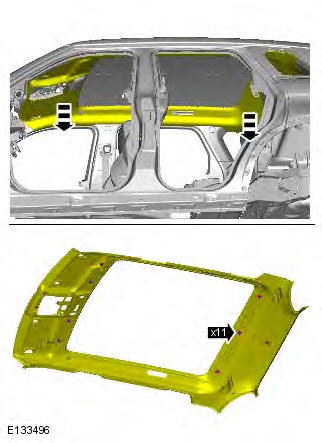
18. CAUTION: Extra care must be taken at this point, as the headliner is still retained by a locating clip at the rear and the 3 retaining clips at the front.
NOTE: This step requires the aid of another technician.
Release the headliner retaining clips.
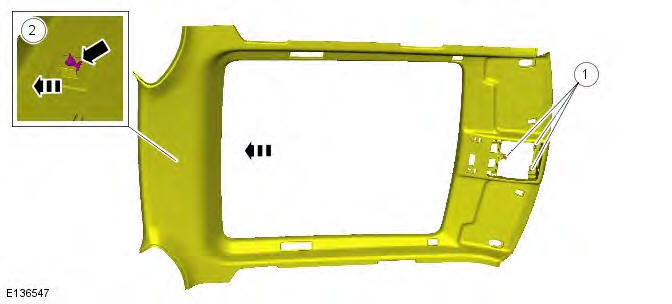
19. NOTES:
Headliner shown removed for clarity.
This step requires the aid of another technician.
- Release the headliner from the 3 front retaining clips (1) and slide rear wards to detatch from the locating clip (2).
- Lower the headliner for access.
20.
21. NOTE: This step requires the aid of another technician.
22. NOTES:
Do not disassemble further if the component is removed for access only.
When installing the component, install the left-hand side first.

Installation
1. To install, reverse the removal procedure.
READ NEXT:
 Engine Cover GTDi 2.0L Petrol, Engine Cover TD4 2.2L Diesel
Engine Cover GTDi 2.0L Petrol
Removal
NOTE: Removal steps in this procedure may contain installation details.
1.
2. NOTE: Do not disassemble further if the
component is removed for access only.
Inst
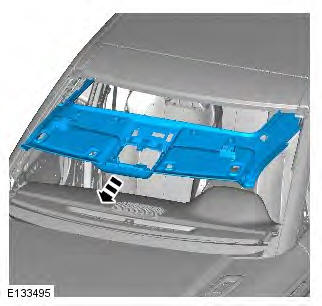
Loadspace Trim Panel
CAUTION: LH illustration shown, RH is similar.
NOTE: Removal steps in this procedure may contain installation details.
All vehicles
1.
2.
3.
4. Torque: 1.4 Nm
5. Torque: 20 Nm
6. NOTE: LH side o
C-Pillar Upper Trim Panel
Removal
NOTE: Removal steps in this procedure may contain installation details.
1.
2.
3.
4.
5. Torque: 6 Nm
6.
Installation
1. To install, reverse the removal procedure.
C-Pillar Lower Trim Pane
SEE MORE:
Accessory Drive - GTDi 2.0L Petrol
Torque Specifications
Accessory Drive Belt
Removal
NOTE: Some illustrations may show the engine removed for clarity.
1. Disconnect the battery ground cable.
Refer to: Specifications (414-01 Battery, Mounting and Cables,
Specifications).
2. WARNING: Make sure to support the vehicle with axle stand
Starting System - GTDi 2.0L Petrol
Starting System - Component
Location
COMPONENT LOCATION
Solenoid
12V supply from battery
Solenoid power supply from Battery Junction Box (BJB)
Starter motor
Pinion gear
Starting System - Overview
OVERVIEW
The starter motor is rated as 1.3 kW and is a Denso conventional design with
the motor
