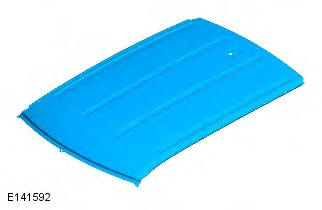
Range Rover Evoque: Roof Panel Vehicles Without: Sliding Roof Opening Panel
Removal
NOTES:
The roof panel is manufactured from aluminium 6111T4.
The screw in studs must be renewed with the installation of a new roof panel.
1. The roof panel is replaced in conjunction with:
- Liftgate
- Windshield
- Headliner
2. For additional information relating to this repair procedure please see the following: For additional information, refer to: Health and Safety Precautions (100-00 General Information, Description and Operation) / Body Repairs (501-25A Body Repairs - General Information, Description and Operation) / Corrosion Protection (501-25B Body Repairs - Corrosion Protection, Description and Operation) / Body and Frame (501-26 Body Repairs - Vehicle Specific Information and Tolerance Checks, Description and Operation) / Standard Workshop Practices (100-00 General Information, Description and Operation).
3. Remove the liftgate.
For additional information, refer to: Liftgate (501-03 Body Closures, Removal and Installation).
4. Remove both front seats.
For additional information, refer to: Front Seat (501-10 Seating, Removal and Installation).
5. Remove the rear seat.
For additional information, refer to: Rear Seat Cushion (501-10 Seating, Removal and Installation).
6. Remove both side air curtain modules.
For additional information, refer to: Side Air Curtain Module (501-20B Supplemental Restraint System, Removal and Installation).
7. Release and lay aside the wiring harness.
8. Make sure that all remaining interior trim items are adequately covered to protect from falling adhesive on installation.
9. CAUTION: Take care when removing the screw in studs so as not to rotate the captive nuts.
NOTE: The 14 x screw in studs must be replaced in the installation of the roof panel.
Remove the 14 screw in studs.
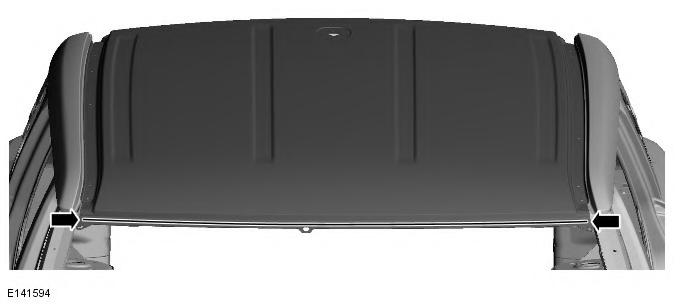
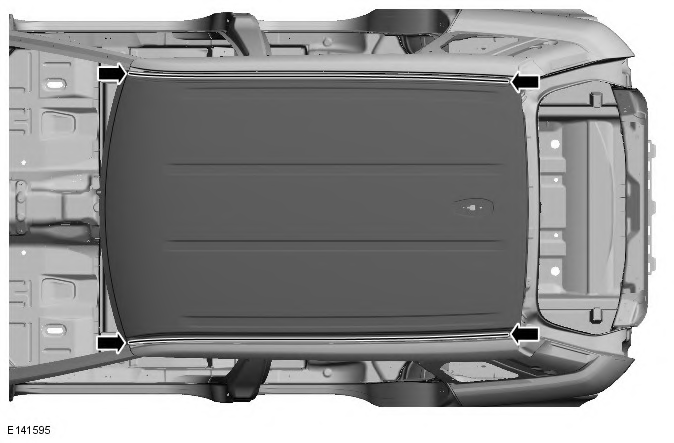
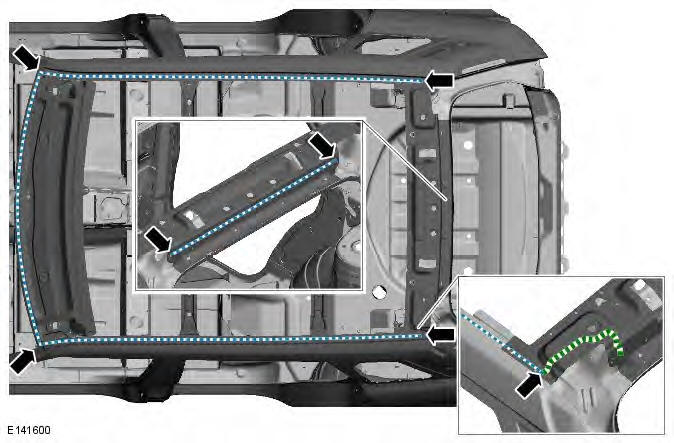
10. Using a 6.5mm drill bit, drill out the self piercing rivets as indicated.
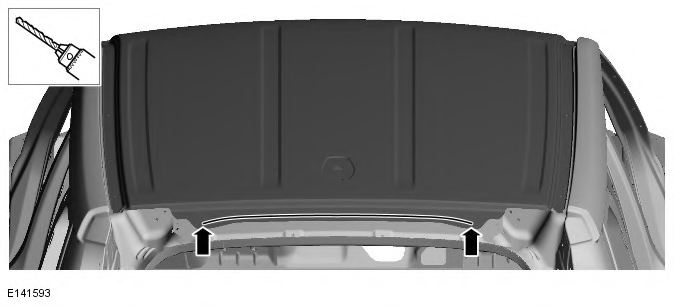
11. Using the Land Rover approved tooling, remove the self piercing rivets in the areas indicated.
12. CAUTION: Care should be taken not to cut through into the inner reinforcements or roof bows. Bulk cut roof panel as indicated.
13. With the aid of a second technician separate the joints and remove the bulk of the old roof panel, also releasing the adhesive from the roof bows.
14. Using the Land Rover approved tooling, remove the self piercing rivets in the areas indicated.
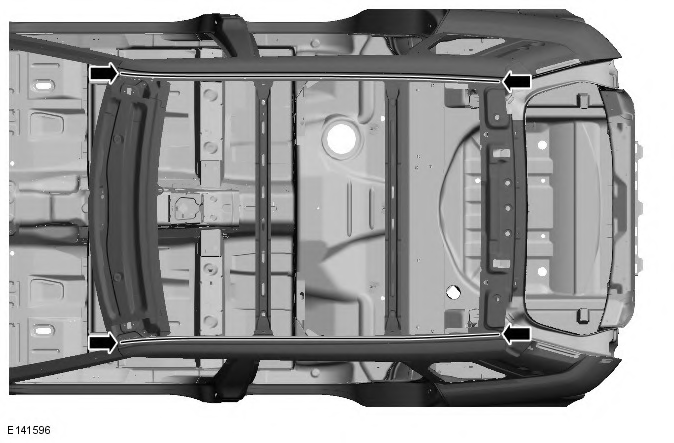
15. Separate the joints and remove the remnants of the old roof panel.
Installation
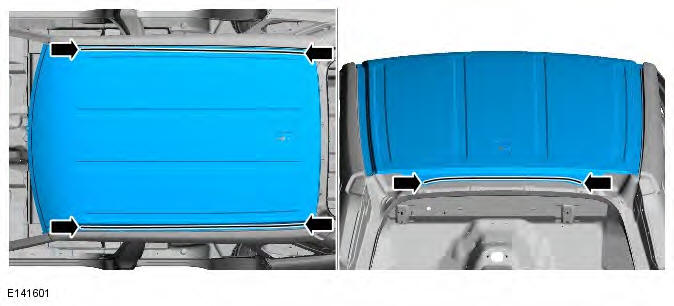
1. NOTE: Mark locations of removed rivet holes in the rear joint prior to fitment to aid installation of the new roof panel. Prepare the old roof panel joint surfaces.
2. Clean out the old adhesive from the screw in stud threads.
3. Offer up the new panel, loosely install the screw in studs and clamp into position. Check alignment, if correct, proceed to next step, if not, rectify and recheck before proceeding.
4. NOTES:
A longer drill bit is required to drill out the last self piercing rivet location on the rear.
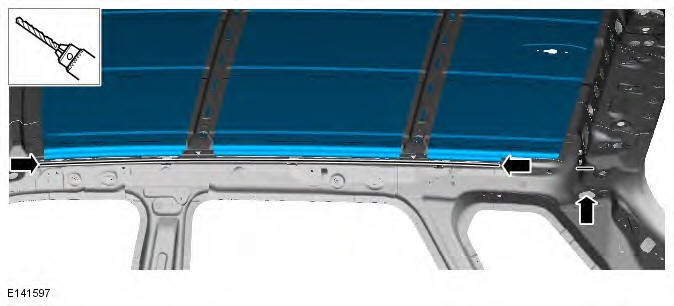
The graphic shows the RH side, the LH side is the same. Using a 6.5mm drill bit, drill out through the removed self piercing rivet locations from the underside through the new roof panel. 13 locations each side.
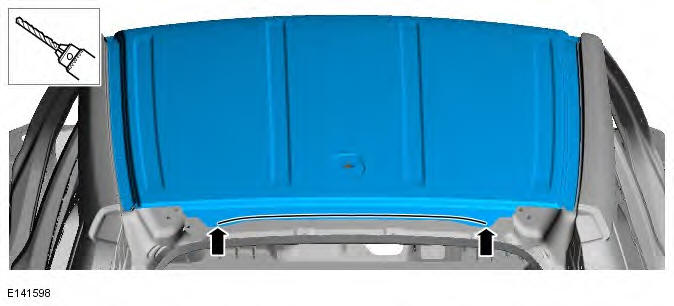
5. NOTE: Refer to the marked rivet locations on rear roof joint. Using a 6.5mm drill bit, drill out holes adjacent to the removed marked locations on the rear roof joint.
6. Remove the new panel.
7. CAUTION: Rigorous cleaning of swarf and loose debris in these areas must be carried out. Debur the drilled out holes on the vehicle and the new panel.
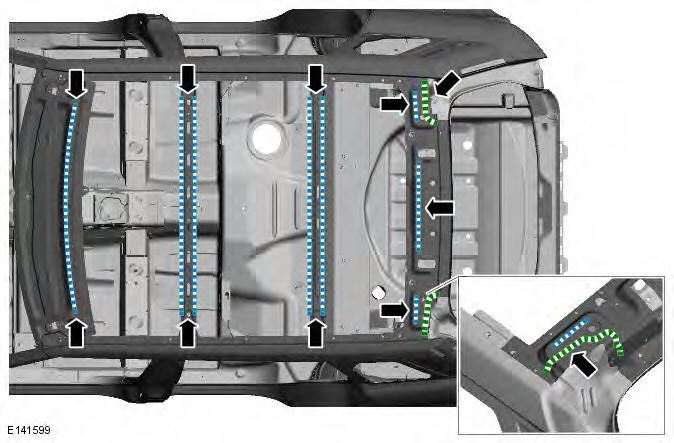
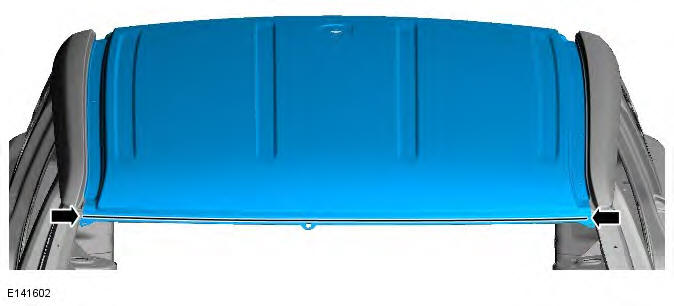
8. Apply Land Rover approved sealer adhesive to roof header rails and bows as indicated. Ensure area highlighted with the green and white line fills the gap between roof panel and rear header rail.
For additional information, refer to: Corrosion Protection (501-25B Body Repairs - Corrosion Protection, Description and Operation).
9. NOTE: Care must be taken not to contaminate the threads on the 14 x screw in stud captive nut inserts with adhesive.
Apply aluminium to steel adhesive to riveted/bonded areas as indicated. Arrow indicates overlap between gap fill and aluminium to steel adhesive. Ensure materials overlap and no possible gap can occur.
For additional information, refer to: Corrosion Protection (501-25B Body Repairs - Corrosion Protection, Description and Operation).
10. With the aid of a second technician offer up the new panel and clamp into position. Check alignment, if correct, proceed to next step, if not, rectify and recheck before proceeding.
11. Loosely install the new 14 x screw in studs.
12. Loosely install breakstem fasteners into the pre-drilled location holes.
13. NOTE: It is important to use the longer fastener in the last location on each side towards the rear of the vehicle. Using the Land Rover approved breakstem fastener tool, install the fasteners in the areas as indicated. Use JLR part number LR044284 in all locations except the last location towards the rear of the vehicle on each side where JLR part number LR044283 must be used.
14. Using the Land Rover approved SPR tool and die; 78230-050088, install SPR Part number LR043550 with an application force of 40 kN into the area as indicated.
15. Tighten the 14 screw in studs to 13Nm.
16. Remove any excess aluminium to steel adhesive.
17. CAUTION: Rivet heads must be sealed to prevent water ingress. Make sure all joints and fastener/SPR rivet heads are suitably sealed once the aluminium to steel adhesive has fully cured. Use the Land Rover approved sealant.
For additional information, refer to: Corrosion Protection (501-25B Body Repairs - Corrosion Protection, Description and Operation).
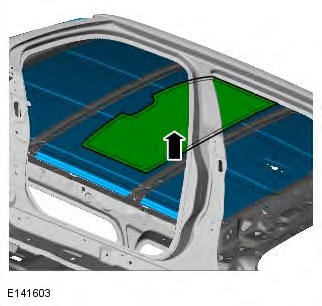
18. Install a new roof stiffener pad, part number LR035345, to the centre of the new roof panel as indicated. Use an upwards force of 10kg with the palm of your hand, sliding all over points on the pad's underside.
19. The installation of associated panels and mechanical components is the reverse of removal.
READ NEXT:
 Roof Front Panel Vehicles With: Sliding
Roof Opening Panel
Roof Front Panel Vehicles With: Sliding
Roof Opening Panel
Removal
NOTES:
The roof front panel is manufactured from mild steel.
The 4 x screw in studs must be replaced in the installation of the roof front
panel.
1. The roof front panel is replaced in conju
Side Panel
Removal
NOTES:
The side panel is manufactured from mild steel. The fender mounting
bracket is serviced on the new panel.
This procedure identifies the method for the replacement of the side panel in
SEE MORE:
Important information
The information contained in this handbook covers all vehicle derivatives and
optional equipment,
some of which may not be fitted to your vehicle. Due to printing cycles, this
handbook may include
descriptions of options before they become generally available.
The vehicle options, hardware an
Symbols used in this handbook
Safety warnings indicate either a procedure which must be followed
precisely, or
information that should be considered with great care, in order to avoid the
possibility
of personal injury.
Cautions indicate either a procedure which must be followed precisely, or
information that
should
