Range Rover Evoque: B-Pillar Lower Trim Panel, D-Pillar Trim Panel
Land Rover Range Rover Evoque L538 (2011–2018) Service Manual / Body and Paint / Interior Trim and Ornamentation / B-Pillar Lower Trim Panel, D-Pillar Trim Panel
B-Pillar Lower Trim Panel
Removal
NOTE: Removal steps in this procedure may contain installation details.
1.
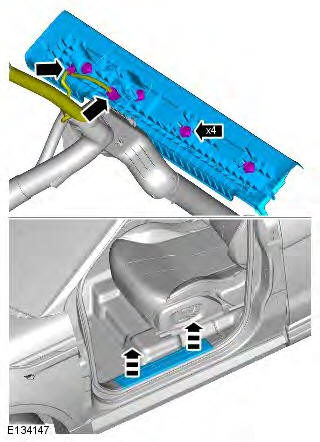
2.
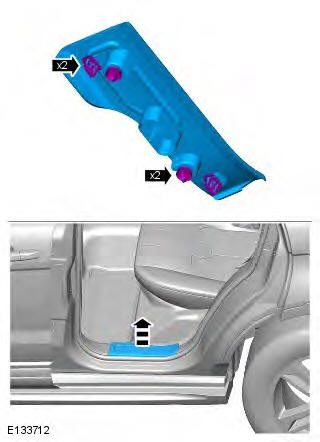
3.
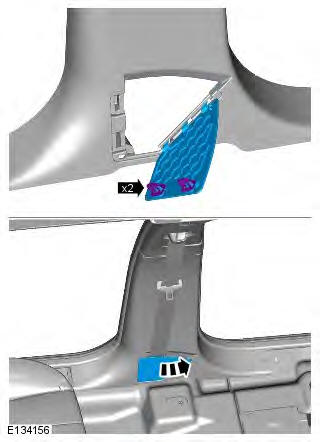
4. CAUTION: Discard the bolt.
Torque: 45 Nm
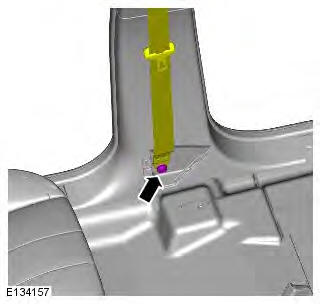
5.
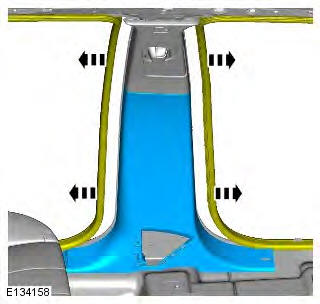
6.
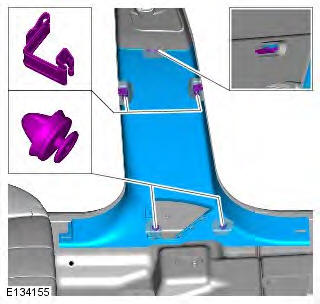
Installation
1. WARNING: Make sure that a new bolt is installed.
CAUTION: Make sure the safety belt is secure and correctly installed.
NOTE: Make sure the safety belt is operating correctly.
To install, reverse the removal procedure.
D-Pillar Trim Panel
Removal
NOTE: Removal steps in this procedure may contain installation details.
All vehicles
1.
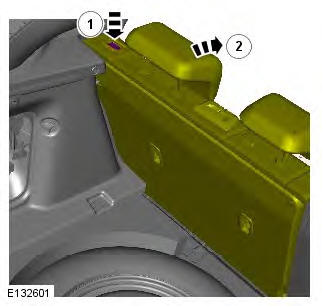
2. NOTE: LH side only.
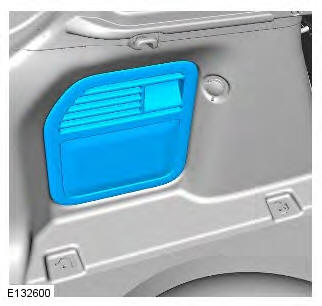
3.
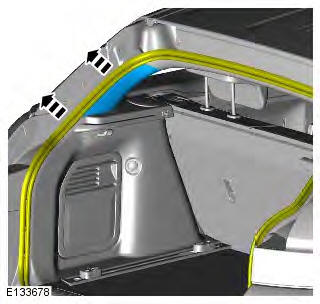
5-door
4.
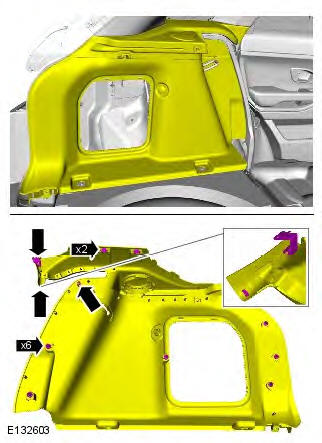
3-door
5.
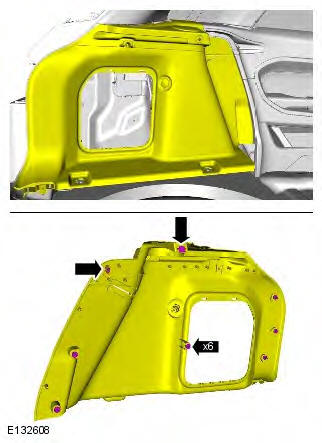
All vehicles
6. Torque: 6 Nm
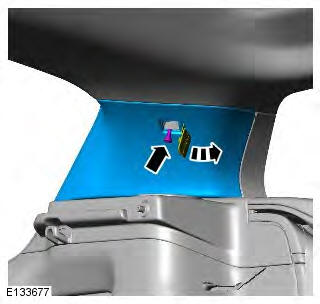
7.
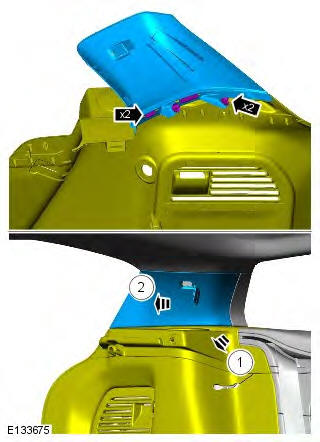
8.
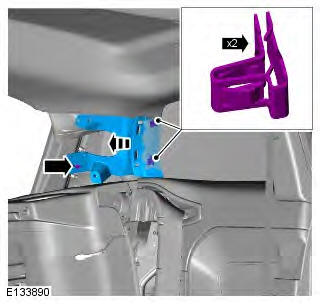
Installation
1. To install, reverse the removal procedure.
READ NEXT:
 Front Door Trim Panel
Removal
NOTE: Removal steps in this procedure may contain installation details.
All vehicles
1. Torque: 6 Nm
2. Torque: 6 Nm
3. Torque: 0.9 Nm
4. Torque: 1.3 Nm
5-door
5.
3-door
6.
All vehicles
 Rear Door Trim Panel
Removal
NOTE: Removal steps in this procedure may contain installation details.
1. Torque: 1.3 Nm
2. Torque: 6 Nm
3. Torque: 6 Nm
4.
5.
6.
7. NOTE: Do not disassemble further if the
component is
 Headliner
Removal
NOTES:
Removal steps in this procedure may contain installation details.
Vehicles with glass roof panel shown, vehicles without glass roof panel similar.
All vehicles
1. Refer to: Windshield
SEE MORE:
 Transmission Vehicles With: M66 6-Speed
Manual Transmission FWD - Removal
Removal
Special Tool(s)
205-857
Remover, Halfshaft
303-021
Engine support bracket
303-662
Support Beam Arm and Hook Assembly, Engine
General Equipment
Transmission jack
1. Disconnect the battery ground cable.
Refer to: Specifications (414-01 Battery, Mounting and Cables,
Specifications).
2. Refe
 Cup holders and storage
Cup holders and storage
1. Glovebox.
2. Inside the glovebox is a drop down storage
area for the Owner’s Handbook pack.
3. Cubby box.
4. Sliding top to reveal cup holders.
Do not drink, or use the
drinks
holders when driving.
5. Rear armrest storage and cup holders.
6. Storage areas.
© 2011-2026 Copyright www.rrevoque.org

