Range Rover Evoque: Timing Chain
Removal
NOTES:
Some illustrations may show the engine removed for clarity.
Some variation in the illustrations may occur, but the essential information is always correct.
1. Refer to: Specifications (414-01 Battery, Mounting and Cables, Specifications).
2. WARNING: Make sure to support the vehicle with axle stands. Raise and support the vehicle.
3. Refer to: Timing Cover (303-01B Engine - GTDi 2.0L Petrol, Removal and Installation).
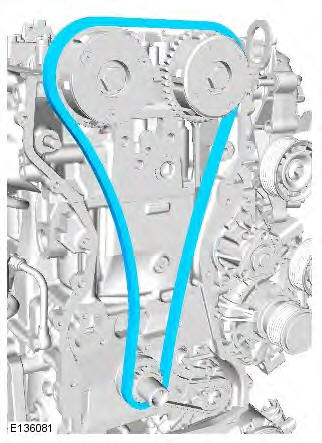
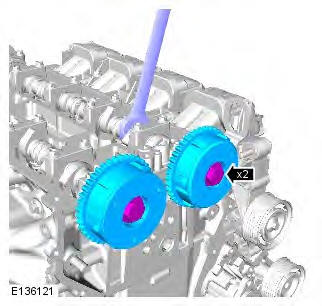
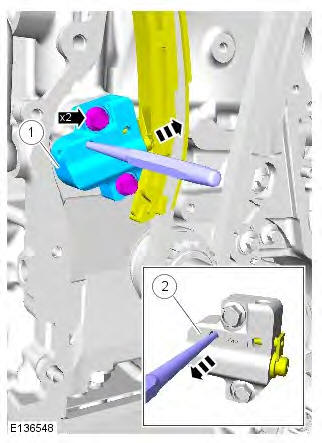
4.
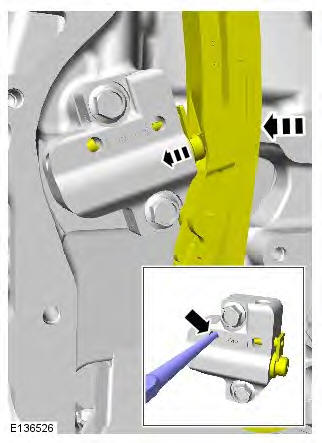
5.
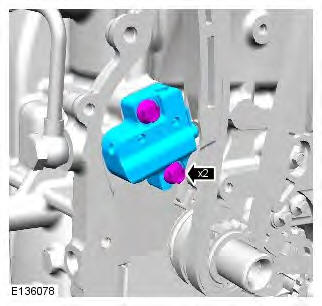
6.
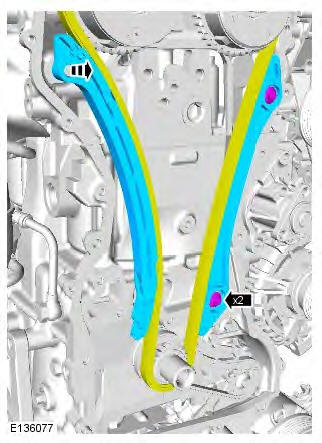
7.
8. CAUTIONS:
Use an open-ended wrench to hold the camshafts by the hexagon to prevent the camshafts from turning.
Note the fitted position of the component prior to removal. Do not disassemble further if removed for access only
9.
Installation
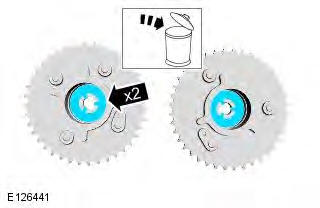
1. CAUTION: Install a new friction washer.
2. CAUTIONS:
Use an open-ended wrench to hold the camshafts by the hexagon to prevent the camshafts from turning.
Make sure that these components are installed to the noted removal position.
Only tighten the bolts finger-tight at this stage.

3.

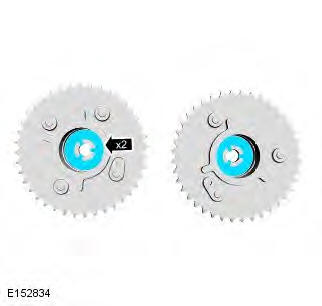
4. Torque: 10 Nm

5. Torque: 10 Nm
6. CAUTION: Use an open-ended wrench to hold the camshafts by the hexagon to prevent the camshafts from turning. Torque: 72 Nm

7. Refer to: Timing Cover (303-01B Engine - GTDi 2.0L Petrol, Removal and Installation).
8. Refer to: Specifications (414-01 Battery, Mounting and Cables, Specifications).
READ NEXT:
 Timing Cover
Special Tool(s)
303-021
Engine support bracket
JLR-303-1591
Lifting Bracket, Engine - Rear
Removal
NOTES:
Some illustrations may show the engine removed for clarity.
Some variation in the illustratio
Valve Cover
Removal
NOTES:
Some illustrations may show the engine removed for clarity.
Some variation in the illustrations may occur, but the essential information is
always correct.
Removal steps in this proc
Engine - Removal and Installation
Removal
Special Tool(s)
205-857
Remover, Halfshaft
1. Refer to: Battery Tray (414-01 Battery, Mounting and Cables,
Removal and Installation).
2. Refer to: Air Conditioning (A/C) System Recovery, Evacu
SEE MORE:
Important information
The information contained in this handbook covers all vehicle derivatives and
optional equipment,
some of which may not be fitted to your vehicle. Due to printing cycles, this
handbook may include
descriptions of options before they become generally available.
The vehicle options, hardware an
Symbols used in this handbook
Safety warnings indicate either a procedure which must be followed
precisely, or
information that should be considered with great care, in order to avoid the
possibility
of personal injury.
Cautions indicate either a procedure which must be followed precisely, or
information that
should
